

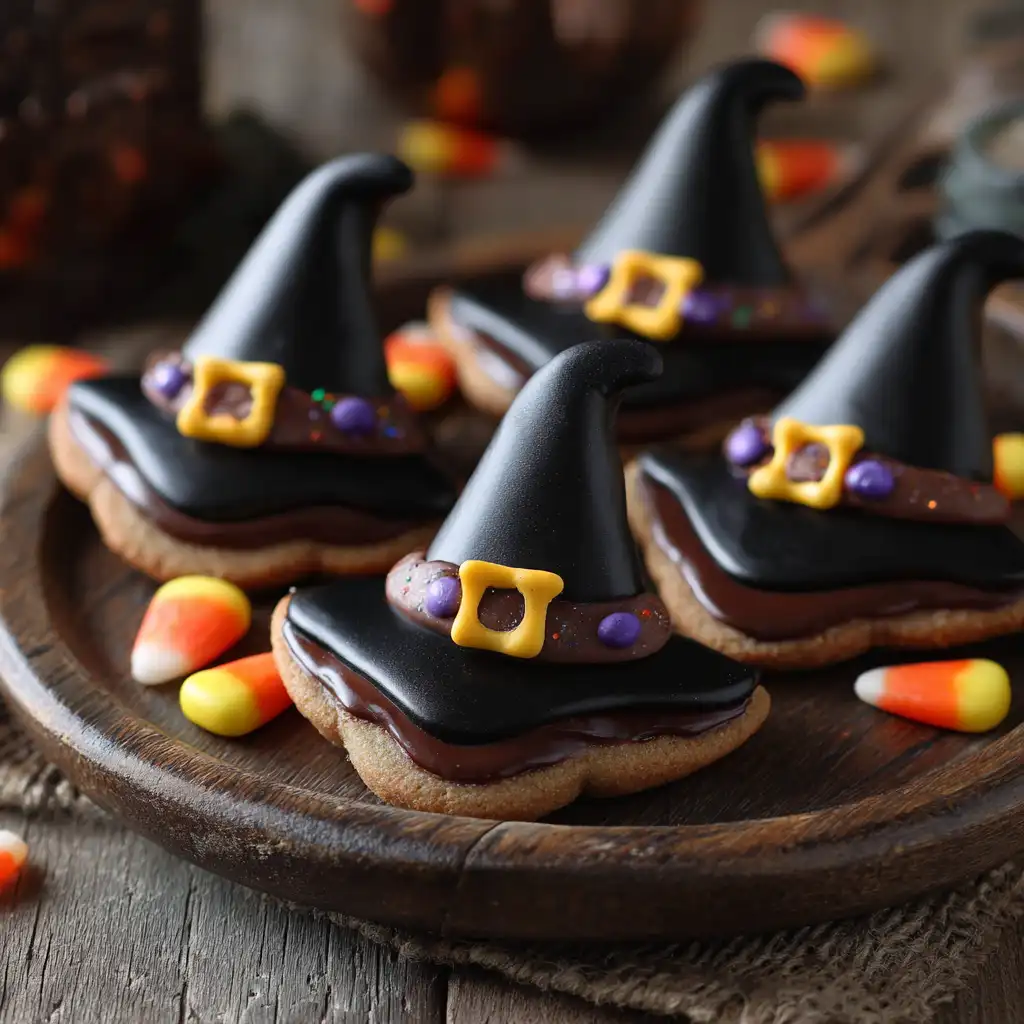
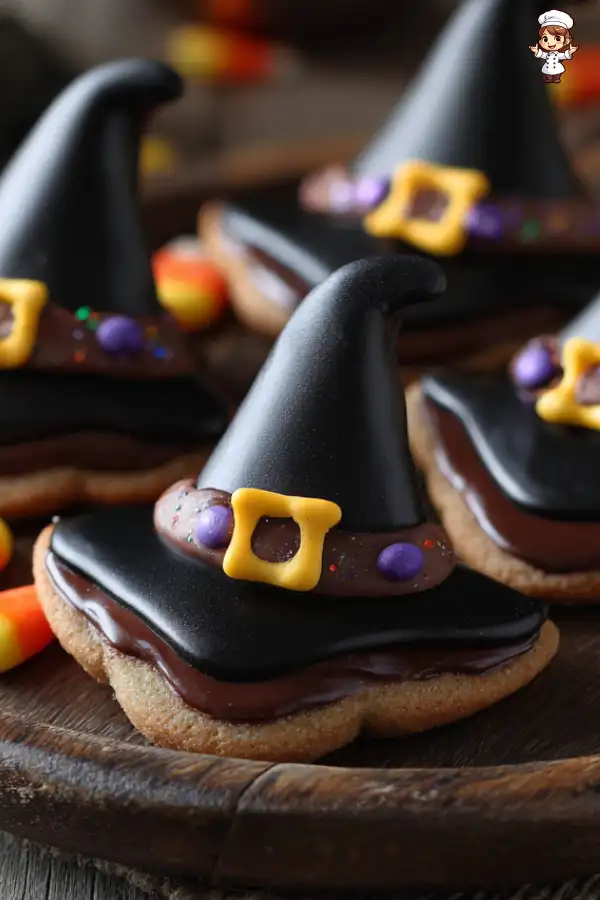
Witch Hat Cookies are delightful treats that bring a touch of magic to any Halloween celebration. These whimsical cookies are shaped like pointed witch hats, making them a fun and festive addition to your spooky festivities. With their rich chocolate flavor and colorful decorations, they are sure to enchant both kids and adults alike.
These cookies are not just visually appealing; they also offer a delicious taste that combines the sweetness of sugar with the richness of cocoa. The combination of chocolate icing and colorful candies adds a playful twist, making them perfect for parties, school events, or simply as a fun baking project with family.
Whether you’re hosting a Halloween gathering or looking for a creative way to celebrate the season, Witch Hat Cookies are an excellent choice. They are easy to make and can be customized to fit your theme. Plus, they provide a wonderful opportunity for kids to get involved in the kitchen, allowing them to express their creativity through decorating.
In this article, we will guide you through the ingredients and preparation steps for making these delightful cookies. We’ll also share tips for perfecting your Witch Hat Cookies and suggest variations to keep things exciting. So, let’s dive into the magical world of baking and create some enchanting treats!
Ingredients for Witch Hat Cookies Recipe
To create your own batch of Witch Hat Cookies, you’ll need a few simple ingredients. Each component plays a vital role in achieving that perfect flavor and texture. Here’s what you’ll need:
- 2 cups all-purpose flour
- 1/2 cup unsweetened cocoa powder
- 1 teaspoon baking powder
- 1/2 teaspoon baking soda
- 1/4 teaspoon salt
- 1/2 cup unsalted butter, softened
- 1 cup granulated sugar
- 1 large egg
- 1 teaspoon vanilla extract
- 1/2 cup chocolate icing (store-bought or homemade)
- 1/2 cup black icing (store-bought or homemade)
- Colorful candy (such as M&M’s or chocolate-covered candies) for buckles
- Optional: powdered sugar for dusting
These ingredients come together to create a rich, chocolatey cookie that is both fun to make and delicious to eat. The cocoa powder gives the cookies their deep color and flavor, while the butter and sugar create a soft, chewy texture. The colorful candies add a festive touch, making these cookies perfect for Halloween.
Gathering these ingredients is the first step in your baking adventure. Make sure to have everything ready before you start, as this will make the process smoother and more enjoyable. Now that you have your ingredients, let’s move on to the preparation of these delightful Witch Hat Cookies!


Preparation of Witch Hat Cookies Recipe
Step 1: Gather Your Ingredients
Before you start baking, it’s essential to gather all your ingredients. This will help you stay organized and make the process smoother. Make sure you have everything listed in the ingredients section. Having your ingredients ready will also keep the fun going without interruptions!
Step 2: Prepare the Cookie Dough
Now, let’s dive into making the cookie dough! Start by preheating your oven to 350°F (175°C). While the oven warms up, take a medium bowl and whisk together the all-purpose flour, cocoa powder, baking powder, baking soda, and salt. This mixture is crucial as it gives your cookies the right texture and flavor.
Next, in a large mixing bowl, cream the softened butter and granulated sugar using an electric mixer. Mix until the mixture is light and fluffy, which should take about 3-4 minutes. This step is important because it incorporates air into the dough, making your cookies soft and chewy.
Once the butter and sugar are well combined, add in the egg and vanilla extract. Beat these ingredients together until they are fully mixed. Now, it’s time to combine the wet and dry ingredients. Gradually add the dry mixture to the wet mixture, stirring until just combined. Be careful not to overmix, as this can make your cookies tough.
Step 3: Shape the Cookies
With your dough ready, it’s time to shape the cookies! Take a small amount of dough and roll it into a cone shape, resembling a witch hat. This is where the fun begins! Place each shaped cookie on a baking sheet lined with parchment paper, leaving some space between them. This will allow the cookies to spread while baking.
Step 4: Bake the Cookies
Now, it’s time to bake! Place the baking sheet in the preheated oven and bake the cookies for 10-12 minutes. Keep an eye on them; you want the edges to be firm but the centers to remain soft. Once they are done, let the cookies cool on the baking sheet for a few minutes before transferring them to a wire rack. This cooling time is essential for the cookies to set properly.
Step 5: Assemble the Witch Hats
After your cookies have cooled completely, it’s time to decorate! Use the chocolate icing to create a glossy tip on each cookie. Then, take the black icing and outline the base of the hat. This will give your cookies that classic witch hat look.
While the icing is still wet, gently press a colorful candy into the icing to resemble a buckle on the hat. This step adds a fun and festive touch to your Witch Hat Cookies. Once decorated, arrange them on a rustic wooden platter and scatter some extra candies around for a delightful presentation. If you want to add a little extra flair, dust the cookies with powdered sugar for a magical finish!
Tips for Perfect Witch Hat Cookies Recipe
Choosing the Right Chocolate
When it comes to making Witch Hat Cookies, the type of chocolate you choose can make a big difference. For the best flavor, opt for high-quality chocolate icing. If you’re making your own icing, use semi-sweet chocolate for a rich taste. This will complement the cocoa in the cookies beautifully.
Additionally, consider using chocolate chips for the tip of the hat. They melt perfectly and create a smooth finish. If you want a fun twist, try using colored chocolate melts. These can add a pop of color and make your cookies even more festive!
Remember, the chocolate should be easy to work with. If it’s too thick, it may not spread well. You can thin it out with a little vegetable oil or milk. This will help you achieve that glossy look that makes your Witch Hat Cookies so appealing.
Decorating Ideas for Witch Hat Cookies
Decorating your Witch Hat Cookies is where the real fun begins! While the basic design is charming, you can get creative with your decorations. Here are some ideas to inspire you:
- Sprinkles: Add colorful sprinkles on top of the icing for a festive touch. Halloween-themed sprinkles, like ghosts or pumpkins, can enhance the spooky vibe.
- Edible Glitter: For a magical effect, sprinkle some edible glitter over the icing. This will give your cookies a shimmering look that’s sure to impress.
- Fondant Shapes: Use fondant to create small shapes like bats or stars. Place these on top of the icing for an extra layer of decoration.
- Different Colors: Experiment with different colors of icing for the hat’s base. You can create a rainbow of witch hats, each with its unique style!
Don’t be afraid to let your imagination run wild! The more creative you get, the more fun your Witch Hat Cookies will be. Plus, involving kids in the decorating process can make it a memorable family activity. Enjoy the process and watch your cookies transform into delightful Halloween treats!
Variation of Witch Hat Cookies Recipe
Alternative Ingredients for Witch Hat Cookies
If you want to switch things up a bit, there are plenty of alternative ingredients you can use in your Witch Hat Cookies. These substitutions can cater to dietary needs or simply add a new twist to the classic recipe.
- Gluten-Free Flour: For a gluten-free version, substitute all-purpose flour with a gluten-free flour blend. Make sure it contains xanthan gum for the best texture.
- Coconut Oil: Instead of unsalted butter, try using coconut oil. This will give your cookies a subtle coconut flavor and a slightly different texture.
- Natural Sweeteners: If you prefer a healthier option, consider using natural sweeteners like honey or maple syrup. Just remember to adjust the liquid ingredients accordingly.
- Dark Cocoa Powder: For a richer chocolate flavor, use dark cocoa powder instead of regular cocoa powder. This will deepen the color and taste of your cookies.
These alternative ingredients can help you create a version of Witch Hat Cookies that suits your preferences. Feel free to experiment and find the combination that works best for you!
Different Themes for Witch Hat Cookies
Witch Hat Cookies are not just for Halloween! You can easily adapt them for various themes and occasions. Here are some fun ideas to inspire your creativity:
- Holiday Themes: For Christmas, shape the cookies like Santa hats and use red and white icing. Add small candy canes as decorations for a festive touch.
- Birthday Parties: Customize the cookies with bright colors and fun sprinkles. Use different shapes like party hats and add colorful icing to match the birthday theme.
- Seasonal Variations: In the fall, you can create pumpkin hats using orange icing and green candy for the stem. In spring, try pastel colors for a cheerful look.
- Movie Themes: If you have a favorite movie or character, design the cookies to match! For example, create wizard hats for a Harry Potter-themed party.
These variations allow you to enjoy Witch Hat Cookies all year round. By changing the decorations and themes, you can make them suitable for any celebration. So, gather your ingredients and let your imagination run wild!
FAQs About Witch Hat Cookies Recipe
Can I make Witch Hat Cookies in advance?
Absolutely! You can make Witch Hat Cookies in advance, which is perfect for busy schedules. You can prepare the cookie dough and shape the hats a day or two ahead of time. Just store the shaped cookies in an airtight container in the refrigerator. When you’re ready to bake, simply preheat your oven and bake them as directed. If you want to decorate them in advance, you can also do that. Just make sure to store the decorated cookies in a cool place to keep the icing from melting.
How do I store Witch Hat Cookies?
Storing your Witch Hat Cookies is easy! Place them in an airtight container at room temperature. They will stay fresh for up to a week. If you live in a humid area, consider placing a piece of parchment paper between layers of cookies to prevent them from sticking together. If you want to keep them longer, you can freeze the cookies. Just make sure they are fully cooled and wrapped tightly in plastic wrap before placing them in a freezer-safe container. They can last up to three months in the freezer!
What can I use instead of chocolate kisses?
If you don’t have chocolate kisses on hand, don’t worry! There are plenty of alternatives you can use. You can try using chocolate chips, which will melt nicely and create a similar effect. Another option is to use mini peanut butter cups or even small marshmallows for a fun twist. If you want to keep it colorful, consider using candy melts in various colors. This will add a vibrant touch to your Witch Hat Cookies!
Are Witch Hat Cookies suitable for kids to make?
Yes, Witch Hat Cookies are perfect for kids to make! The process is simple and fun, making it a great family activity. Kids can help with shaping the cookies, decorating them, and even choosing their favorite candies for the buckles. Just be sure to supervise them, especially when using the oven or handling hot cookies. This baking project not only encourages creativity but also helps kids develop their cooking skills. Plus, they’ll love showing off their spooky creations!
Print
Witch Hat Cookies
- Total Time: 42 minutes
- Yield: 24 cookies 1x
- Diet: Vegetarian
Description
Witch Hat Cookies are delightful treats shaped like pointed witch hats, perfect for Halloween celebrations. They combine rich chocolate flavor with colorful decorations, making them a fun and festive addition to any spooky gathering.
Ingredients
- 2 cups all-purpose flour
- 1/2 cup unsweetened cocoa powder
- 1 teaspoon baking powder
- 1/2 teaspoon baking soda
- 1/4 teaspoon salt
- 1/2 cup unsalted butter, softened
- 1 cup granulated sugar
- 1 large egg
- 1 teaspoon vanilla extract
- 1/2 cup chocolate icing (store-bought or homemade)
- 1/2 cup black icing (store-bought or homemade)
- Colorful candy (such as M&M’s or chocolate-covered candies) for buckles
- Optional: powdered sugar for dusting
Instructions
- Gather all your ingredients.
- Preheat your oven to 350°F (175°C). In a medium bowl, whisk together flour, cocoa powder, baking powder, baking soda, and salt.
- Cream the softened butter and granulated sugar in a large mixing bowl until light and fluffy. Add the egg and vanilla extract, mixing until combined.
- Gradually add the dry mixture to the wet mixture, stirring until just combined.
- Shape the dough into cone shapes resembling witch hats and place them on a baking sheet lined with parchment paper.
- Bake for 10-12 minutes, until the edges are firm but the centers remain soft. Let cool on the baking sheet for a few minutes before transferring to a wire rack.
- Decorate the cooled cookies with chocolate icing for the tip and black icing for the base. Press a colorful candy into the icing to resemble a buckle.
- Arrange the cookies on a platter and dust with powdered sugar if desired.
Latest Amazon Finds


Notes
- Use high-quality chocolate for the icing for the best flavor.
- Consider using chocolate chips for the tip of the hat.
- Get creative with decorations, such as sprinkles or edible glitter.
- Experiment with alternative ingredients for dietary needs.
- Prep Time: 30 minutes
- Cook Time: 12 minutes
- Category: Dessert
- Method: Baking
- Cuisine: American
Nutrition
- Serving Size: 1 cookie
- Calories: 150
- Sugar: 10g
- Sodium: 50mg
- Fat: 7g
- Saturated Fat: 4g
- Unsaturated Fat: 2g
- Trans Fat: 0g
- Carbohydrates: 20g
- Fiber: 1g
- Protein: 2g
- Cholesterol: 20mg
Keywords: Witch Hat Cookies, Halloween cookies, chocolate cookies, festive treats