
Halloween is a time for fun, creativity, and, of course, delicious treats! One of the most delightful desserts you can whip up for this spooky season is the Wicked Witch Hat Brownies. These brownies are not just tasty; they are also visually striking, making them a perfect addition to any Halloween gathering. With their rich chocolate flavor and whimsical presentation, they are sure to impress both kids and adults alike.
What Makes Wicked Witch Hat Brownies Special?
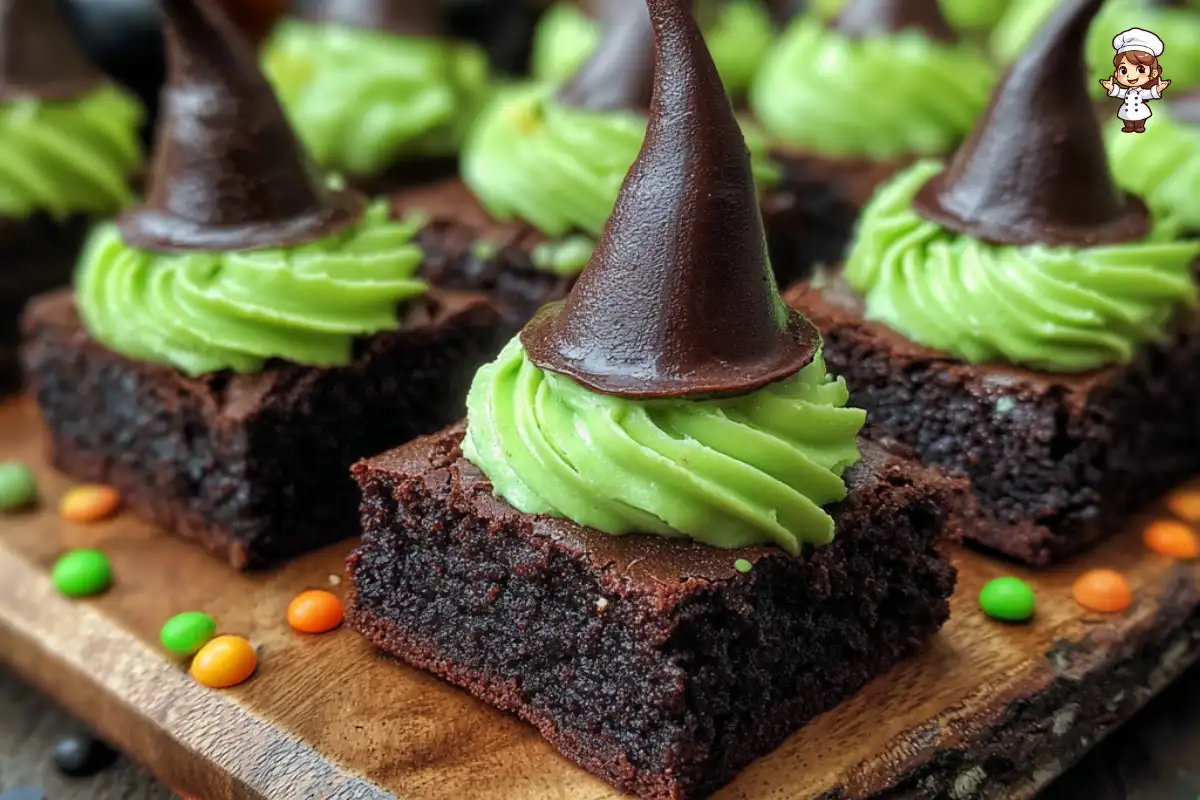
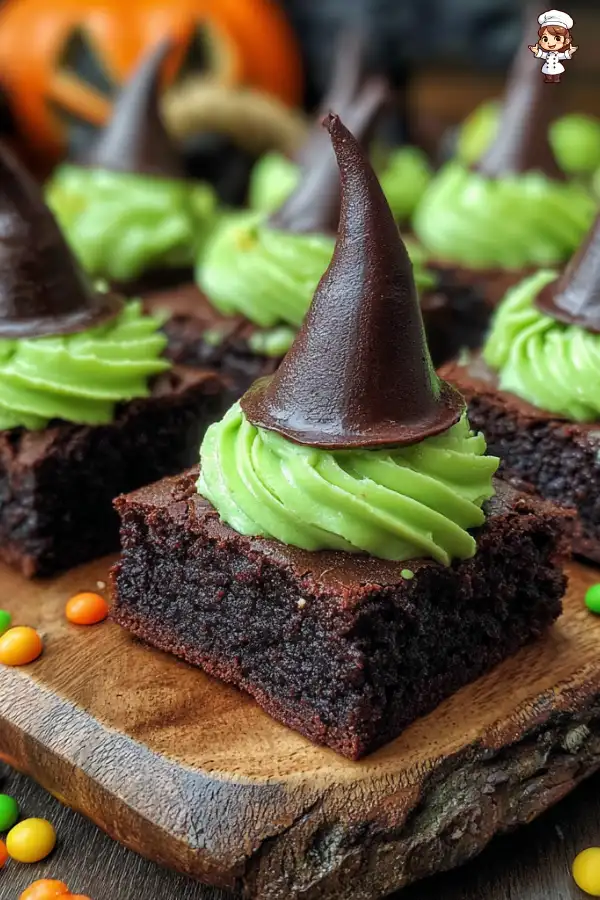
What sets Wicked Witch Hat Brownies apart from regular brownies? First, it’s all about the presentation. The chocolate ice cream cones, when placed upside down, resemble witch hats, adding a fun twist to a classic dessert. This creative touch makes them a hit at Halloween parties, school events, or even cozy family gatherings.
Moreover, the brownies themselves are incredibly moist and fudgy, thanks to the combination of butter and cocoa powder. Each bite is rich and satisfying, making it hard to resist going back for seconds. The vibrant green frosting adds a pop of color, making these treats not only delicious but also visually appealing.
Additionally, the recipe is quite simple, allowing even novice bakers to create these enchanting desserts. With just a few ingredients and straightforward steps, you can bring a little magic to your kitchen. Plus, the opportunity to decorate with Halloween-themed sprinkles opens the door for creativity, letting you personalize each brownie to your liking.
In summary, Wicked Witch Hat Brownies are special because they combine fun, flavor, and creativity. They are a delightful way to celebrate Halloween while satisfying your sweet tooth. So, let’s dive into the ingredients and get started on making these wickedly delicious treats!
Ingredients for Wicked Witch Hat Brownies
To create your own batch of Wicked Witch Hat Brownies, you’ll need a selection of simple yet essential ingredients. Each component plays a vital role in achieving that rich, fudgy texture and delightful flavor. Here’s what you’ll need:
- 1 cup (225g) unsalted butter: This adds moisture and richness to the brownies.
- 2 cups (400g) granulated sugar: Sweetens the brownies and helps create a chewy texture.
- 4 large eggs: These provide structure and stability to the batter.
- 1 teaspoon vanilla extract: Enhances the overall flavor of the brownies.
- 1 cup (125g) all-purpose flour: Gives the brownies their structure.
- 1 cup (90g) unsweetened cocoa powder: The star ingredient that gives the brownies their rich chocolate flavor.
- 1/2 teaspoon salt: Balances the sweetness and enhances the chocolate taste.
- 1/2 teaspoon baking powder: Helps the brownies rise slightly, making them light and fluffy.
- 12 chocolate ice cream cones: These will serve as the witch hats, adding a fun twist to your dessert.
- 2 cups (300g) powdered sugar: Used for the frosting, making it sweet and creamy.
- 1/4 cup (60ml) milk: Adjusts the consistency of the frosting to your liking.
- 1 teaspoon vanilla extract (for frosting): Adds flavor to the frosting.
- Green food coloring: Gives the frosting a spooky, witchy hue.
- Halloween-themed sprinkles: For decoration, adding a festive touch to your brownies.
Gathering these ingredients is the first step in your baking adventure. Each item contributes to the overall taste and appearance of your Wicked Witch Hat Brownies. Now that you have everything ready, let’s move on to the step-by-step preparation!
Step-by-Step Preparation of Wicked Witch Hat Brownies
Now that you have all your ingredients ready, it’s time to dive into the fun part: preparing your Wicked Witch Hat Brownies. Follow these simple steps to create a batch of delicious, spooky treats that will wow your guests!
Step 1: Preparing the Brownie Batter
Start by melting the unsalted butter in a medium saucepan over low heat. Once it’s melted, take it off the heat and let it cool for a few minutes. In a large mixing bowl, combine the melted butter with the granulated sugar. Stir until the mixture is smooth and well combined. Next, add the eggs one at a time, mixing well after each addition. This step is crucial for creating a rich, fudgy texture.
After that, stir in the vanilla extract. In a separate bowl, whisk together the all-purpose flour, cocoa powder, salt, and baking powder. Gradually add this dry mixture to the wet ingredients, stirring gently until just combined. Be careful not to overmix, as this can make your brownies tough. Your brownie batter should be thick and glossy, ready for baking!
Step 2: Baking the Brownies
Now it’s time to bake! Pour the brownie batter into your prepared 9×13 inch baking pan, spreading it evenly. Place the pan in your preheated oven at 350°F (175°C) and bake for 25-30 minutes. To check if they’re done, insert a toothpick into the center. If it comes out with a few moist crumbs, your brownies are perfect! Once baked, allow them to cool completely in the pan on a wire rack. This cooling step is essential for easy frosting later on.
Step 3: Creating the Witch Hats
While your brownies are cooling, it’s time to prepare the witch hats! Grab your chocolate ice cream cones. These will be the fun, pointy hats that sit atop your brownies. You can leave them as they are, or if you want to get creative, consider dipping the tops in melted chocolate and then in Halloween-themed sprinkles. This adds an extra layer of flavor and a festive touch!
Step 4: Assembling the Wicked Witch Hat Brownies
Once the brownies are completely cool, it’s time to frost them. In a mixing bowl, combine the powdered sugar, milk, and vanilla extract. Mix until smooth, then add green food coloring until you achieve your desired shade. Spread a generous layer of this green frosting over the top of each brownie square.
Now, carefully place a chocolate ice cream cone upside down on top of each frosted brownie. This creates the appearance of a witch’s hat. Finally, sprinkle some Halloween-themed sprinkles around the brownies for a festive finish. Your Wicked Witch Hat Brownies are now ready to be served!
Tips for Perfect Wicked Witch Hat Brownies
Creating the perfect Wicked Witch Hat Brownies can be a delightful experience. However, there are a few common mistakes that bakers often make. By avoiding these pitfalls, you can ensure your brownies turn out delicious and visually appealing. Here are some tips to help you achieve brownie perfection!
Common Mistakes to Avoid
- Overmixing the Batter: One of the biggest mistakes is overmixing the brownie batter. This can lead to tough brownies. Mix just until the dry ingredients are incorporated.
- Not Measuring Ingredients Accurately: Baking is a science! Use measuring cups and spoons for accuracy. Too much flour or sugar can change the texture and taste.
- Skipping the Cooling Time: Allowing the brownies to cool completely is crucial. If you frost them while warm, the frosting may melt and slide off.
- Using the Wrong Pan Size: Make sure to use a 9×13 inch pan. A different size can affect baking time and the thickness of your brownies.
- Not Testing for Doneness: Always check your brownies with a toothpick. If it comes out clean or with a few moist crumbs, they’re ready. If it’s too wet, they need more time.
Storage Tips for Wicked Witch Hat Brownies
After making your Wicked Witch Hat Brownies, you might have some leftovers. Here’s how to store them properly:
- Room Temperature: Store brownies in an airtight container at room temperature for up to 3 days. This keeps them fresh and chewy.
- Refrigeration: If you want to keep them longer, you can refrigerate them for up to a week. Just make sure they are in a sealed container to prevent drying out.
- Freezing: For longer storage, freeze the brownies. Wrap them tightly in plastic wrap and then place them in a freezer-safe bag. They can last up to 3 months. Thaw them in the fridge before serving.
By following these tips, you can ensure that your Wicked Witch Hat Brownies are not only delicious but also stay fresh for your Halloween festivities. Happy baking!
Variation Ideas for Wicked Witch Hat Brownies
If you want to mix things up or cater to different dietary needs, there are plenty of fun variations for your Wicked Witch Hat Brownies. Here are two popular options that everyone can enjoy!
Gluten-Free Wicked Witch Hat Brownies
Making gluten-free Wicked Witch Hat Brownies is easier than you might think! Simply swap out the all-purpose flour for a gluten-free flour blend. Look for a blend that includes xanthan gum, as this helps mimic the texture of regular flour. Here’s how to do it:
- Use Gluten-Free Flour: Replace the 1 cup of all-purpose flour with a gluten-free flour blend. This will keep your brownies moist and delicious.
- Check Other Ingredients: Ensure that your cocoa powder and baking powder are gluten-free. Most brands are, but it’s always good to double-check.
- Follow the Same Steps: You can follow the original recipe steps without any changes. Your brownies will still turn out fudgy and delightful!
These gluten-free brownies will be just as tasty and fun, allowing everyone to enjoy the spooky treat!
Vegan Wicked Witch Hat Brownies
If you’re looking for a vegan version of Wicked Witch Hat Brownies, you can easily make some substitutions. Here’s how to create a delicious vegan treat:
- Replace Eggs: Use flax eggs instead of regular eggs. To make one flax egg, mix 1 tablespoon of ground flaxseed with 2.5 tablespoons of water. Let it sit for a few minutes until it thickens.
- Use Vegan Butter: Substitute the unsalted butter with a vegan butter alternative or coconut oil. This will keep your brownies rich and moist.
- Choose Dairy-Free Milk: Use almond milk, soy milk, or any other plant-based milk in the frosting. This keeps the frosting creamy without dairy.
By making these simple swaps, you can create a vegan version of Wicked Witch Hat Brownies that everyone will love. They’ll be just as fun and festive, perfect for any Halloween celebration!
FAQs about Wicked Witch Hat Brownies
How can I make Wicked Witch Hat Brownies ahead of time?
Making Wicked Witch Hat Brownies ahead of time is a great idea! You can bake the brownies a day or two in advance. Just follow these steps:
- Cool Completely: After baking, let the brownies cool completely in the pan. This prevents them from becoming soggy.
- Store Properly: Place the cooled brownies in an airtight container. Keep them at room temperature if you plan to serve them within a couple of days.
- Frost Before Serving: It’s best to frost the brownies on the day you plan to serve them. This keeps the frosting fresh and vibrant.
By preparing them ahead of time, you can save yourself some stress on the day of your Halloween gathering!
Can I use a different type of chocolate for Wicked Witch Hat Brownies?
Absolutely! You can customize your Wicked Witch Hat Brownies by using different types of chocolate. Here are some options:
- Dark Chocolate: For a richer flavor, use dark chocolate cocoa powder or melted dark chocolate in the batter.
- Milk Chocolate: If you prefer a sweeter taste, milk chocolate cocoa powder can be a delightful alternative.
- White Chocolate: You can also add white chocolate chips to the batter for a fun twist. Just remember to adjust the sugar in the recipe, as white chocolate is sweeter.
Experimenting with different chocolates can add a unique flavor to your brownies!
What is the best way to decorate Wicked Witch Hat Brownies?
Decorating your Wicked Witch Hat Brownies is where the fun really begins! Here are some creative ideas:
- Sprinkles: Use Halloween-themed sprinkles to add color and excitement. They can be placed around the base of the ice cream cone hats.
- Chocolate Drizzle: Drizzle melted chocolate over the green frosting for an extra touch of sweetness.
- Edible Eyes: Add edible candy eyes on the frosting for a spooky effect. This makes the brownies look even more festive!
Feel free to let your creativity shine when decorating. The more fun, the better!
How long do Wicked Witch Hat Brownies last?
When stored properly, Wicked Witch Hat Brownies can last for several days:
- At Room Temperature: They will stay fresh for up to 3 days in an airtight container.
- In the Refrigerator: If you want to keep them longer, refrigerate them for up to a week. Just ensure they are sealed well to avoid drying out.
- In the Freezer: For longer storage, freeze the brownies. They can last up to 3 months. Thaw them in the fridge before serving.
By following these storage tips, you can enjoy your Wicked Witch Hat Brownies for days to come!
Print
Wicked Witch Hat Brownies
- Total Time: 50 minutes
- Yield: 12 servings 1x
- Diet: Vegetarian
Description
Wicked Witch Hat Brownies are a fun and creative Halloween treat that combines rich, fudgy brownies with chocolate ice cream cones resembling witch hats, topped with vibrant green frosting and festive sprinkles.
Ingredients
- 1 cup (225g) unsalted butter
- 2 cups (400g) granulated sugar
- 4 large eggs
- 1 teaspoon vanilla extract
- 1 cup (125g) all-purpose flour
- 1 cup (90g) unsweetened cocoa powder
- 1/2 teaspoon salt
- 1/2 teaspoon baking powder
- 12 chocolate ice cream cones
- 2 cups (300g) powdered sugar
- 1/4 cup (60ml) milk
- 1 teaspoon vanilla extract (for frosting)
- Green food coloring
- Halloween-themed sprinkles
Instructions
- Prepare the brownie batter by melting the unsalted butter and mixing it with granulated sugar, then adding eggs and vanilla extract.
- Whisk together the dry ingredients and combine with the wet mixture until just combined.
- Pour the brownie batter into a prepared 9×13 inch baking pan and bake at 350°F (175°C) for 25-30 minutes.
- Allow the brownies to cool completely in the pan on a wire rack.
- Prepare the witch hats by optionally dipping the tops of the chocolate ice cream cones in melted chocolate and sprinkles.
- Frost the cooled brownies with a mixture of powdered sugar, milk, vanilla extract, and green food coloring.
- Place an upside-down chocolate ice cream cone on top of each frosted brownie and decorate with Halloween-themed sprinkles.
Latest Amazon Finds


Notes
- Overmixing the batter can lead to tough brownies.
- Accurate measurement of ingredients is crucial for the best results.
- Allow brownies to cool completely before frosting to prevent melting.
- Use a 9×13 inch pan for proper baking.
- Check for doneness with a toothpick.
- Prep Time: 20 minutes
- Cook Time: 30 minutes
- Category: Dessert
- Method: Baking
- Cuisine: American
Nutrition
- Serving Size: 1 brownie with hat
- Calories: 350
- Sugar: 30g
- Sodium: 150mg
- Fat: 15g
- Saturated Fat: 9g
- Unsaturated Fat: 4g
- Trans Fat: 0g
- Carbohydrates: 50g
- Fiber: 2g
- Protein: 4g
- Cholesterol: 70mg
Keywords: Halloween, brownies, dessert, spooky treats, baking