

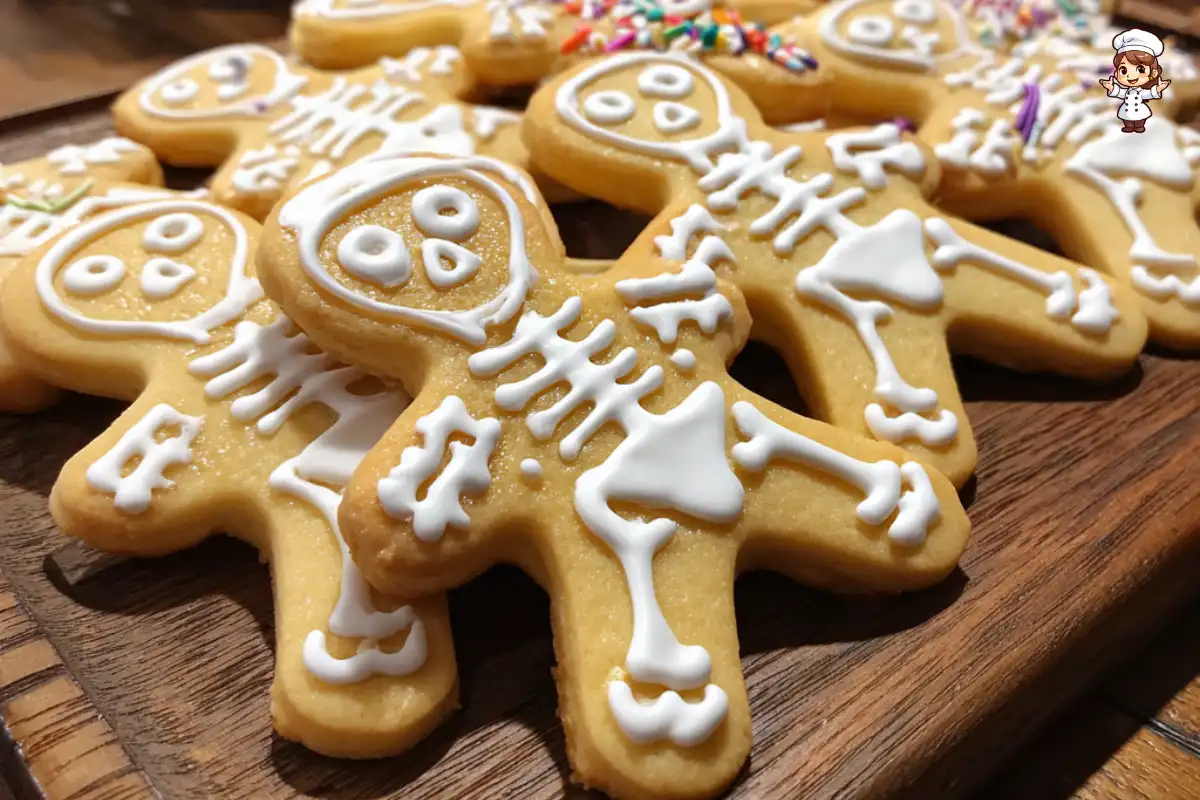
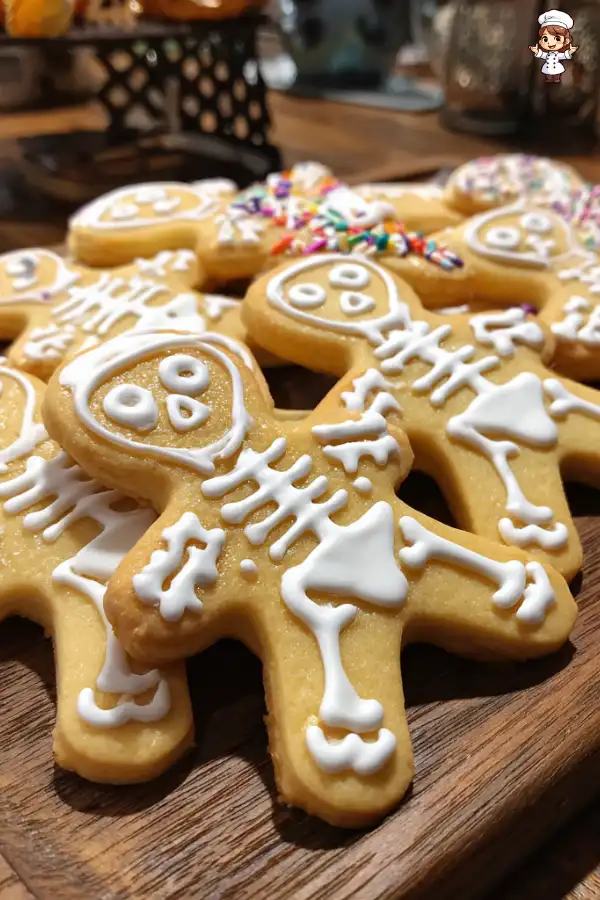
Skeleton sugar cookies are a delightful treat that brings a spooky twist to your baking. Perfect for Halloween, these cookies are not only fun to make but also a joy to decorate. With their charming skeleton shapes and colorful icing, they are sure to be a hit at any gathering. Whether you’re hosting a Halloween party or simply looking for a fun family activity, this skeleton sugar cookies recipe is the perfect choice.
What Makes Skeleton Sugar Cookies Special?
What sets skeleton sugar cookies apart from regular cookies? First, it’s all about the design! The skeleton shape adds a playful element that captures the spirit of Halloween. Additionally, the royal icing allows for creativity. You can pipe intricate details, making each cookie unique. The combination of buttery cookie dough and sweet icing creates a delicious treat that everyone will love.
Moreover, these cookies are versatile. You can customize them with different colors and decorations. Want to add some spooky eyes or colorful sprinkles? Go for it! This recipe encourages creativity, making it a fantastic project for kids and adults alike. Plus, the process of baking and decorating together can create lasting memories.
In summary, skeleton sugar cookies are not just a tasty treat; they are a fun and engaging way to celebrate Halloween. With this recipe, you’ll be able to create a batch of cookies that are as delightful to look at as they are to eat. So, roll up your sleeves and get ready to bake some spooky delights!
Ingredients for Skeleton Sugar Cookies Recipe
To create your delicious skeleton sugar cookies, you’ll need a few essential ingredients. Each component plays a vital role in achieving the perfect texture and flavor. Here’s what you’ll need:
- 2 3/4 cups all-purpose flour: This is the base of your cookie dough, providing structure.
- 1 teaspoon baking powder: This helps the cookies rise and become fluffy.
- 1/2 teaspoon salt: A pinch of salt enhances the sweetness of the cookies.
- 1 cup unsalted butter, softened (226 grams): Butter adds richness and flavor to the cookies.
- 1 1/2 cups granulated sugar: This sweetens the dough and helps create a nice texture.
- 1 large egg: The egg binds the ingredients together and adds moisture.
- 1 teaspoon vanilla extract: This adds a lovely flavor that complements the sweetness.
- 1 teaspoon almond extract (optional): For a unique twist, almond extract can enhance the flavor.
For decorating your skeleton cookies, you’ll also need:
- Royal icing: Made from 4 cups powdered sugar, 3 tablespoons meringue powder, and 6-8 tablespoons water. This icing is perfect for creating detailed designs.
- Black food coloring: This is essential for adding spooky details to your skeletons.
- Colorful sprinkles: These add a festive touch and make your cookies even more fun!
Gather these ingredients, and you’ll be ready to start your baking adventure. Each item contributes to the delightful taste and appearance of your skeleton sugar cookies. So, let’s get ready to mix, roll, and decorate!


Preparation of Skeleton Sugar Cookies Recipe
Step 1: Preparing the Dough
To kick off your skeleton sugar cookies recipe, start by preparing the dough. In a medium bowl, whisk together the all-purpose flour, baking powder, and salt. This mixture is essential as it provides the structure for your cookies. Meanwhile, in a large bowl, cream the softened butter and granulated sugar together. Beat them until the mixture is light and fluffy, which usually takes about 3 to 5 minutes. This step is crucial because it incorporates air into the dough, making your cookies soft and tender.
Next, add in the large egg, vanilla extract, and optional almond extract. Mix everything until well combined. The egg acts as a binder, ensuring that your cookies hold their shape. Once your wet ingredients are ready, it’s time to combine them with the dry ingredients.
Step 2: Chilling the Dough
After mixing the wet and dry ingredients, you’ll want to chill the dough. Gradually add the flour mixture to the butter mixture, mixing until just combined. Be careful not to overmix, as this can lead to tough cookies. Once combined, divide the dough into two equal portions. Flatten each portion into a disk, wrap them in plastic wrap, and refrigerate for at least 1 hour. Chilling the dough is important because it helps the cookies maintain their shape while baking.
Step 3: Rolling and Cutting the Cookies
Once the dough is chilled and firm, it’s time to roll it out. Preheat your oven to 350°F (175°C) and line your baking sheets with parchment paper. On a lightly floured surface, take one disk of dough and roll it out to about 1/4 inch thickness. This thickness is perfect for achieving that delightful cookie texture. Use a skeleton-shaped cookie cutter to cut out your cookies. Place them on the prepared baking sheets, ensuring there’s enough space between each cookie for even baking.
Step 4: Baking the Skeleton Sugar Cookies
Now, it’s time to bake your cookies! Place the baking sheets in the preheated oven and bake for 8 to 10 minutes. Keep an eye on them; you want the edges to be lightly golden. Once baked, remove the cookies from the oven and let them cool on the baking sheets for a few minutes. After that, transfer them to wire racks to cool completely. This cooling step is vital, as it prevents the icing from melting when you decorate.
Step 5: Decorating the Cookies
Finally, the fun part—decorating your skeleton sugar cookies! Prepare the royal icing by combining powdered sugar, meringue powder, and water in a large bowl. Beat the mixture until it holds stiff peaks. If it’s too thick, add more water, one teaspoon at a time, until you reach the desired consistency. Divide the icing into separate bowls and tint with black food coloring for those spooky skeleton details.
Using piping bags or a small spatula, decorate your cookies with the royal icing. Create fun skeleton features like bones and eyes. Allow the icing to dry completely, which usually takes about 4 to 6 hours. Once dry, you can add colorful sprinkles for an extra festive touch. Your skeleton sugar cookies are now ready to be enjoyed!
Tips for Perfect Skeleton Sugar Cookies Recipe
Common Mistakes to Avoid
When making skeleton sugar cookies, a few common mistakes can lead to less-than-perfect results. First, be careful not to overmix the dough. Overmixing can make your cookies tough instead of soft and tender. Remember, mix until just combined!
Another mistake is skipping the chilling step. Chilling the dough is crucial for keeping the cookies from spreading too much while baking. If you skip this step, your cookies may lose their fun skeleton shape.
Also, pay attention to baking time. Every oven is different, so keep an eye on your cookies. If you bake them too long, they can become hard. Aim for lightly golden edges, and remember that they will continue to cook a bit after you take them out of the oven.
Lastly, let the cookies cool completely before decorating. If they are warm, the icing will melt and run, ruining your beautiful designs. Patience is key here!
Storage Tips for Skeleton Sugar Cookies
Once your skeleton sugar cookies are decorated and ready to enjoy, you’ll want to store them properly. To keep them fresh, place the cookies in an airtight container. This will help maintain their softness and prevent them from becoming stale.
If you plan to make the cookies in advance, they can be stored in this way for up to a week. Just make sure the icing is completely dry before stacking them in the container. You don’t want the icing to stick together!
For longer storage, you can freeze the cookies. Place them in a single layer on a baking sheet and freeze until solid. Then, transfer them to a freezer-safe container or bag. They can be frozen for up to three months. When you’re ready to enjoy them, simply thaw them at room temperature.
By following these tips, you’ll ensure that your skeleton sugar cookies stay delicious and festive for all your Halloween celebrations!
Variation of Skeleton Sugar Cookies Recipe
Alternative Decorating Ideas
While the classic skeleton design is a fun way to celebrate Halloween, there are many alternative decorating ideas to explore! You can let your creativity shine by trying different themes and colors. Here are some exciting options:
- Monster Cookies: Instead of skeletons, use cookie cutters to create monster shapes. Decorate them with bright colors and fun eyes using royal icing and sprinkles.
- Spooky Ghosts: Use a ghost-shaped cookie cutter and decorate with white icing. Add black icing for eyes and a mouth to create a cute ghostly look.
- Pumpkin Faces: Shape your cookies like pumpkins and use orange icing. Add green icing for the stem and black icing for spooky faces.
- Witch Hats: Create witch hat cookies using a triangle cutter for the hat and a circle cutter for the base. Decorate with black icing and colorful sprinkles.
These alternative decorating ideas can make your baking experience even more enjoyable. You can mix and match designs to create a festive cookie platter that will impress your guests!
Gluten-Free Skeleton Sugar Cookies Recipe
If you or your guests have gluten sensitivities, you can still enjoy delicious skeleton sugar cookies! Here’s how to make a gluten-free version:
To start, substitute the all-purpose flour with a gluten-free flour blend. Make sure to choose a blend that includes xanthan gum, as this helps mimic the texture of regular flour. Here’s a quick list of ingredients for the gluten-free version:
- 2 3/4 cups gluten-free flour blend: Ensure it contains xanthan gum for the best results.
- 1 teaspoon baking powder: This will help your cookies rise.
- 1/2 teaspoon salt: Enhances the flavor.
- 1 cup unsalted butter, softened: Adds richness.
- 1 1/2 cups granulated sugar: Sweetens the dough.
- 1 large egg: Binds the ingredients.
- 1 teaspoon vanilla extract: Adds flavor.
- 1 teaspoon almond extract (optional): For a unique twist.
Follow the same preparation steps as the original recipe. The chilling, rolling, and baking times remain the same. Just be sure to keep an eye on the cookies as they bake, as gluten-free cookies can sometimes bake faster.
With these variations, everyone can enjoy the fun of baking and decorating skeleton sugar cookies, regardless of dietary preferences. So gather your ingredients and get ready for a spooky baking adventure!
FAQs about Skeleton Sugar Cookies Recipe
How long do Skeleton Sugar Cookies last?
Skeleton sugar cookies can last up to a week when stored properly. To keep them fresh, place the cookies in an airtight container. This will help maintain their softness and prevent them from becoming stale. If you want to enjoy them later, consider freezing them for longer storage.
Can I freeze Skeleton Sugar Cookies?
Yes, you can freeze skeleton sugar cookies! To do this, place the cookies in a single layer on a baking sheet and freeze until solid. Once frozen, transfer them to a freezer-safe container or bag. They can be stored in the freezer for up to three months. When you’re ready to enjoy them, simply thaw them at room temperature.
What is the best way to decorate Skeleton Sugar Cookies?
The best way to decorate skeleton sugar cookies is by using royal icing. This icing holds its shape well and allows for detailed designs. Use piping bags to create outlines and fill in the skeleton features. You can also use colorful sprinkles to add a festive touch. Remember to let the icing dry completely before stacking or serving the cookies!
Can I use a different flavor for the cookies?
Absolutely! While the classic flavor is delicious, you can experiment with different extracts to create unique flavors. For example, you can use lemon or orange extract for a citrusy twist. Just remember to adjust the amount based on the strength of the extract. This way, you can customize your skeleton sugar cookies to suit your taste!
Print
Skeleton Sugar Cookies Recipe
- Total Time: 1 hour 40 minutes
- Yield: 24 cookies 1x
- Diet: Vegetarian
Description
Skeleton sugar cookies are a delightful treat that brings a spooky twist to your baking, perfect for Halloween.
Ingredients
- 2 3/4 cups all-purpose flour: This is the base of your cookie dough, providing structure.
- 1 teaspoon baking powder: This helps the cookies rise and become fluffy.
- 1/2 teaspoon salt: A pinch of salt enhances the sweetness of the cookies.
- 1 cup unsalted butter, softened (226 grams): Butter adds richness and flavor to the cookies.
- 1 1/2 cups granulated sugar: This sweetens the dough and helps create a nice texture.
- 1 large egg: The egg binds the ingredients together and adds moisture.
- 1 teaspoon vanilla extract: This adds a lovely flavor that complements the sweetness.
- 1 teaspoon almond extract (optional): For a unique twist, almond extract can enhance the flavor.
For decorating your skeleton cookies, you’ll also need:
- Royal icing: Made from 4 cups powdered sugar, 3 tablespoons meringue powder, and 6-8 tablespoons water.
- Black food coloring: This is essential for adding spooky details to your skeletons.
- Colorful sprinkles: These add a festive touch and make your cookies even more fun!
Instructions
- Prepare the dough by whisking together flour, baking powder, and salt in a medium bowl. Cream softened butter and sugar in a large bowl until light and fluffy.
- Add the egg, vanilla extract, and optional almond extract to the butter mixture and mix until well combined.
- Gradually add the flour mixture to the butter mixture, mixing until just combined. Divide the dough into two portions, flatten into disks, wrap in plastic, and refrigerate for at least 1 hour.
- Preheat the oven to 350°F (175°C) and line baking sheets with parchment paper. Roll out the chilled dough to 1/4 inch thickness and cut out skeleton shapes.
- Bake the cookies for 8 to 10 minutes until the edges are lightly golden. Let them cool on the baking sheets for a few minutes before transferring to wire racks.
- Prepare royal icing and decorate the cookies with it, allowing the icing to dry completely for 4 to 6 hours before adding sprinkles.
Latest Amazon Finds


Notes
- Be careful not to overmix the dough to avoid tough cookies.
- Chilling the dough is crucial for maintaining the cookie shape.
- Keep an eye on baking time as ovens vary.
- Let cookies cool completely before decorating to prevent melting icing.
- Prep Time: 30 minutes
- Cook Time: 10 minutes
- Category: Dessert
- Method: Baking
- Cuisine: American
Nutrition
- Serving Size: 1 cookie
- Calories: 150
- Sugar: 10g
- Sodium: 50mg
- Fat: 7g
- Saturated Fat: 4g
- Unsaturated Fat: 2g
- Trans Fat: 0g
- Carbohydrates: 20g
- Fiber: 0g
- Protein: 2g
- Cholesterol: 20mg
Keywords: skeleton sugar cookies, Halloween cookies, decorated cookies, royal icing