

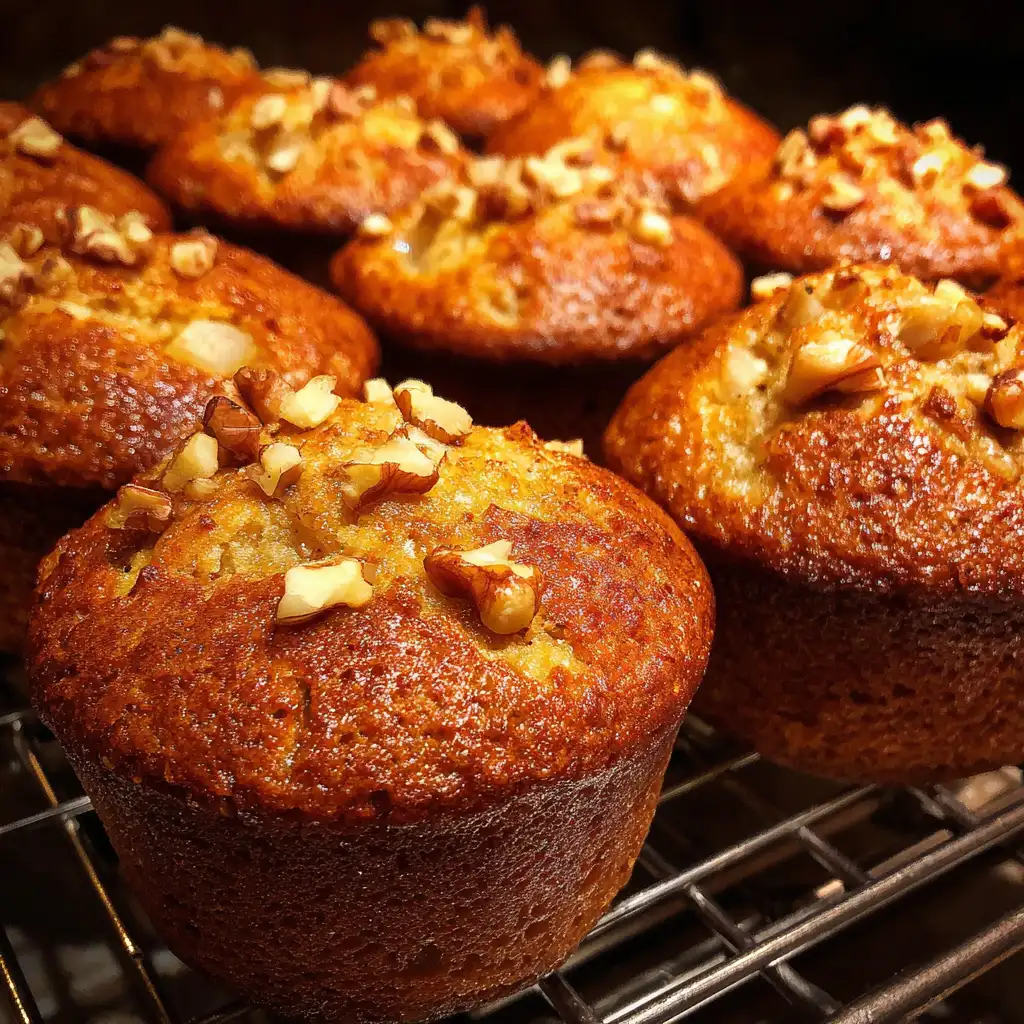
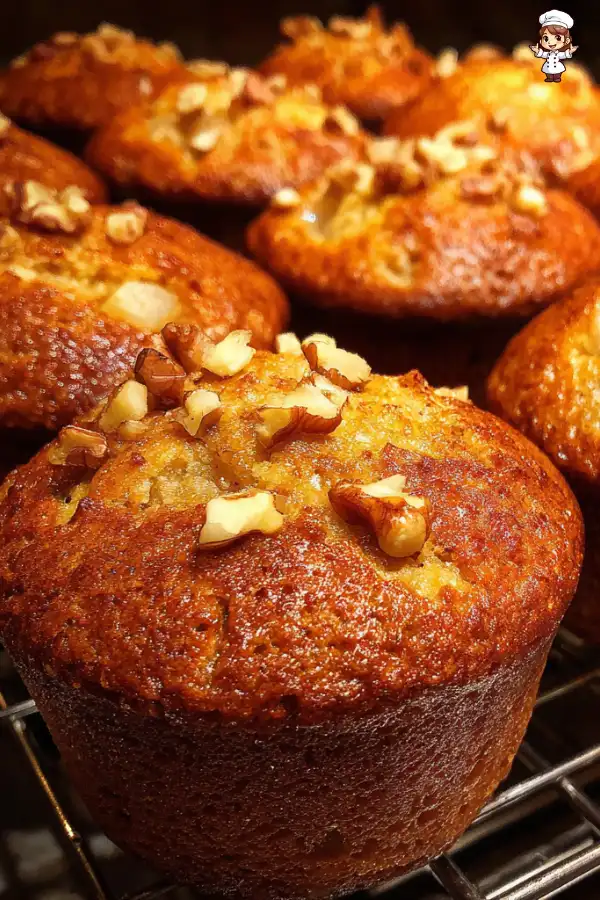
Pear walnut muffins are a delightful treat that combines the sweetness of ripe pears with the rich, nutty flavor of walnuts. These muffins are not just delicious; they are also easy to make and perfect for any occasion. Whether you’re looking for a quick breakfast, a snack for the kids, or a sweet addition to your brunch table, pear walnut muffins fit the bill. They are moist, fluffy, and packed with wholesome ingredients, making them a favorite among many.
What Makes Pear Walnut Muffins Special?
What sets pear walnut muffins apart from other muffin recipes? First, the combination of pears and walnuts creates a unique flavor profile. The juicy pears add natural sweetness and moisture, while the walnuts provide a satisfying crunch. This delightful contrast makes each bite a wonderful experience.
Moreover, these muffins are versatile. You can enjoy them warm out of the oven or at room temperature. They are perfect for breakfast, a midday snack, or even dessert. Additionally, they are easy to customize. You can add spices like cinnamon or nutmeg for extra warmth, or even swap in different nuts if you prefer.
Another reason to love pear walnut muffins is their nutritional value. Pears are a great source of fiber and vitamins, while walnuts are rich in healthy fats and protein. This means you can indulge in these muffins without feeling guilty. They not only satisfy your sweet tooth but also provide essential nutrients.
In summary, pear walnut muffins are special because they combine delicious flavors, nutritional benefits, and versatility. They are sure to become a staple in your baking repertoire. So, let’s dive into the ingredients and get started on making these delightful muffins!
Ingredients for Pear Walnut Muffins
To create the perfect pear walnut muffins, you’ll need a few simple ingredients. Each component plays a vital role in achieving that delightful taste and texture. Here’s what you’ll need:
- 2 ripe pears: Choose pears that are soft to the touch for maximum sweetness and moisture.
- 1 cup walnuts: Chopped walnuts add a crunchy texture and nutty flavor.
- 2 cups all-purpose flour: This forms the base of your muffins, providing structure.
- 1 cup brown sugar: Packed brown sugar gives a rich sweetness and a hint of caramel flavor.
- 2 teaspoons baking powder: This leavening agent helps the muffins rise and become fluffy.
- 1 teaspoon ground cinnamon: Cinnamon adds warmth and enhances the flavor of the pears.
- 2 large eggs: Eggs bind the ingredients together and add moisture.
- 1 cup milk: Milk keeps the muffins moist and tender.
- 1/2 cup unsalted butter: Melted butter adds richness and flavor to the muffins.
- 1/2 teaspoon salt: A pinch of salt balances the sweetness and enhances the overall flavor.
Gathering these ingredients is the first step toward baking your delicious pear walnut muffins. Make sure to use fresh, high-quality ingredients for the best results. Now that you have everything ready, let’s move on to the step-by-step preparation!


Step-by-Step Preparation of Pear Walnut Muffins
Step 1: Preheat the Oven
First things first, preheating your oven is essential. Set your oven to 350°F (175°C). This ensures that your pear walnut muffins bake evenly. While the oven heats up, you can prepare your muffin tin. Line it with paper liners or grease it with butter or cooking spray. This step will help prevent the muffins from sticking, making it easier to enjoy them later!
Step 2: Prepare the Muffin Batter
Now, let’s get to the fun part—mixing the batter! In a large mixing bowl, combine the all-purpose flour, brown sugar, baking powder, ground cinnamon, and salt. Use a whisk to mix these dry ingredients well. This helps to evenly distribute the baking powder and spices, ensuring your muffins rise perfectly.
In a separate bowl, beat the two large eggs. Then, add the milk and melted butter to the eggs. Mix everything until it’s smooth and well combined. This wet mixture will bring moisture to your muffins, making them soft and fluffy.
Step 3: Fold in Pears and Walnuts
Next, it’s time to combine the wet and dry ingredients. Pour the wet mixture into the bowl with the dry ingredients. Gently stir the two together until just combined. Remember, it’s okay if there are a few lumps! Overmixing can lead to tough muffins, and we want them to be light and airy.
Now, carefully fold in the chopped pears and walnuts. This step is crucial as it ensures that the fruit and nuts are evenly distributed throughout the batter. The pears will add moisture, while the walnuts will give a delightful crunch.
Step 4: Fill the Muffin Tins
With your batter ready, it’s time to fill the muffin tin. Using a spoon or an ice cream scoop, fill each muffin cup about two-thirds full. This allows enough space for the muffins to rise without overflowing. If you like, you can sprinkle some extra chopped walnuts on top for added texture and flavor.
Step 5: Bake the Pear Walnut Muffins
Now, place the muffin tin in your preheated oven. Bake the muffins for 18-22 minutes. To check if they’re done, insert a toothpick into the center of a muffin. If it comes out clean, your muffins are ready! The aroma of baking muffins will fill your kitchen, making it hard to wait!
Step 6: Cool and Serve
Once baked, remove the muffin tin from the oven. Let the muffins cool in the tin for about 5 minutes. This helps them set and makes them easier to remove. After that, transfer the muffins to a wire rack to cool completely. You can enjoy them warm or at room temperature. They make a perfect breakfast or snack, and they’re great for sharing with friends and family!
Tips for Perfect Pear Walnut Muffins
Choosing the Right Pears
Choosing the right pears is key to making delicious pear walnut muffins. Look for ripe pears that are slightly soft to the touch. Varieties like Bartlett or Anjou are excellent choices. They are juicy and sweet, which enhances the flavor of your muffins. Avoid pears that are too hard, as they won’t soften much during baking. If your pears are not quite ripe, you can leave them at room temperature for a few days. This will help them ripen and develop their natural sweetness.
When preparing your pears, make sure to peel and chop them into small pieces. This ensures that they mix well into the batter and distribute evenly throughout the muffins. The smaller the pieces, the more flavor you’ll get in each bite. Plus, they’ll bake down nicely, adding moisture to your muffins.
Storing Your Pear Walnut Muffins
Storing your pear walnut muffins properly will keep them fresh and delicious. Once they have cooled completely, place them in an airtight container. They can be stored at room temperature for up to three days. If you want to keep them longer, consider freezing them. To freeze, wrap each muffin individually in plastic wrap and then place them in a freezer-safe bag. They can last up to three months in the freezer.
When you’re ready to enjoy a muffin, simply take it out of the freezer and let it thaw at room temperature. You can also warm it in the microwave for a few seconds for that fresh-baked taste. This way, you can enjoy your pear walnut muffins anytime, whether it’s for breakfast or a snack!
Variation of Pear Walnut Muffins
Adding Spices for Extra Flavor
If you want to elevate your pear walnut muffins, consider adding spices! Spices can enhance the flavor and make your muffins even more delightful. For instance, a pinch of nutmeg can add a warm, cozy taste. You might also try adding ground ginger for a hint of spice that pairs beautifully with the sweetness of the pears.
Another great option is to mix in some allspice or cardamom. These spices bring a unique flavor that can surprise your taste buds. Just remember, a little goes a long way! Start with about 1/4 teaspoon of any additional spice and adjust according to your taste. This way, you can create a muffin that’s not only delicious but also uniquely yours.
Don’t hesitate to experiment! You can even create a seasonal twist by adding pumpkin spice in the fall or a dash of peppermint extract during the winter holidays. The possibilities are endless, and your pear walnut muffins will always be a hit!
Gluten-Free Option for Pear Walnut Muffins
For those who need a gluten-free option, you can easily adapt this recipe! Simply replace the all-purpose flour with a gluten-free flour blend. Many blends are available in stores, and they work well in baking. Just make sure to choose a blend that includes xanthan gum, as this helps mimic the texture of traditional flour.
When using gluten-free flour, the muffins may require a little extra moisture. You can add an extra tablespoon of milk or yogurt to the batter. This will help keep your muffins moist and fluffy. Additionally, be sure to check the baking powder to ensure it’s gluten-free, as some brands may contain gluten.
With these simple adjustments, you can enjoy delicious pear walnut muffins that everyone can savor, regardless of dietary needs. Whether you stick to the classic recipe or try these variations, your muffins are sure to be a crowd-pleaser!
FAQs about Pear Walnut Muffins
Can I use other nuts in Pear Walnut Muffins?
Absolutely! While walnuts add a lovely crunch and flavor, you can easily substitute them with other nuts. Pecans, almonds, or hazelnuts work wonderfully in pear walnut muffins. Each nut brings its unique taste and texture, so feel free to experiment. Just chop them up as you would with walnuts and fold them into the batter. This way, you can create a muffin that suits your taste preferences!
How do I know when my Pear Walnut Muffins are done baking?
Knowing when your pear walnut muffins are done is simple! The best way is to use a toothpick. Insert it into the center of a muffin. If it comes out clean or with just a few crumbs, your muffins are ready. If the toothpick has wet batter on it, they need a few more minutes in the oven. Keep an eye on them, as baking times can vary slightly based on your oven. The tops should also be golden brown and spring back when lightly pressed.
Can I freeze Pear Walnut Muffins?
Yes, you can freeze pear walnut muffins! Freezing is a great way to enjoy them later. Once the muffins have cooled completely, wrap each one in plastic wrap. Then, place them in a freezer-safe bag or container. They can last up to three months in the freezer. When you’re ready to enjoy one, simply take it out and let it thaw at room temperature. You can also warm it in the microwave for a few seconds for that fresh-baked taste!
What can I serve with Pear Walnut Muffins?
Pear walnut muffins are delicious on their own, but you can enhance your experience by serving them with a few tasty accompaniments. A dollop of cream cheese or butter spread adds a rich flavor. You might also enjoy them with a drizzle of honey or maple syrup for extra sweetness. For a refreshing touch, serve them alongside fresh fruit or a yogurt parfait. These pairings make for a delightful breakfast or snack that everyone will love!
Conclusion: Enjoying Your Pear Walnut Muffins
In conclusion, pear walnut muffins are a delightful treat that brings together the sweetness of ripe pears and the crunch of walnuts. They are not only easy to make but also versatile enough to suit any occasion. Whether you’re enjoying them for breakfast, as a snack, or sharing them with friends, these muffins are sure to impress.
As you bake your pear walnut muffins, remember to savor the process. The aroma of baking muffins fills your kitchen with warmth and comfort. Once they are out of the oven, let them cool slightly before indulging. Enjoy them warm, or store them for later. Either way, you’ll have a delicious treat ready to brighten your day.
Don’t hesitate to experiment with variations, such as adding spices or trying different nuts. Each twist can create a new favorite version of this classic recipe. Plus, with gluten-free options available, everyone can enjoy these muffins, regardless of dietary needs.
So, gather your ingredients, preheat your oven, and get ready to bake a batch of pear walnut muffins. They are not just a recipe; they are a way to create memories and share joy with those you love. Happy baking!
Print
Pear Walnut Muffins: Discover the Perfect Recipe Today!
- Total Time: 37 minutes
- Yield: 12 muffins 1x
- Diet: Vegetarian
Description
Pear walnut muffins are a delightful treat that combines the sweetness of ripe pears with the rich, nutty flavor of walnuts. They are moist, fluffy, and packed with wholesome ingredients, making them perfect for any occasion.
Ingredients
- 2 ripe pears
- 1 cup walnuts, chopped
- 2 cups all-purpose flour
- 1 cup brown sugar
- 2 teaspoons baking powder
- 1 teaspoon ground cinnamon
- 2 large eggs
- 1 cup milk
- 1/2 cup unsalted butter, melted
- 1/2 teaspoon salt
Instructions
- Preheat the oven to 350°F (175°C) and prepare the muffin tin.
- In a large mixing bowl, combine the dry ingredients: flour, brown sugar, baking powder, cinnamon, and salt.
- In a separate bowl, beat the eggs and mix in the milk and melted butter.
- Pour the wet mixture into the dry ingredients and stir until just combined.
- Fold in the chopped pears and walnuts.
- Fill the muffin tins about two-thirds full and bake for 18-22 minutes.
- Cool in the tin for 5 minutes, then transfer to a wire rack to cool completely.
Latest Amazon Finds


Notes
- Choose ripe pears that are slightly soft for maximum sweetness.
- Store muffins in an airtight container at room temperature for up to three days.
- For a gluten-free option, use a gluten-free flour blend.
- Prep Time: 15 minutes
- Cook Time: 22 minutes
- Category: Baking
- Method: Baking
- Cuisine: American
Nutrition
- Serving Size: 1 muffin
- Calories: 200
- Sugar: 10g
- Sodium: 150mg
- Fat: 8g
- Saturated Fat: 4g
- Unsaturated Fat: 3g
- Trans Fat: 0g
- Carbohydrates: 30g
- Fiber: 2g
- Protein: 4g
- Cholesterol: 40mg
Keywords: pear walnut muffins, baking, easy recipe, healthy muffins