

No bake cereal bars are a perfect snack for busy people looking for something tasty and healthy. They combine crunchy cereal, sweetener, and sometimes other delicious ingredients to create a treat that kids and adults love. You can enjoy them any time of the day and they are great for on-the-go snacking, school lunches, or even a quick breakfast. The best part? There’s no baking required, making them a quick and easy option for anyone!
These bars are also very versatile. You can adjust the ingredients based on what you have in your pantry or your personal preferences. Whether you prefer a nutty flavor or enjoy dried fruits, it’s easy to customize no-bake cereal bars to fit your taste. Let’s dive deeper into the specifics of this delightful recipe.
Ingredients about No Bake Cereal Bars
List of Ingredients with Measurements
Here’s what you’ll need to make your no bake cereal bars:
- 3 cups of cereal (like Cheerios, Rice Krispies, or your favorite nutty cereal)
- 1 cup of honey or maple syrup
- 1/2 cup of nut butter (peanut butter, almond butter, or sunflower seed butter)
- 1/2 cup of mini chocolate chips (optional)
- 1/2 cup of dried fruits, like raisins or cranberries (optional)
- 1/4 cup of chopped nuts (optional)
Optional Ingredient Substitutions
If you want to switch things up or cater to specific dietary needs, here are some substitutions:
- Use agave syrup instead of honey for a vegan option.
- Swap nut butter for a seed butter if you need a nut-free alternative.
- Change dried fruits for fresh fruits like banana or apples for a different taste.
- Use gluten-free cereal if you’re looking for a gluten-free treat.


How to Make No Bake Cereal Bars Directions
Step 1: Prepare Your Baking Pan
Start by taking an 8×8-inch baking dish and lining it with parchment paper. Leave some extra paper hanging over the sides. This will help you lift the bars out later. Grease the parchment paper lightly with cooking spray or oil to prevent sticking.
Step 2: Mix the Sweeteners and Nut Butter
In a medium saucepan, combine honey (or maple syrup) and nut butter over medium heat. Stir them together until the mixture is smooth and well combined. This process usually takes about 2-3 minutes. Keep stirring to avoid burning. Once it’s melted and mixed well, remove the saucepan from the heat.
Step 3: Combine Cereal and Mix
In a large bowl, pour the cereal. Add any optional items like chocolate chips, dried fruits, or nuts at this stage. Once you’ve got everything in the bowl, pour the warm honey and nut butter mixture over the cereal. Use a spatula or wooden spoon to gently fold and combine everything together until the cereal is evenly coated.
Step 4: Press Mixture into the Pan
Transfer the mixture into the prepared baking pan. Use your hands or the back of a spatula to firmly press the mixture down. Make sure to spread it evenly in the pan to ensure uniformity in the bars. The firmer you pack it, the better the bars will hold together. Once it’s all pressed down, place the pan in the refrigerator for at least 1-2 hours, until it’s set.
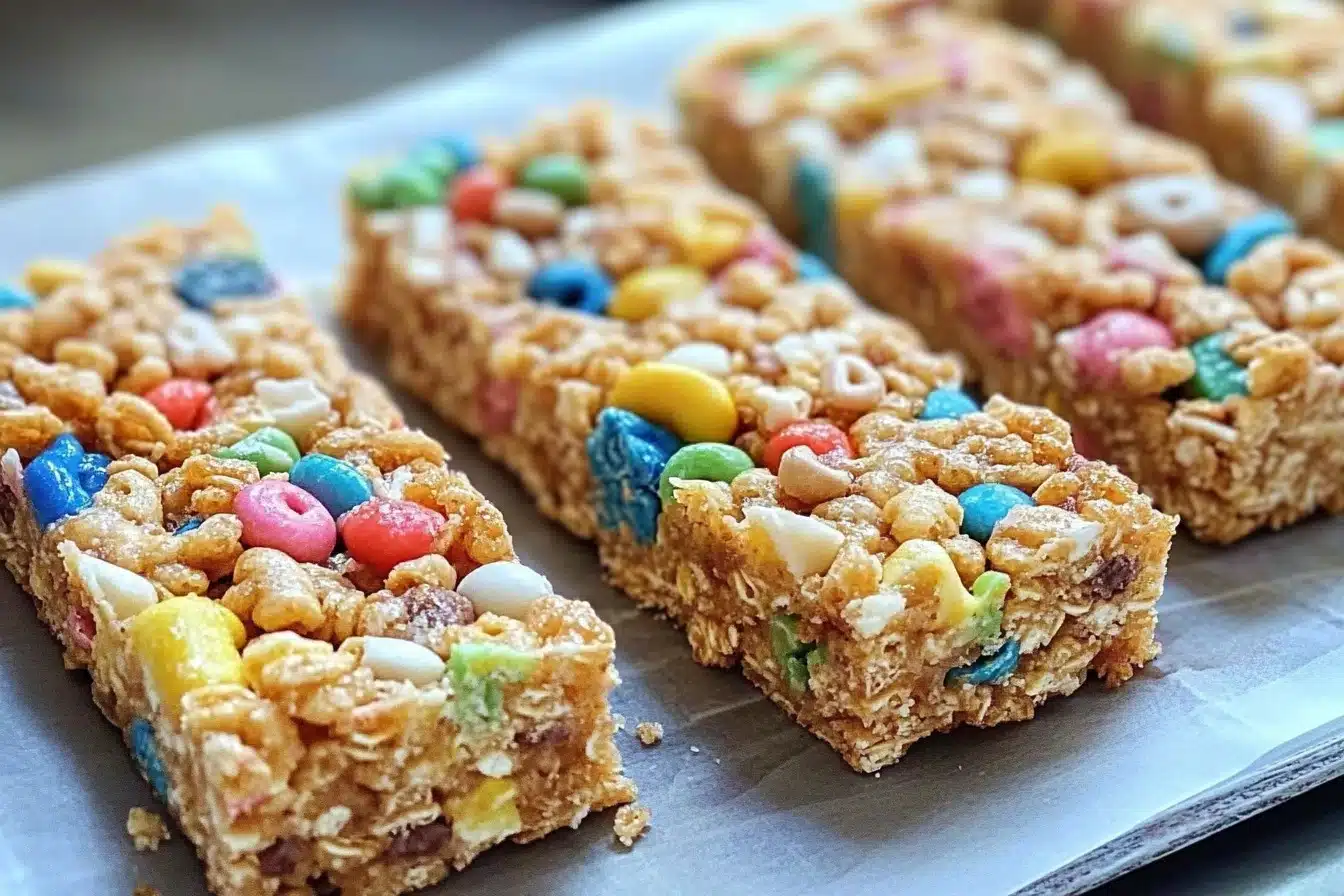
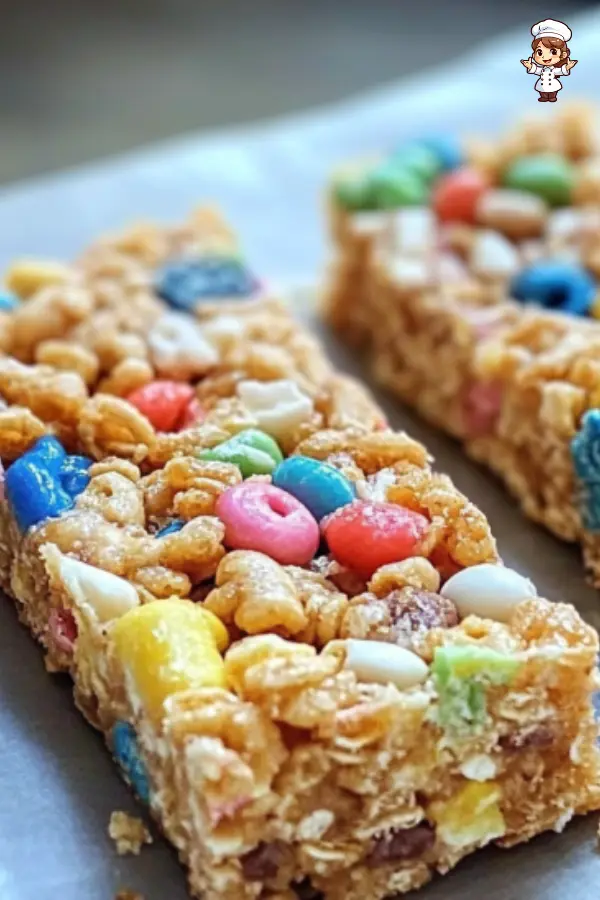
Step 5: Slice and Enjoy!
After chilling, take the no bake cereal bars out of the refrigerator. Use the hanging parchment paper to lift them out and place them on a cutting board. Slice into squares or rectangles, depending on your preference. Enjoy your homemade no bake cereal bars as a delicious snack!
How to Serve No Bake Cereal Bars
Best Ways to Serve No Bake Cereal Bars
These no bake cereal bars are incredibly versatile. You can serve them plain, but they also pair wonderfully with a side of fresh fruit or yogurt. If you like a bit more crunch, add some chopped nuts or even a drizzle of melted chocolate on top.
Serving Suggestions or Pairings
Consider packing these bars for lunch with a side of apple slices or carrot sticks. They also go well with a glass of milk or a smoothie for a quick breakfast. For a fun treat, you can crumble the bars over a bowl of ice cream or yogurt for added texture and sweetness.
How to Store No Bake Cereal Bars
Proper Storage Methods
To keep your no bake cereal bars fresh, store them in an airtight container. Layer the bars between sheets of parchment paper to prevent them from sticking together. They can last up to a week at room temperature, or a little longer in the refrigerator.
Tips for Reheating or Freezing
If you want to make a bigger batch, you can freeze these bars for up to three months. Just cut and wrap each bar individually in plastic wrap before placing them in a freezer bag or container. When you’re ready to eat them, let them thaw at room temperature for a few hours.
Tips to Make No Bake Cereal Bars
Common Mistakes to Avoid
One common mistake is not pressing the mixture firmly enough into the baking pan. If it’s too loose, the bars won’t hold together when you cut them. Also, avoid using too much liquid sweetener, which can make the bars soggy.
Helpful Tips for Better Results
For better results, always use fresh ingredients, especially when it comes to nuts and dried fruits. You can also experiment with adding spices like cinnamon or vanilla for extra flavor. If you find the mixture too sticky, you can lightly coat your hands or spatula with oil to make it easier to work with.
Variation of No Bake Cereal Bars
Suggested Variations or Twists on the Recipe
Get creative with your no bake cereal bars! Try adding cocoa powder for a chocolatey version or mixing in seeds like chia or flaxseed for added nutrition. You can also swap out the cereal for granola to give it a different texture.
Adjustments for Dietary Preferences
For those who are vegan or gluten-free, simply switch to plant-based sweeteners and gluten-free cereals. You can also create a nut-free version by using sunflower seed butter in place of nut butter, ensuring it’s safe for those with nut allergies.
FAQs
What can I do if the dish isn’t turning out right?
If your bars are crumbly and not sticking together, it’s likely that the mixture wasn’t enough wet or packed down properly. You can try remelting the mixture and adding a bit more nut butter or honey to help it bind.
Can I make this ahead of time?
Absolutely! You can prepare these no bake cereal bars ahead of time. They are perfect for meal prep and can last in the fridge for up to a week, or you can freeze them for longer storage.
What can I substitute for ingredients?
There are plenty of substitutions available. You can swap out the nut butter for sun butter, use agave instead of honey, or even swap cereals based on your preferences. Dried fruits can also be replaced with fresh fruits for different flavors.
No bake cereal bars are not just easy and quick to make; they are also delicious and versatile. With simple ingredients and minimal effort, you can create a healthy snack that everyone will love! Enjoy making and sharing them as a perfect treat for any occasion!
Print
No Bake Cereal Bars
- Total Time: 1-2 hours (to chill)
- Yield: 12–16 bars 1x
- Diet: Vegan
Description
No-bake cereal bars are a quick, healthy snack made with simple ingredients. Perfect for on-the-go, school lunches, or a delicious treat.
Ingredients
- 3 cups of cereal (like Cheerios, Rice Krispies, or your favorite nutty cereal)
- 1 cup of honey or maple syrup
- 1/2 cup of nut butter (peanut butter, almond butter, or sunflower seed butter)
- 1/2 cup of mini chocolate chips (optional)
- 1/2 cup of dried fruits, like raisins or cranberries (optional)
- 1/4 cup of chopped nuts (optional)
Instructions
- Prepare an 8×8-inch baking dish with parchment paper, greasing it lightly to prevent sticking.
- In a medium saucepan, heat honey (or maple syrup) and nut butter over medium heat, stirring until smooth, about 2-3 minutes.
- In a large bowl, combine the cereal and any optional ingredients like chocolate chips, dried fruits, or nuts.
- Pour the warm honey and nut butter mixture over the cereal, gently folding it in until everything is evenly coated.
- Press the mixture into the prepared baking pan firmly, spreading it evenly to ensure the bars hold together.
- Refrigerate for at least 1-2 hours to set. Once chilled, lift the bars out of the pan using the parchment paper, slice into squares, and enjoy!
Latest Amazon Finds


Notes
- Make sure to press the mixture firmly into the pan to prevent crumbly bars.
- Feel free to customize with other ingredients such as seeds or spices like cinnamon or vanilla.
- If using fresh fruit, be mindful that the bars may be a bit softer.
- These bars can be stored in an airtight container for up to a week at room temperature or longer in the fridge.
- Prep Time: 15 minutes
- Cook Time: 0 minutes
- Category: Snack
- Method: No-bake
- Cuisine: American
Nutrition
- Serving Size: 1 bar
- Calories: 150
- Sugar: 12g
- Sodium: 30mg
- Fat: 7g
- Saturated Fat: 1g
- Unsaturated Fat: 6g
- Trans Fat: 0g
- Carbohydrates: 20g
- Fiber: 2g
- Protein: 3g
- Cholesterol: 0mg
Keywords: no-bake cereal bars, healthy snack, quick breakfast, easy snack, homemade cereal bars