

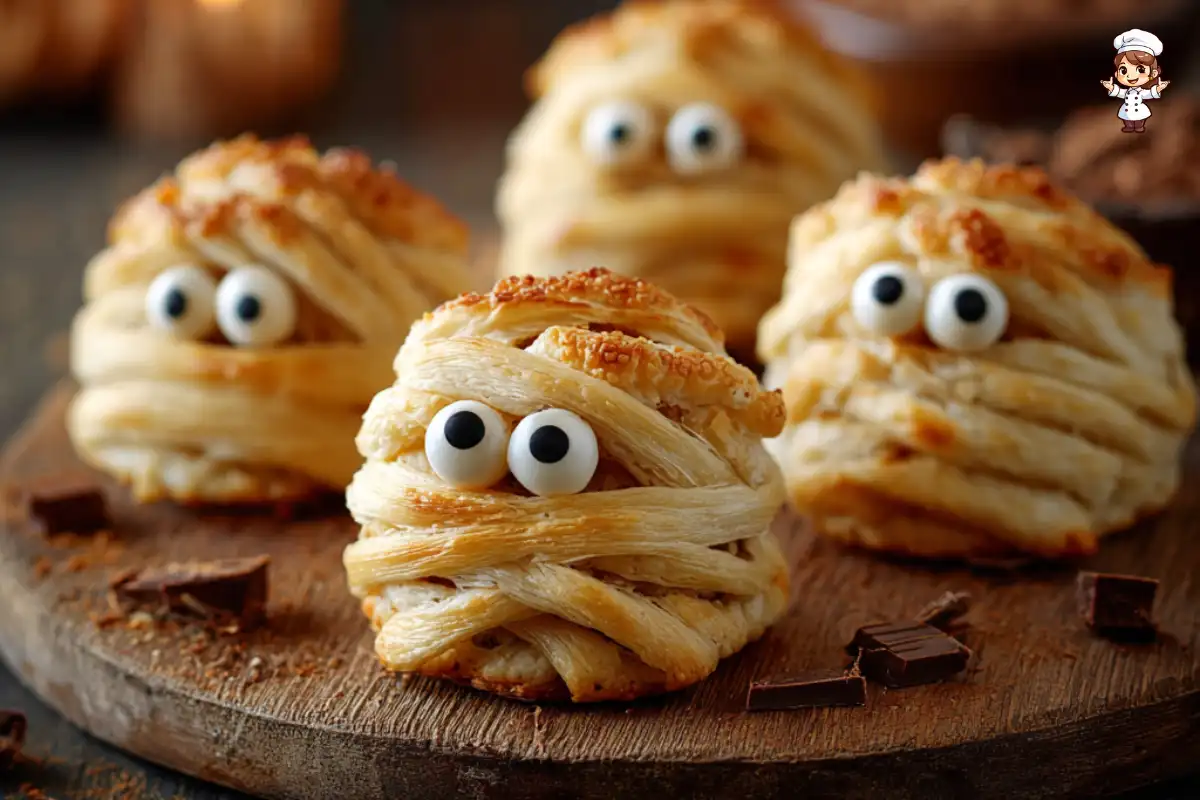
Mummy Wrapped Cheesecake Bites are delightful treats that combine the creamy goodness of cheesecake with the flaky texture of puff pastry. These bite-sized desserts are wrapped in strips of pastry, resembling mummies, making them perfect for Halloween festivities. Each bite is filled with a rich cheesecake mixture, offering a sweet surprise inside. The fun presentation and delicious flavor make them a hit among both kids and adults alike!
Why You Should Make Mummy Wrapped Cheesecake Bites This Halloween
Halloween is all about creativity and fun, and what better way to celebrate than with Mummy Wrapped Cheesecake Bites? These treats not only look festive but also taste amazing. They are easy to prepare, allowing you to spend more time enjoying the holiday with friends and family. Plus, they can be customized to suit different tastes, making them a versatile addition to your Halloween spread.
Imagine serving these spooky bites at your Halloween party. Guests will be impressed by your culinary skills and creativity. The combination of creamy cheesecake and flaky pastry is sure to delight everyone. So, gather your ingredients and get ready to create a Halloween treat that will be the talk of the town!
Ingredients for Mummy Wrapped Cheesecake Bites
To create these delightful Mummy Wrapped Cheesecake Bites, you’ll need a few simple ingredients. Each component plays a vital role in achieving that perfect balance of flavor and texture. Here’s what you’ll need:
- 1 package of cream cheese – 8 oz (softened): This is the base of your cheesecake filling, providing a rich and creamy texture.
- 1/2 cup of granulated sugar: This sweetens the filling, making it deliciously indulgent.
- 1 teaspoon of vanilla extract: Adds a lovely flavor that complements the cream cheese.
- 1/2 cup of sour cream: This ingredient adds a tangy flavor and creaminess to the filling.
- 1 package of puff pastry sheets – 1 lb (thawed): The flaky outer layer that gives these bites their mummy-like appearance.
- 1 egg: Used for the egg wash, it helps achieve a golden-brown color when baked.
- 1/4 cup of chocolate chips (for eyes): These will be melted and used to create the spooky eyes on your mummies.
- 1 tablespoon of milk (for melting chocolate): This helps to smooth out the chocolate for easy application.
- Flour: For dusting your work surface to prevent the pastry from sticking.
- Powdered sugar (optional): A light dusting adds a sweet touch and enhances the spooky look.
Gather these ingredients before you start cooking. Having everything ready will make the process smoother and more enjoyable. Plus, it’s always fun to see all the components come together to create a delicious Halloween treat!


Preparation of Mummy Wrapped Cheesecake Bites
Step 1: Prepare the Cheesecake Mixture
First, let’s get that creamy cheesecake filling ready! In a mixing bowl, combine the softened cream cheese, granulated sugar, vanilla extract, and sour cream. Using an electric mixer, beat the mixture until it’s smooth and creamy. This step is crucial, as a well-mixed filling ensures a delightful taste in every bite. Once it’s ready, set it aside while you prepare the pastry.
Step 2: Shape the Cheesecake Bites
Now, it’s time to work with the puff pastry. On a lightly floured surface, roll out the thawed puff pastry sheets to about 1/8 inch thickness. This thickness is perfect for achieving that flaky texture. Next, cut the pastry into squares, approximately 3×3 inches. These squares will be the perfect size to hold your cheesecake filling. Make sure to keep the edges neat for a better presentation!
Step 3: Wrap the Cheesecake Bites
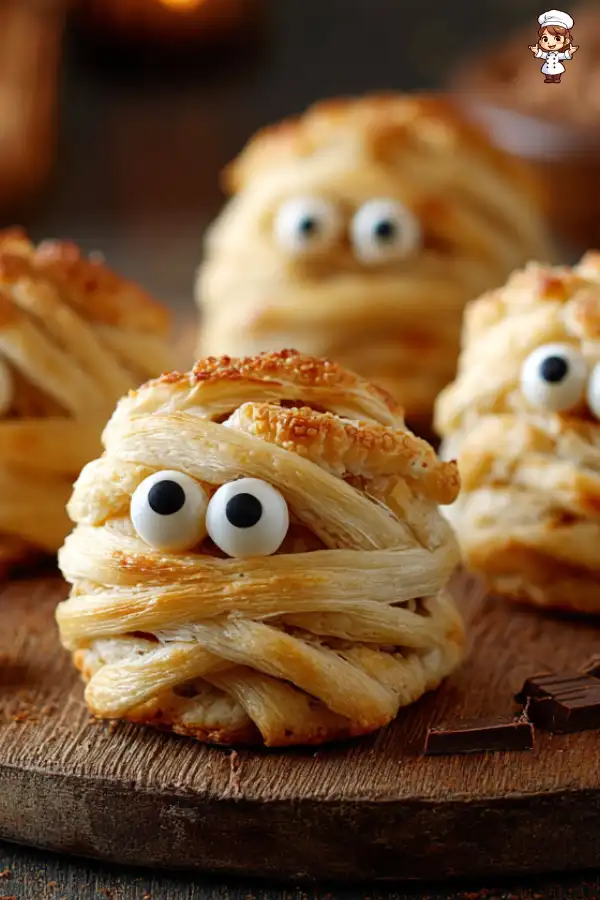
With your pastry squares ready, it’s time to fill them! Place a small spoonful of the cheesecake mixture in the center of each pastry square. Be careful not to overfill, as you’ll need to fold the pastry over the filling. Once filled, take thin strips of puff pastry from the remaining dough and lay them over the filled squares. This creates a fun bandage effect, making your bites look like little mummies. Remember, some of the cheesecake filling should still be visible for that spooky look!
Step 4: Bake the Mummy Wrapped Cheesecake Bites
Preheat your oven to 400°F (200°C) to get it nice and hot. While the oven heats up, place the wrapped cheesecake bites on a baking sheet lined with parchment paper. This prevents sticking and makes cleanup easier. Beat the egg and brush it over the pastry. This egg wash will give your bites a beautiful golden color when baked. Now, pop them in the oven and bake for about 15-20 minutes. Keep an eye on them until they are golden brown and puffed up!
Step 5: Decorate Your Mummy Wrapped Cheesecake Bites
Once your mummy bites are out of the oven, let them cool slightly. While they cool, melt the chocolate chips with the tablespoon of milk in a microwave-safe bowl. Heat in 30-second intervals, stirring until smooth. This melted chocolate will be used to create the eyes on your mummies. Using a toothpick or a small piping bag, place two tiny dots of melted chocolate on each bite to give them their spooky eyes. This final touch adds character and fun to your Halloween treats!
Tips for Perfect Mummy Wrapped Cheesecake Bites
Common Mistakes to Avoid
Making Mummy Wrapped Cheesecake Bites can be a fun experience, but there are a few common mistakes to watch out for. First, ensure your puff pastry is fully thawed before rolling it out. If it’s still cold, it may tear easily, making it hard to wrap around the filling. Also, be careful not to overfill the pastry squares. If you add too much cheesecake mixture, the filling may spill out during baking, ruining the mummy look.
Another mistake is not sealing the edges properly. Make sure to press the pastry edges together firmly to prevent them from opening while baking. Lastly, keep an eye on the baking time. Every oven is different, so check your bites a few minutes early. You want them golden brown, not burnt!
Storage Tips for Mummy Wrapped Cheesecake Bites
After your Mummy Wrapped Cheesecake Bites are baked and decorated, you might have some leftovers. To store them, let them cool completely first. Then, place them in an airtight container. They can be kept in the refrigerator for up to three days. If you want to keep them longer, consider freezing them. Just make sure to wrap each bite in plastic wrap and then place them in a freezer-safe bag. They can last up to a month in the freezer.
When you’re ready to enjoy them again, simply thaw them in the fridge overnight. You can reheat them in the oven at a low temperature for a few minutes to restore their flaky texture. This way, you can savor the deliciousness of your Mummy Wrapped Cheesecake Bites even after Halloween!
Variation of Mummy Wrapped Cheesecake Bites
Alternative Fillings for Mummy Wrapped Cheesecake Bites
While the classic cheesecake filling is delicious, you can get creative with alternative fillings for your Mummy Wrapped Cheesecake Bites. For a seasonal twist, consider adding pumpkin puree and spices like cinnamon and nutmeg to your cream cheese mixture. This will give your bites a delightful pumpkin cheesecake flavor, perfect for fall!
If you’re a chocolate lover, try mixing in some melted chocolate or chocolate chips into the cream cheese filling. This will create a rich chocolate cheesecake that pairs wonderfully with the flaky pastry. You can also experiment with fruit flavors. Adding mashed strawberries or blueberries can give a refreshing taste to your bites. Just make sure to adjust the sugar accordingly to balance the sweetness.
Another fun idea is to create a peanut butter filling. Simply mix peanut butter with cream cheese and a bit of powdered sugar for a nutty twist. This filling will surprise your guests and add a unique flavor to your Mummy Wrapped Cheesecake Bites. The possibilities are endless, so feel free to mix and match flavors to find your favorite combination!
Different Wrapping Techniques for Mummy Wrapped Cheesecake Bites
Wrapping your cheesecake bites can be just as fun as making the filling! While the classic mummy look involves strips of pastry, you can try different techniques to create unique designs. For instance, instead of using long strips, cut the pastry into small squares or triangles and layer them over the filling. This will give a patchwork effect that looks just as spooky!
Another technique is to create a spiral wrap. Roll out the pastry and cut it into thin strips. Then, wrap the strips around the filling in a spiral motion. This will give your bites a fun, swirled appearance. You can also leave some areas uncovered for a more rustic look, allowing the cheesecake filling to peek through.
For a more playful approach, consider using cookie cutters to create fun shapes from the pastry. You can cut out little ghosts or bats and place them on top of the bites before baking. This adds an extra layer of creativity and makes your Mummy Wrapped Cheesecake Bites even more festive for Halloween!
FAQs
Can I make Mummy Wrapped Cheesecake Bites ahead of time?
Absolutely! You can prepare Mummy Wrapped Cheesecake Bites ahead of time. To do this, follow the steps up to wrapping the bites. Once wrapped, place them on a baking sheet and cover them with plastic wrap. You can store them in the refrigerator for up to 24 hours before baking. This way, you can save time on the day of your Halloween party. Just remember to brush them with the egg wash right before baking for that golden finish!
What can I use instead of cream cheese in Mummy Wrapped Cheesecake Bites?
If you’re looking for a substitute for cream cheese, there are a few options. You can use mascarpone cheese for a similar creamy texture. Another option is ricotta cheese, but you may want to blend it until smooth. For a dairy-free alternative, consider using vegan cream cheese. This will give you a similar taste and texture while accommodating dietary restrictions. Just make sure to adjust the sugar to taste, as some alternatives may be sweeter than cream cheese.
How do I store leftover Mummy Wrapped Cheesecake Bites?
Storing leftover Mummy Wrapped Cheesecake Bites is easy! First, let them cool completely. Then, place them in an airtight container. They can be stored in the refrigerator for up to three days. If you want to keep them longer, consider freezing them. Wrap each bite in plastic wrap and place them in a freezer-safe bag. They can last up to a month in the freezer. When you’re ready to enjoy them, simply thaw in the fridge overnight and reheat in the oven for a few minutes.
Can I freeze Mummy Wrapped Cheesecake Bites?
Yes, you can freeze Mummy Wrapped Cheesecake Bites! This is a great way to enjoy them later. After baking and cooling, wrap each bite in plastic wrap and place them in a freezer-safe bag. They can be frozen for up to a month. When you’re ready to eat them, thaw them in the refrigerator overnight. To restore their flaky texture, reheat them in the oven at a low temperature for a few minutes. This way, you can savor the deliciousness of your Mummy Wrapped Cheesecake Bites even after Halloween!
Print
Mummy Wrapped Cheesecake Bites
- Total Time: 50 minutes
- Yield: 12–16 bites 1x
- Diet: Vegetarian
Description
Mummy Wrapped Cheesecake Bites are delightful treats that combine the creamy goodness of cheesecake with the flaky texture of puff pastry, perfect for Halloween festivities.
Ingredients
- 1 package of cream cheese – 8 oz (softened)
- 1/2 cup of granulated sugar
- 1 teaspoon of vanilla extract
- 1/2 cup of sour cream
- 1 package of puff pastry sheets – 1 lb (thawed)
- 1 egg
- 1/4 cup of chocolate chips (for eyes)
- 1 tablespoon of milk (for melting chocolate)
- Flour (for dusting)
- Powdered sugar (optional)
Instructions
- Prepare the cheesecake mixture by combining cream cheese, sugar, vanilla extract, and sour cream in a mixing bowl and beat until smooth.
- Roll out the thawed puff pastry sheets to about 1/8 inch thickness and cut into 3×3 inch squares.
- Place a small spoonful of cheesecake mixture in the center of each pastry square and wrap with thin strips of puff pastry.
- Preheat the oven to 400°F (200°C), place the wrapped bites on a baking sheet, brush with egg wash, and bake for 15-20 minutes until golden brown.
- Once cooled, melt chocolate chips with milk and use to create eyes on the bites.
Latest Amazon Finds


Notes
- Ensure puff pastry is fully thawed before rolling out.
- Do not overfill the pastry squares to prevent spilling during baking.
- Seal the edges of the pastry properly to avoid opening while baking.
- Store leftovers in an airtight container in the refrigerator for up to three days.
- Freeze wrapped bites for up to a month for longer storage.
- Prep Time: 30 minutes
- Cook Time: 20 minutes
- Category: Dessert
- Method: Baking
- Cuisine: American
Nutrition
- Serving Size: 1 bite
- Calories: 150
- Sugar: 5g
- Sodium: 150mg
- Fat: 8g
- Saturated Fat: 3g
- Unsaturated Fat: 4g
- Trans Fat: 0g
- Carbohydrates: 15g
- Fiber: 1g
- Protein: 3g
- Cholesterol: 30mg
Keywords: Halloween, cheesecake, dessert, treats, mummy