

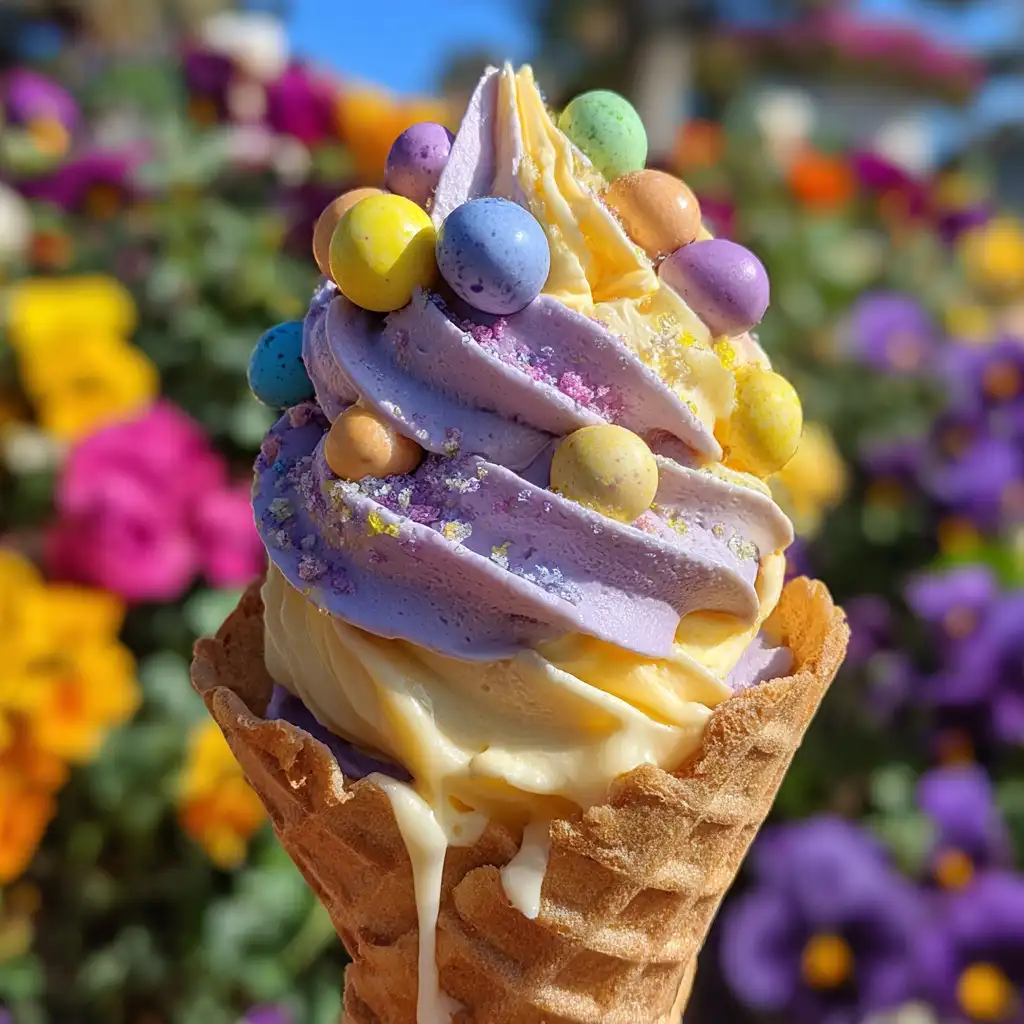
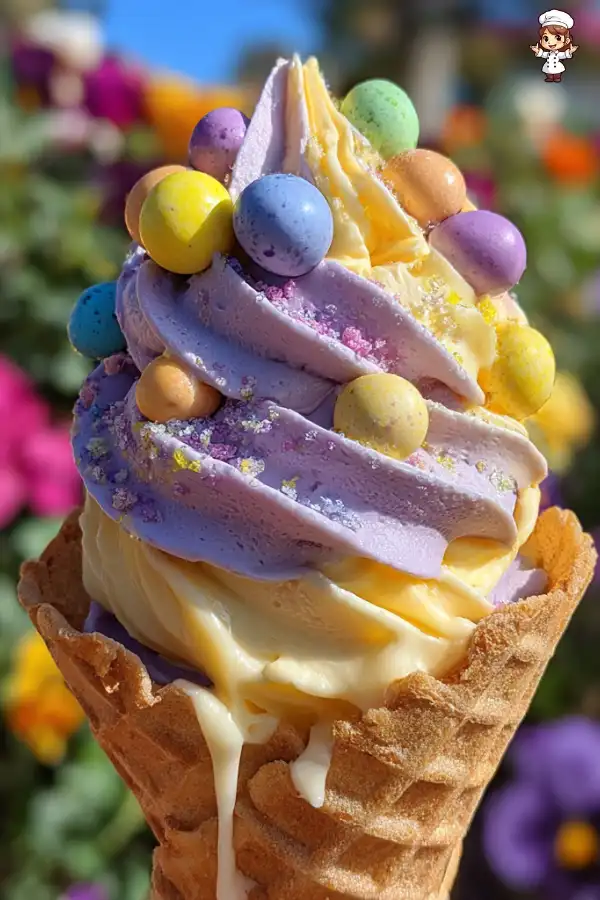
Are you ready to indulge in a delightful treat that combines the joy of ice cream with the fun of mini chocolate eggs? The Mini Egg Ice Cream Recipe is not just a dessert; it’s an experience! This creamy, colorful ice cream is perfect for spring celebrations, family gatherings, or simply enjoying on a warm day. With its vibrant pastel colors and the crunch of mini chocolate eggs, this ice cream is sure to bring smiles to everyone’s faces.
What Makes Mini Egg Ice Cream Special?
What sets this ice cream apart? First, it’s the unique combination of flavors and textures. The rich, creamy base made from heavy cream and whole milk provides a smooth canvas for the sweet, crunchy mini chocolate eggs. These little gems add a delightful surprise in every bite!
Moreover, the pastel colors of lavender and yellow not only make the ice cream visually appealing but also evoke the cheerful spirit of spring. Whether you’re hosting an Easter party or just want to treat yourself, this ice cream is a perfect choice. It’s easy to make and can be customized to suit your taste.
Additionally, the Mini Egg Ice Cream Recipe allows for creativity. You can experiment with different colors and flavors, making it a fun activity for kids and adults alike. So, gather your ingredients and get ready to create a dessert that’s as delightful to make as it is to eat!
Ingredients for Mini Egg Ice Cream Recipe
To create your own delicious Mini Egg Ice Cream Recipe, you’ll need a few simple ingredients. Each component plays a vital role in achieving that creamy texture and delightful flavor. Here’s what you’ll need:
- 2 cups heavy cream (480 ml): This is the base of your ice cream, providing richness and creaminess.
- 1 cup whole milk (240 ml): Whole milk adds a smooth consistency and balances the heaviness of the cream.
- 3/4 cup granulated sugar (150 g): Sugar sweetens the ice cream and helps create a soft texture.
- 1 teaspoon vanilla extract: This adds a lovely flavor that complements the chocolate eggs.
- 1/4 teaspoon salt: A pinch of salt enhances the sweetness and overall flavor.
- 1/2 cup mini chocolate eggs (about 100 g), roughly chopped: These are the stars of the show, adding crunch and sweetness.
- Purple food coloring (optional): For a fun lavender hue.
- Yellow food coloring (optional): To create a cheerful yellow layer.
- 4-6 waffle cones: Perfect for serving your delightful ice cream.
Gather these ingredients, and you’re ready to embark on your ice cream-making adventure! Each item contributes to the overall taste and presentation of your Mini Egg Ice Cream Recipe. So, let’s get started on the next steps to create this delightful treat!


Step-by-Step Preparation of Mini Egg Ice Cream Recipe
Step 1: Gather Your Ingredients
Before you start making your Mini Egg Ice Cream Recipe, it’s essential to gather all your ingredients. Having everything ready will make the process smoother and more enjoyable. Make sure you have:
- Heavy cream
- Whole milk
- Granulated sugar
- Vanilla extract
- Salt
- Mini chocolate eggs
- Food coloring (if desired)
- Waffle cones
Once you have everything in one place, you’re all set to create this delightful ice cream!
Step 2: Prepare the Base for Mini Egg Ice Cream
Now it’s time to make the ice cream base. In a large mixing bowl, combine the heavy cream, whole milk, granulated sugar, vanilla extract, and salt. Use a whisk to mix everything together. Keep whisking until the sugar is fully dissolved. This step is crucial as it ensures a smooth and creamy texture for your ice cream.
Once your mixture is well combined, you’ll have a delicious base ready for the next steps. It’s the foundation of your Mini Egg Ice Cream Recipe, so take your time to get it just right!
Step 3: Incorporate Mini Eggs into the Mixture
Next, it’s time to add some fun! Divide your ice cream base into two bowls. In one bowl, add a few drops of purple food coloring. Stir until you achieve your desired lavender shade. In the other bowl, add yellow food coloring and mix until you reach a soft yellow color.
Now, take the bowl with the lavender mixture and fold in half of the chopped mini chocolate eggs. This will give your ice cream a delightful crunch. Repeat the same with the yellow mixture, folding in the remaining mini eggs. Be gentle while mixing; you want to keep those beautiful colors intact!
Step 4: Churn the Ice Cream
It’s time to churn! Pour the lavender mixture into your ice cream maker. Follow the manufacturer’s instructions, usually churning for about 20-25 minutes. You want it to reach a soft-serve consistency. Once done, transfer it to a large container.
Repeat this process with the yellow mixture. Churning is what gives your ice cream that light and fluffy texture, so don’t skip this step!
Step 5: Freeze the Ice Cream
After churning, it’s time to freeze your ice cream. In the container with the lavender ice cream, gently fold in the remaining mini chocolate eggs. Then, layer the yellow ice cream on top. Use a spatula to create swirls, but be careful not to overmix. You want those lovely pastel colors to shine through!
Cover the container with a lid or plastic wrap and place it in the freezer. Let it freeze for at least 4 hours or until firm. This step is essential for achieving that perfect scoopable texture.
Once your ice cream is fully frozen, you’re ready to serve it in waffle cones. Enjoy the delightful flavors and colors of your homemade Mini Egg Ice Cream Recipe!
Tips for Perfecting Your Mini Egg Ice Cream Recipe
Choosing the Right Mini Eggs
When it comes to making your Mini Egg Ice Cream Recipe, the type of mini eggs you choose can make a big difference. Look for high-quality chocolate eggs that are not only tasty but also have a fun crunch. Popular brands often have a variety of flavors, so feel free to experiment!
For a classic taste, opt for milk chocolate mini eggs. If you want to add a twist, consider using dark chocolate or even white chocolate eggs. You can also mix different types for a delightful surprise in every scoop. Just remember to chop them into smaller pieces to ensure they blend well into the ice cream.
Additionally, consider seasonal options. Around Easter, many stores offer special mini eggs with unique flavors or designs. These can add a festive touch to your ice cream and make it even more special. So, keep an eye out for those limited-edition treats!
Storage Tips for Mini Egg Ice Cream
Once you’ve made your delicious Mini Egg Ice Cream Recipe, proper storage is key to keeping it fresh and tasty. After freezing, transfer any leftover ice cream into an airtight container. This will help prevent ice crystals from forming and keep your ice cream creamy.
Label the container with the date so you can keep track of how long it’s been in the freezer. Generally, homemade ice cream can last for about 2-3 weeks in the freezer. However, for the best flavor and texture, try to enjoy it within the first week.
When you’re ready to serve, let the ice cream sit at room temperature for a few minutes. This will make it easier to scoop. If you notice any ice crystals on the surface, simply stir the ice cream gently before serving. This will help restore its creamy consistency.
With these tips, you’ll be well on your way to creating the perfect Mini Egg Ice Cream Recipe that everyone will love!
Variations of Mini Egg Ice Cream Recipe
Adding Different Flavors to Mini Egg Ice Cream
While the classic Mini Egg Ice Cream Recipe is delightful on its own, you can easily add different flavors to make it even more exciting! Here are some fun ideas to consider:
- Mint Chocolate: Add a few drops of mint extract to the base for a refreshing twist. The mint flavor pairs wonderfully with the chocolate eggs.
- Cookie Dough: Fold in small pieces of cookie dough into the ice cream mixture. This adds a chewy texture and a sweet surprise in every bite.
- Fruit Flavors: Incorporate pureed fruits like strawberries or raspberries for a fruity version. This will give your ice cream a vibrant color and a fresh taste.
- Peanut Butter: Swirl in some creamy peanut butter for a rich and nutty flavor. It complements the chocolate eggs beautifully!
Feel free to mix and match these flavors to create your own unique version of the Mini Egg Ice Cream Recipe. The possibilities are endless, and experimenting can lead to delicious discoveries!
Dairy-Free Mini Egg Ice Cream Recipe
If you’re looking for a dairy-free option, you can still enjoy the joy of Mini Egg Ice Cream! Here’s how to make a dairy-free version:
- Coconut Milk: Substitute heavy cream and whole milk with full-fat coconut milk. This will give your ice cream a creamy texture and a hint of coconut flavor.
- Sweetener: Use a dairy-free sweetener like agave syrup or maple syrup instead of granulated sugar. This will keep it sweet and delicious.
- Dairy-Free Mini Eggs: Look for dairy-free chocolate eggs available in stores. These are often made with almond or coconut milk and are just as tasty!
Follow the same steps as the original recipe, and you’ll have a delightful dairy-free Mini Egg Ice Cream Recipe that everyone can enjoy. It’s a great way to include those with dietary restrictions in the fun!
FAQs About Mini Egg Ice Cream Recipe
Can I use other types of chocolate eggs in this recipe?
Absolutely! While mini chocolate eggs are the star of the Mini Egg Ice Cream Recipe, you can use other types of chocolate eggs as well. Dark chocolate, white chocolate, or even flavored chocolate eggs can add a unique twist to your ice cream. Just make sure to chop them into smaller pieces so they mix well into the creamy base. This way, you can customize your ice cream to suit your taste preferences!
How long does Mini Egg Ice Cream last in the freezer?
Homemade Mini Egg Ice Cream can last in the freezer for about 2-3 weeks when stored properly in an airtight container. However, for the best flavor and texture, it’s recommended to enjoy it within the first week. Over time, ice crystals may form, which can affect the creaminess. So, gather your friends and family and enjoy this delightful treat while it’s fresh!
Is it possible to make Mini Egg Ice Cream without an ice cream maker?
Yes, you can definitely make Mini Egg Ice Cream without an ice cream maker! Simply pour the prepared ice cream base into a shallow dish and place it in the freezer. Every 30 minutes, take it out and stir vigorously with a fork. This helps break up ice crystals and creates a smoother texture. Repeat this process until the ice cream reaches your desired consistency, usually about 3-4 hours. It’s a simple method that still yields delicious results!
What can I serve with Mini Egg Ice Cream?
There are many delightful options to serve alongside your Mini Egg Ice Cream. Here are a few ideas:
- Fresh Fruits: Slices of strawberries, bananas, or raspberries add a refreshing touch.
- Chocolate Sauce: Drizzle some warm chocolate sauce over the ice cream for an extra indulgent treat.
- Whipped Cream: A dollop of whipped cream on top makes for a classic ice cream experience.
- Sprinkles: Colorful sprinkles can add a fun and festive look to your dessert.
Feel free to mix and match these options to create a delightful dessert experience. Your Mini Egg Ice Cream Recipe is sure to be a hit!
Print
Mini Egg Ice Cream Recipe
- Total Time: 4 hours 45 minutes
- Yield: 4–6 servings 1x
- Diet: Vegetarian
Description
A delightful ice cream recipe that combines creamy texture with the fun of mini chocolate eggs, perfect for spring celebrations.
Ingredients
- 2 cups heavy cream (480 ml): This is the base of your ice cream, providing richness and creaminess.
- 1 cup whole milk (240 ml): Whole milk adds a smooth consistency and balances the heaviness of the cream.
- 3/4 cup granulated sugar (150 g): Sugar sweetens the ice cream and helps create a soft texture.
- 1 teaspoon vanilla extract: This adds a lovely flavor that complements the chocolate eggs.
- 1/4 teaspoon salt: A pinch of salt enhances the sweetness and overall flavor.
- 1/2 cup mini chocolate eggs (about 100 g), roughly chopped: These are the stars of the show, adding crunch and sweetness.
- Purple food coloring (optional): For a fun lavender hue.
- Yellow food coloring (optional): To create a cheerful yellow layer.
- 4–6 waffle cones: Perfect for serving your delightful ice cream.
Instructions
- Gather all your ingredients.
- Prepare the base by mixing heavy cream, whole milk, sugar, vanilla extract, and salt in a large bowl until the sugar is dissolved.
- Divide the mixture into two bowls and add purple food coloring to one and yellow to the other.
- Fold in half of the chopped mini chocolate eggs into each colored mixture.
- Churn the lavender mixture in an ice cream maker for 20-25 minutes until soft-serve consistency, then transfer to a container.
- Repeat the churning process with the yellow mixture.
- Fold in remaining mini chocolate eggs into the lavender ice cream and layer the yellow on top, creating swirls.
- Cover and freeze for at least 4 hours until firm.
- Serve in waffle cones and enjoy!
Latest Amazon Finds


Notes
- Choose high-quality mini chocolate eggs for the best flavor.
- Store leftover ice cream in an airtight container to prevent ice crystals.
- Let the ice cream sit at room temperature for a few minutes before serving for easier scooping.
- Prep Time: 20 minutes
- Cook Time: 25 minutes
- Category: Dessert
- Method: Churning
- Cuisine: American
Nutrition
- Serving Size: 1 scoop
- Calories: 250
- Sugar: 20g
- Sodium: 50mg
- Fat: 15g
- Saturated Fat: 10g
- Unsaturated Fat: 3g
- Trans Fat: 0g
- Carbohydrates: 30g
- Fiber: 0g
- Protein: 3g
- Cholesterol: 60mg
Keywords: Mini Egg Ice Cream, Ice Cream Recipe, Spring Dessert, Chocolate Eggs