

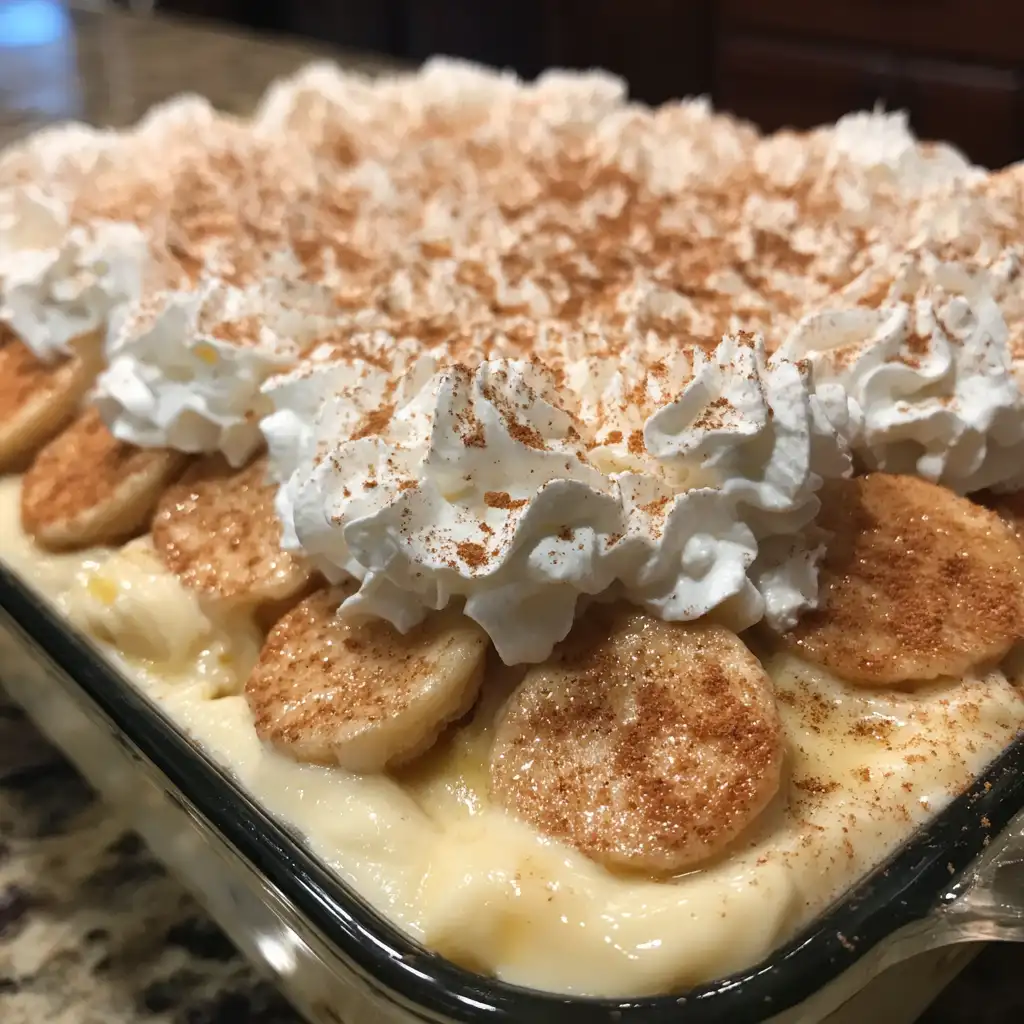
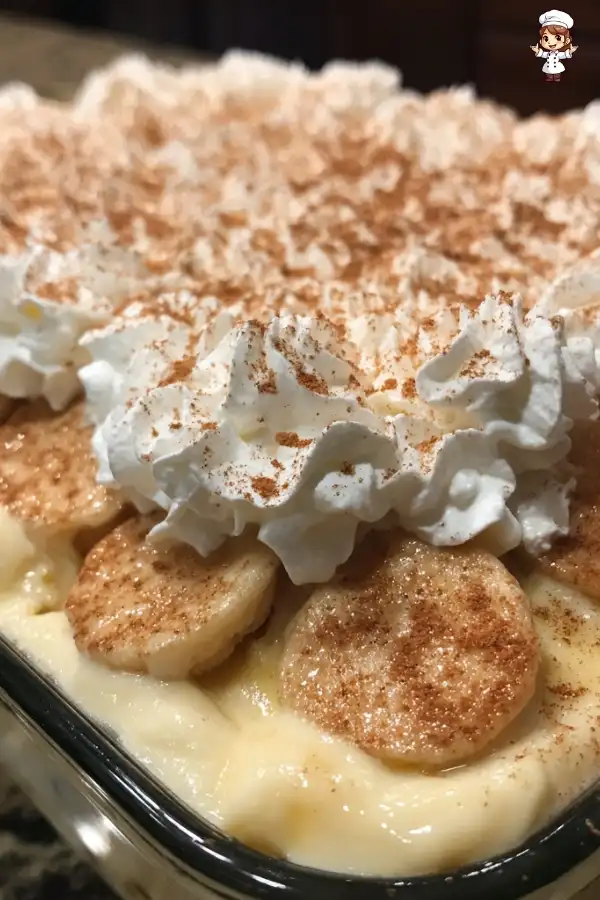
Mama’s Banana Pudding is more than just a dessert; it’s a cherished tradition in many households. This delightful treat brings back memories of family gatherings, summer picnics, and holiday celebrations. With its creamy layers of pudding, fresh bananas, and crunchy vanilla wafers, it’s a dish that warms the heart and satisfies the sweet tooth.
But where did this beloved dessert come from? The history of banana pudding dates back to the 19th century. It is believed to have originated in the Southern United States, where bananas were introduced as a popular fruit. The combination of bananas with creamy pudding and cookies quickly became a favorite among families. Over the years, many variations have emerged, but Mama’s Banana Pudding remains a classic.
The History of Mama’s Banana Pudding
The roots of banana pudding can be traced to the early 1900s. At that time, recipes began to appear in cookbooks, showcasing the delicious combination of bananas, custard, and cookies. The dish gained popularity during the Great Depression, as it was an affordable and easy dessert to make. Families would often gather around the table to enjoy this sweet treat, creating lasting memories.
As time went on, banana pudding evolved. The introduction of instant pudding mixes in the 1950s made it even easier to prepare. This convenience allowed more people to enjoy the dessert, leading to its widespread popularity. Today, Mama’s Banana Pudding is often made with a mix of fresh ingredients and store-bought items, making it a go-to recipe for many home cooks.
In many families, the recipe for Mama’s Banana Pudding is passed down through generations. Each family may have its own special twist, whether it’s a secret ingredient or a unique layering technique. Regardless of the variations, the essence of Mama’s Banana Pudding remains the same: a comforting dessert that brings people together.
So, whether you’re making it for a special occasion or just a cozy night in, Mama’s Banana Pudding is sure to bring joy to your table. Let’s dive into the ingredients and preparation methods that make this dessert a timeless favorite!
Ingredients for Mama’s Banana Pudding
To create the delightful layers of Mama’s Banana Pudding, you’ll need a few simple ingredients. Each component plays a vital role in achieving that creamy, sweet, and satisfying flavor. Here’s what you’ll need:
- 4 ripe bananas: Choose bananas that are perfectly ripe. They should be yellow with a few brown spots for the best sweetness and flavor.
- 1 box (3.4 oz) vanilla pudding mix: This is the base of your pudding. It adds creaminess and a rich vanilla flavor.
- 1 can (14 oz) sweetened condensed milk: This ingredient adds sweetness and a smooth texture to the pudding.
- 2 cups cold milk: Use cold milk to help the pudding mix thicken properly. Whole milk works best for a creamier texture.
- 1 tub (8 oz) whipped cream: You can use store-bought whipped cream or make your own. This adds a light and fluffy topping.
- 1 box (11 oz) vanilla wafers: These cookies provide a crunchy layer that contrasts beautifully with the creamy pudding and bananas.
- Ground cinnamon: A light sprinkle of cinnamon on top adds a warm flavor and enhances the dessert’s visual appeal.
Gathering these ingredients is the first step toward making your own Mama’s Banana Pudding. Each item contributes to the overall taste and texture, making it a beloved dessert for all ages. Now that you have everything you need, let’s move on to the preparation steps that will bring this delicious treat to life!


Preparation of Mama’s Banana Pudding
Now that you have all the ingredients ready, it’s time to prepare Mama’s Banana Pudding. This process is simple and fun, allowing you to create a delicious dessert that everyone will love. Let’s break it down into three easy steps.
Step 1: Preparing the Pudding Base
First, you need to make the pudding base. In a large mixing bowl, combine the vanilla pudding mix and sweetened condensed milk. Whisk them together until they are well blended. Next, gradually add the cold milk while continuing to whisk. This helps to create a smooth mixture. After everything is combined, let it sit for about 5 minutes. This resting time allows the pudding to thicken nicely, giving it that creamy texture we all adore.
Step 2: Layering the Ingredients
Once your pudding base is ready, it’s time to layer the ingredients. Start by taking a large serving dish or individual cups. Place a layer of vanilla wafers at the bottom. These cookies will provide a delightful crunch. Next, add a layer of sliced bananas over the wafers. Make sure to cover the wafers completely with the bananas. Then, pour a layer of the pudding mixture over the bananas, ensuring they are fully covered. Repeat this process, adding more layers of wafers, bananas, and pudding until you use all the ingredients. Finish with a final layer of pudding on top. This creates a beautiful presentation!
Step 3: Chilling the Pudding
The last step is to chill your masterpiece. Spread the whipped cream evenly over the top layer of pudding. You can use a spatula to create a smooth surface or make decorative swirls for a fancy touch. To enhance the flavor and appearance, lightly sprinkle ground cinnamon over the whipped cream. Now, cover the dish with plastic wrap and refrigerate it for at least 2 hours. This chilling time allows the flavors to meld together and the wafers to soften slightly, making each bite a delightful experience.
After chilling, your Mama’s Banana Pudding is ready to serve! Scoop out portions into bowls or serve directly from the dish. Enjoy this comforting dessert that is sure to delight everyone!
Tips for Making the Best Mama’s Banana Pudding
Creating the perfect Mama’s Banana Pudding is all about the details. With a few helpful tips, you can elevate your dessert to new heights. Here are some essential pointers to ensure your banana pudding is a hit every time!
Choosing the Right Bananas
The bananas you select can make a big difference in your pudding. Look for bananas that are ripe but not overly brown. A good banana for pudding should be bright yellow with a few brown spots. This ripeness indicates that the bananas are sweet and flavorful. If you use bananas that are too green, they may not have the sweetness you desire. On the other hand, overly brown bananas can become mushy and may not hold their shape in the layers. For the best results, choose bananas that are just right!
Storing Leftover Mama’s Banana Pudding
If you happen to have any leftovers (which is rare!), storing them properly is key to maintaining freshness. First, cover the dish tightly with plastic wrap or transfer the pudding to an airtight container. This helps prevent the pudding from absorbing any odors from the fridge. Mama’s Banana Pudding can last in the refrigerator for about 3 to 4 days. However, keep in mind that the bananas may brown over time. To keep them looking fresh, you can sprinkle a little lemon juice over the banana slices before layering. This will help slow down the browning process and keep your dessert looking appetizing!
By following these tips, you can ensure that your Mama’s Banana Pudding is not only delicious but also visually appealing. Enjoy making this classic dessert, and watch as it becomes a favorite in your home!
Variations of Mama’s Banana Pudding
Mama’s Banana Pudding is a classic dessert that can be easily adapted to fit different dietary needs and preferences. Whether you’re looking for a gluten-free option or a vegan twist, there are plenty of ways to enjoy this beloved treat. Let’s explore some delicious variations that will keep the spirit of Mama’s Banana Pudding alive while catering to various lifestyles.
Gluten-Free Mama’s Banana Pudding
If you or someone you know is gluten-sensitive, you can still enjoy Mama’s Banana Pudding! The key is to choose gluten-free ingredients. Start by selecting gluten-free vanilla wafers. Many brands offer gluten-free options that taste just as good as the traditional ones. You can also make your own gluten-free cookies if you prefer a homemade touch.
For the pudding mix, ensure that it is labeled gluten-free. Most vanilla pudding mixes are naturally gluten-free, but it’s always best to check the packaging. Follow the same preparation steps as the original recipe, and you’ll have a delightful gluten-free version of Mama’s Banana Pudding that everyone can enjoy!
Vegan Mama’s Banana Pudding
For those following a vegan diet, Mama’s Banana Pudding can be made without any animal products. Start by replacing the vanilla pudding mix with a vegan alternative. There are many plant-based pudding mixes available that are both delicious and easy to use. You can also make your own pudding using almond milk or coconut milk, cornstarch, and a sweetener of your choice.
Instead of sweetened condensed milk, use coconut cream or a homemade cashew cream for a rich and creamy texture. For the whipped cream, opt for a vegan whipped topping or make your own using coconut cream. Just whip it until fluffy, and it will be a perfect topping for your pudding.
As with the original recipe, layer your ingredients as described, and you’ll have a scrumptious vegan version of Mama’s Banana Pudding. This variation is not only kind to animals but also packed with flavor!
These variations of Mama’s Banana Pudding ensure that everyone can enjoy this delightful dessert, regardless of dietary restrictions. So, whether you choose the gluten-free or vegan route, you can still savor the comforting taste of this classic treat!
FAQs About Mama’s Banana Pudding
As you prepare to make Mama’s Banana Pudding, you may have some questions. This section addresses common queries to help you create the best dessert possible. Let’s dive into these frequently asked questions!
How long does Mama’s Banana Pudding last in the fridge?
Mama’s Banana Pudding can last in the fridge for about 3 to 4 days. To keep it fresh, make sure to cover it tightly with plastic wrap or store it in an airtight container. However, keep in mind that the bananas may brown over time. To slow this process, you can sprinkle a little lemon juice on the banana slices before layering them. This will help maintain the dessert’s appealing look and taste!
Can I use instant pudding for Mama’s Banana Pudding?
Yes, you can use instant pudding for Mama’s Banana Pudding! Instant pudding is a convenient option that saves time. Just follow the package instructions for mixing it with milk. However, keep in mind that the texture may be slightly different from using the traditional pudding mix. Instant pudding tends to be thicker, but it will still create a delicious dessert. Feel free to experiment and see which version you prefer!
What can I substitute for vanilla wafers in Mama’s Banana Pudding?
If you can’t find vanilla wafers or want to try something different, there are several substitutes you can use. Graham crackers are a popular alternative that adds a sweet crunch. You can also use shortbread cookies or even homemade cookies for a personal touch. For a gluten-free option, look for gluten-free cookies that mimic the taste and texture of vanilla wafers. No matter what you choose, the layers will still be delightful!
Can I freeze Mama’s Banana Pudding?
Freezing Mama’s Banana Pudding is not recommended. The texture of the bananas and whipped cream may change when frozen, leading to a less enjoyable dessert. If you have leftovers, it’s best to store them in the fridge instead. However, if you want to prepare it in advance, you can make the pudding and layer it without the bananas and whipped cream. Then, add those fresh ingredients just before serving. This way, you can enjoy the best flavors and textures!
These FAQs should help clarify any uncertainties you may have about making Mama’s Banana Pudding. With these tips, you’re well on your way to creating a delicious dessert that everyone will love!
Print
Mama’s Banana Pudding
- Total Time: 2 hours 20 minutes
- Yield: 8 servings 1x
- Diet: Vegetarian
Description
Mama’s Banana Pudding is a cherished dessert that combines creamy layers of pudding, fresh bananas, and crunchy vanilla wafers, evoking memories of family gatherings and celebrations.
Ingredients
- 4 ripe bananas
- 1 box (3.4 oz) vanilla pudding mix
- 1 can (14 oz) sweetened condensed milk
- 2 cups cold milk
- 1 tub (8 oz) whipped cream
- 1 box (11 oz) vanilla wafers
- Ground cinnamon
Instructions
- In a large mixing bowl, combine the vanilla pudding mix and sweetened condensed milk. Whisk until well blended.
- Gradually add the cold milk while whisking to create a smooth mixture. Let it sit for about 5 minutes to thicken.
- In a large serving dish, layer vanilla wafers, sliced bananas, and the pudding mixture. Repeat the layers until all ingredients are used, finishing with pudding on top.
- Spread whipped cream over the top layer of pudding and sprinkle with ground cinnamon. Cover with plastic wrap and refrigerate for at least 2 hours before serving.
Latest Amazon Finds


Notes
- Choose ripe bananas that are yellow with a few brown spots for the best flavor.
- Store leftovers in an airtight container in the refrigerator for 3 to 4 days.
- To prevent bananas from browning, sprinkle lemon juice over the slices before layering.
- Prep Time: 20 minutes
- Cook Time: 0 minutes
- Category: Dessert
- Method: No-bake
- Cuisine: American
Nutrition
- Serving Size: 1 serving
- Calories: 250
- Sugar: 20g
- Sodium: 150mg
- Fat: 10g
- Saturated Fat: 5g
- Unsaturated Fat: 3g
- Trans Fat: 0g
- Carbohydrates: 35g
- Fiber: 1g
- Protein: 4g
- Cholesterol: 15mg
Keywords: banana pudding, dessert, comfort food, family recipe