


Ah, Italian Christmas cookies! They hold a special place in my heart and my kitchen every holiday season. Growing up, my Nonna would whip up batches of these delightful treats, filling the house with the sweet aroma of vanilla and buttery goodness. It was a tradition that brought our family together, and I can still picture us gathered around the kitchen table, rolling out dough and decorating cookies with colorful sprinkles. Trust me, there’s nothing quite like the joy of sharing these cookies during festive gatherings or simply enjoying them with a cup of hot cocoa by the fire.
These traditional Italian Christmas cookies are not just desserts; they’re a symbol of love and celebration. Each cookie is a little piece of history and family heritage, and I love passing down this recipe to my friends and family. Whether you’re baking for a holiday party, a cozy night in, or as a gift, these cookies are sure to bring smiles and sweet memories. So, let’s get started on making your own batch of Italian Christmas cookies that will fill your home with warmth and joy this holiday season!
Ingredients for Italian Christmas Cookies
Here’s what you’ll need to create these delightful Italian Christmas cookies. I promise, each ingredient plays a special role in making these treats unforgettable!
- 2 cups all-purpose flour (sifted, to keep things light and fluffy)
- 1 cup granulated sugar (this gives a lovely sweetness)
- 1/2 cup unsalted butter, softened (make sure it’s nice and creamy)
- 2 large eggs (room temperature is best for a smooth mix)
- 1 teaspoon vanilla extract (the real stuff, please! It makes all the difference)
- 1 teaspoon baking powder (for that perfect rise)
- 1/4 teaspoon salt (just a pinch to balance out the sweetness)
- 1 cup powdered sugar (for the icing, it adds a sweet touch)
- 2 tablespoons milk (to thin out the icing to the right consistency)
- Sprinkles (for decoration – get creative with colors!)
Having all these ingredients ready will make your baking experience smooth and enjoyable. Trust me, you’ll want to savor every moment of making these cookies!


How to Prepare Italian Christmas Cookies
Now that we’ve got our ingredients lined up, let’s dive into the fun part—preparing these delicious Italian Christmas cookies! I’m telling you, the aroma that fills your kitchen will make the effort so worthwhile. Follow these steps, and you’ll have a batch of cookies that your friends and family will rave about!
Step 1: Preheat Your Oven
First things first, you want to preheat your oven to 350°F (175°C). This step is super important because it ensures your cookies bake evenly and get that lovely golden color. If you forget this step, your cookies might end up unevenly baked, and we don’t want that!
Step 2: Mix Dry Ingredients
In a medium bowl, whisk together the 2 cups of sifted all-purpose flour, 1 teaspoon of baking powder, and 1/4 teaspoon of salt. This is where the magic begins! Make sure there are no lumps in the flour mixture; it should be light and airy. This helps your cookies rise beautifully while baking. Set this bowl aside for a moment while we tackle the wet ingredients.
Step 3: Cream Butter and Sugar
In a large mixing bowl, cream together 1/2 cup of softened unsalted butter and 1 cup of granulated sugar. I like to use an electric mixer for this, but you can also do it by hand if you’re feeling strong! Beat them together until the mixture is pale and fluffy—this usually takes about 2-3 minutes. The fluffiness is key, as it adds air to the batter, resulting in a lighter cookie!
Step 4: Combine Wet and Dry Ingredients
Now, crack in the 2 large eggs one at a time, followed by 1 teaspoon of vanilla extract. Mix until everything is well combined. Next, gradually add your dry ingredients to this lovely buttery mixture. I recommend adding it in thirds to avoid clumps. Just gently fold it in with a spatula or a wooden spoon until you can’t see any more flour. Don’t overmix—just until it’s combined!
Step 5: Shape the Dough
Here comes the fun part! Take a tablespoon of dough and roll it into small balls—about the size of a walnut. Place them on a baking sheet lined with parchment paper, giving them a little space to spread out. I usually leave about 2 inches between each cookie. This way, they don’t get all cozy with each other in the oven!
Step 6: Baking Time
Pop those cookies in your preheated oven and bake for about 10-12 minutes. You’ll know they’re done when the edges are lightly golden but the centers still look a bit soft. Remember, they’ll continue to cook a bit more even after you take them out, so don’t overbake them!
Step 7: Cooling and Icing
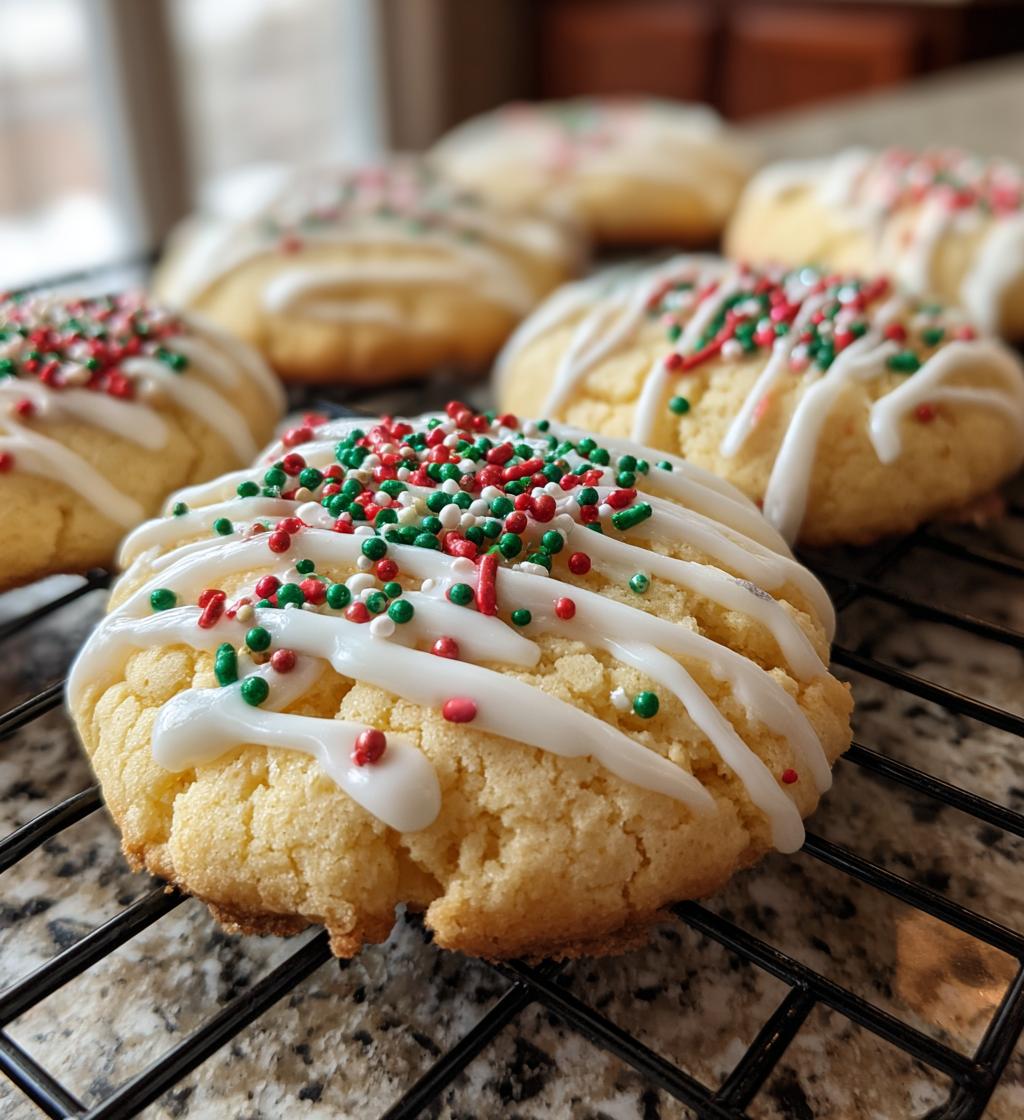
Once baked, let the cookies cool on the baking sheet for about 5 minutes before transferring them to a wire rack to cool completely. While they’re cooling, let’s whip up the icing! In a small bowl, mix together 1 cup of powdered sugar and 2 tablespoons of milk until smooth. Once the cookies are cool, drizzle the icing over them and sprinkle with your favorite decorations. Voilà! You’ve just made a batch of delightful Italian Christmas cookies!
Why You’ll Love This Recipe
- Easy to make – perfect for bakers of all skill levels!
- Deliciously festive – these cookies bring holiday cheer to any gathering.
- Great for gifting – package them up for friends and family!
- Customizable – get creative with icing flavors and sprinkle decorations.
- Perfect for sharing – a delightful treat that everyone will enjoy.
- Make-ahead friendly – bake them in advance and store for later!
Tips for Success with Italian Christmas Cookies
To ensure your Italian Christmas cookies turn out perfectly, here are some tried-and-true tips that I swear by! First off, make sure your ingredients are at room temperature, especially the butter and eggs. This helps everything blend more smoothly and results in a better texture.
When measuring your flour, fluff it up with a spoon before scooping to avoid packing it down. This little trick will keep your cookies light and airy—nobody wants dense cookies, right? Also, don’t skip the sifting step—it really makes a difference in the final product!
Keep an eye on your baking time. Ovens can vary, so it’s a good idea to check on your cookies a minute or two early. They should be lightly golden on the edges but still soft in the middle. If you overbake them, they’ll lose that delicious chewiness!
Lastly, have fun with the decorations! Experiment with different sprinkles or even flavored icing to personalize your cookies. These are all about joy and creativity, so let your personality shine through in every bite!
Variations of Italian Christmas Cookies
If you’re feeling adventurous, there are so many delightful ways to customize these Italian Christmas cookies! Here are some variations that’ll jazz up your holiday baking and let your creativity shine:
- Almond Flavor: Swap out the vanilla extract for almond extract for a nutty twist that brings a whole new dimension of flavor. You can also add finely chopped almonds to the dough for extra crunch!
- Chocolate Chip Delight: Fold in some mini chocolate chips into the dough before baking. The melty chocolate paired with the buttery cookie is simply divine!
- Citrus Zest: Add the zest of one lemon or orange to the dough for a refreshing citrusy kick. It brightens up the flavors and makes each bite feel even more festive!
- Spiced Cookies: Sprinkle in some cinnamon or nutmeg to the dry ingredients for warm, cozy spices that scream holiday cheer. You can even make them ginger-spiced by adding a bit of ground ginger!
- Nutty Variations: Incorporate ground hazelnuts or walnuts into your dough. This adds a lovely nutty flavor and a delightful texture, making each cookie a little more unique.
- Fruity Icing: Instead of the classic icing, try mixing in fruit puree (like raspberry or lemon) into your icing for a burst of fruity flavor and a beautiful color!
- Decorative Shapes: Instead of rolling them into balls, use cookie cutters to create fun shapes! This is especially great if you’re baking with kids—they’ll love decorating their own cookie creations!
The beauty of these Italian Christmas cookies is their versatility. Feel free to mix and match these ideas to create your very own signature version. Happy baking!
Storage & Reheating Instructions
Once you’ve baked your wonderful Italian Christmas cookies, you’ll want to keep them fresh and tasty! Store the cookies in an airtight container at room temperature for up to a week. If you need to keep them longer, you can freeze them. Just layer the cookies between sheets of parchment paper in an airtight container or freezer bag and pop them in the freezer. They’ll stay good for up to two months!
When you’re ready to enjoy them again, simply pull out the desired number of cookies and let them thaw at room temperature. No need to reheat—these cookies are just as delicious served at room temperature! But if you prefer them warm, you can pop them in a preheated oven at 300°F (150°C) for about 5 minutes. Enjoy every last crumb!
Nutritional Information Disclaimer
While I strive to provide accurate nutritional information for my Italian Christmas cookies, please keep in mind that these values can vary based on the specific ingredients and brands you use. Things like different types of butter or sugar can change the final numbers a bit. So, it’s always a good idea to check the labels on your ingredients if you’re keeping an eye on your nutrition!
This information is meant to serve as a general guide, but for the most precise calculations, you might want to use a nutrition calculator based on your exact ingredients. Happy baking and enjoy those cookies without worries!
FAQ about Italian Christmas Cookies
Can I use margarine instead of butter?
While butter gives the best flavor and texture, you can use margarine in a pinch. Just make sure it’s unsalted for the right balance!
How do I know when my cookies are done baking?
Your cookies are ready when the edges are lightly golden and the centers look slightly soft. They’ll firm up as they cool, so don’t worry if they seem a bit underbaked!
Can I make the dough ahead of time?
Absolutely! You can prepare the dough ahead of time, wrap it tightly in plastic wrap, and refrigerate it for up to 2 days. Just let it sit at room temperature for a bit before shaping and baking.
What’s the best way to decorate my cookies?
Get creative! Use colorful sprinkles, drizzles of icing, or even edible glitter for a festive touch. You can also mix in different flavors to your icing for a fun twist!
Can I freeze the cookies after baking?
Yes! Once cooled, store the cookies in an airtight container or freezer bag with parchment paper between layers. They’ll keep well in the freezer for up to two months. Just thaw at room temperature before enjoying!

Italian Christmas Cookies: 7 Sweet Traditions to Cherish
- Total Time: 42 minutes
- Yield: 24 cookies 1x
- Diet: Vegetarian
Description
Traditional Italian cookies for Christmas celebrations.
Ingredients
- 2 cups all-purpose flour
- 1 cup sugar
- 1/2 cup unsalted butter, softened
- 2 large eggs
- 1 teaspoon vanilla extract
- 1 teaspoon baking powder
- 1/4 teaspoon salt
- 1 cup powdered sugar (for icing)
- 2 tablespoons milk (for icing)
- Sprinkles (for decoration)
Instructions
- Preheat your oven to 350°F (175°C).
- In a bowl, mix flour, baking powder, and salt.
- In another bowl, cream together butter and sugar.
- Add eggs and vanilla to the butter mixture and mix well.
- Gradually add the dry ingredients to the wet mixture.
- Shape the dough into small balls and place them on a baking sheet.
- Bake for 10-12 minutes until lightly golden.
- Let cookies cool on a wire rack.
- For icing, mix powdered sugar and milk until smooth.
- Drizzle icing over cookies and add sprinkles.
Notes
- Store cookies in an airtight container.
- These cookies can be made a week in advance.
- Experiment with different sprinkles for decoration.
- Prep Time: 30 minutes
- Cook Time: 12 minutes
- Category: Dessert
- Method: Baking
- Cuisine: Italian
Nutrition
- Serving Size: 1 cookie
- Calories: 150
- Sugar: 10g
- Sodium: 50mg
- Fat: 6g
- Saturated Fat: 4g
- Unsaturated Fat: 2g
- Trans Fat: 0g
- Carbohydrates: 22g
- Fiber: 0g
- Protein: 2g
- Cholesterol: 20mg
Keywords: Italian Christmas cookies, holiday cookies, festive cookies