
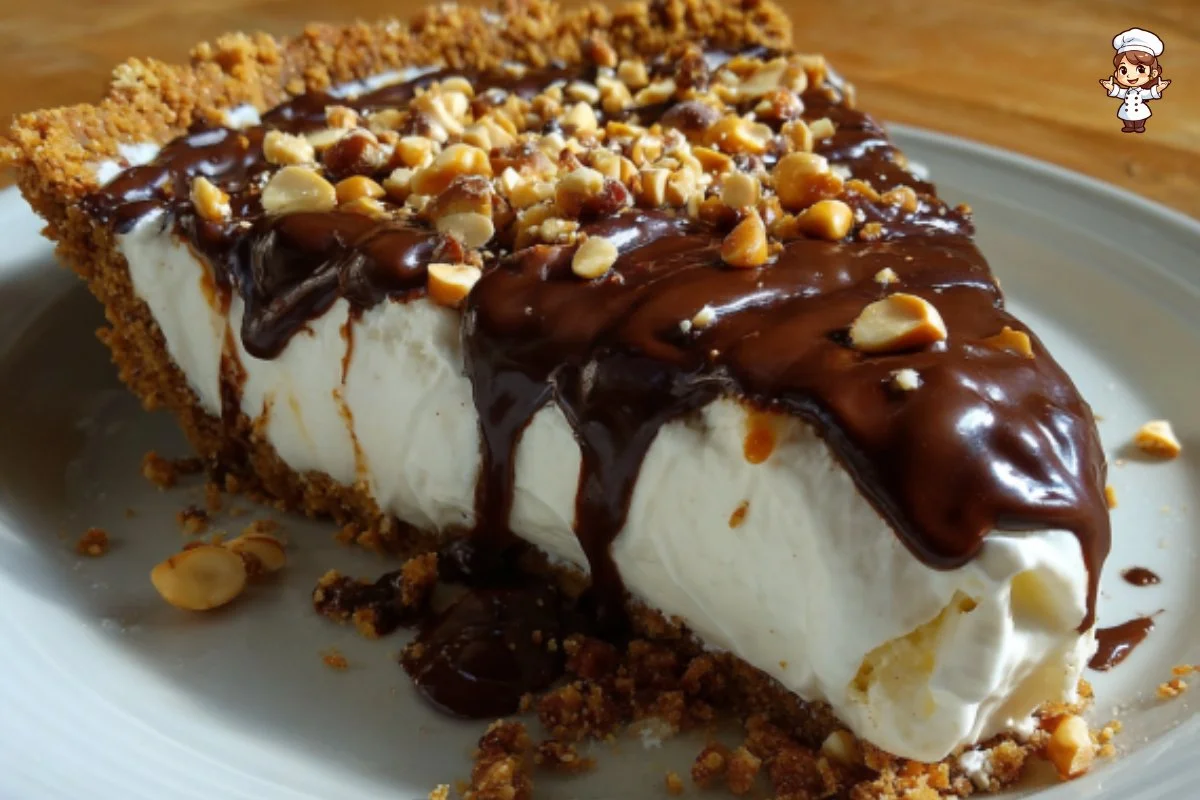
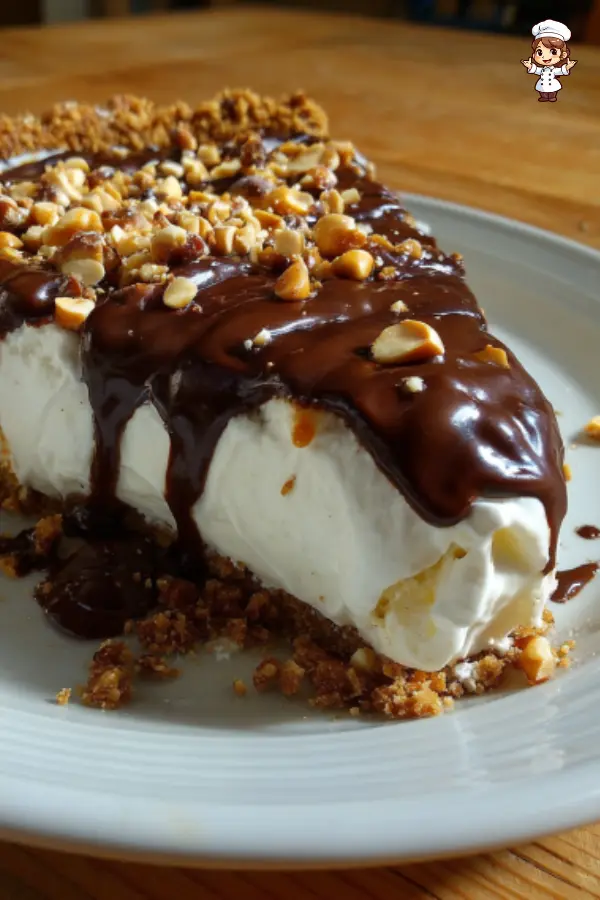
Ice Cream Cone Pie is a delightful and creative dessert that combines the classic flavors of ice cream with the crunchy texture of a cone crust. Imagine biting into a slice of this pie and enjoying the smooth, creamy vanilla ice cream topped with rich chocolate ganache and a sprinkle of peanuts, all resting in a crunchy cone and graham cracker crust. It’s a dessert that’s perfect for summer gatherings, birthday parties, or simply when you want to indulge your sweet tooth. This pie is not just a treat for the taste buds but also a feast for the eyes, making it an ideal centerpiece for any dessert table.
The genius of Ice Cream Cone Pie lies in its simplicity and the nostalgic element of ice cream cones. It’s a great way to bring back childhood memories while enjoying an adult twist. With a serene blend of textures, from the smoothness of the ice cream and ganache to the crunch of the cones, every bite is an adventure. Whether you’re enjoying it on a hot day or as a late-night snack, this pie will quickly become a favorite.
Now, let’s dive into the details of making Ice Cream Cone Pie, which includes everything from ingredients to tips for perfection.
Ingredients about Ice Cream Cone Pie
List of ingredients with measurements
- 6 sugar cones
- 6 graham crackers
- 6 tablespoons melted butter
- 1 tablespoon granulated sugar
- Pinch of salt
- 1 quart vanilla ice cream (softened slightly)
- 7 additional sugar cones (divided)
- 3/4 cup heavy cream
- 3/4 cup semisweet chocolate chips
- 1/4 cup chopped roasted peanuts
Optional ingredient substitutions
If you want to mix things up a bit, you can substitute the vanilla ice cream with your favorite flavor, such as chocolate or cookies and cream. For a dairy-free option, look for a non-dairy ice cream that fits your taste. Instead of heavy cream, coconut cream can work well in creating a similar ganache texture. Feel free to swap chopped roasted peanuts for other nuts like almonds or pecans, or use crushed candies for added fun.
How to Make Ice Cream Cone Pie
Step 1: Make the ganache
Start by preparing the chocolate ganache, which is a rich chocolate sauce that will be drizzled over the ice cream layer. Place the semisweet chocolate chips in a large glass bowl. In a small saucepan, heat the heavy cream over medium heat until you see bubbles forming around the edges. Don’t let it boil. Pour the hot cream over the chocolate chips, then let it sit for about five minutes. This waiting time allows the chocolate to melt gently. After five minutes, whisk the mixture until it is smooth and glossy. Set it aside to cool while you prepare the crust and ice cream.
Step 2: Prepare the crust
Now, it’s time to make the pie crust. In a food processor, pulse together the sugar cones and graham crackers until you have very fine crumbs. This will create a nice texture for the crust. Transfer the crumbs to a large bowl and combine them with the melted butter, granulated sugar, and a pinch of salt. Mix everything until the crumbs are evenly coated with butter. Grease a deep 9-inch pie dish with cooking spray to prevent sticking, then press the crumb mixture firmly into the bottom and up the sides of the dish to form the crust.
Step 3: Layer the ice cream
Take the softened vanilla ice cream and spread it evenly into the prepared crust. Use a spatula to press it down gently, making it nice and smooth. If you feel adventurous, chop up some of the remaining sugar cones and sprinkle them over the ice cream layer for added texture and flavor. Once done, place the pie in the freezer to set for about 30 minutes. This will help the ice cream firm up before adding the ganache.
Step 4: Add the ganache and toppings
After the ice cream has set, it’s time to pour the ganache over the top. Carefully remove the pie from the freezer and drizzle the cooled ganache right over the ice cream layer, spreading it slightly with a spatula if necessary. Next, sprinkle the chopped roasted peanuts over the top for added crunch and nutty flavor, as well as any remaining crushed sugar cones. Put the pie back in the freezer and let it freeze until solid, which usually takes about 4 hours. Once it’s firm, your Ice Cream Cone Pie is ready to be enjoyed!
How to Serve Ice Cream Cone Pie
Best ways to serve Ice Cream Cone Pie
When serving Ice Cream Cone Pie, it’s best to let it sit at room temperature for about 10–15 minutes before slicing. This allows the ice cream to soften slightly, making it easier to cut. For pretty presentation, use a sharp knife, and wipe it clean between slices to keep the cuts neat. Place each slice on a dessert plate, and if you’d like, add a dollop of whipped cream on the side for extra indulgence.
Serving suggestions or pairings
Pair each slice of pie with a drizzle of chocolate or caramel sauce for a more decadent experience. Fresh fruits like strawberries or raspberries also make wonderful companions, adding a hint of tartness to balance out the sweetness of the pie. For those who love a little kick, a sprinkle of sea salt can enhance the flavors even more. You can also serve it alongside a scoop of vanilla or chocolate ice cream for double the treat!
How to Store Ice Cream Cone Pie
Proper storage methods
To properly store Ice Cream Cone Pie, cover it tightly with plastic wrap or aluminum foil once it has frozen solid. This will help prevent freezer burn and keep the pie fresh. If you have leftovers, make sure to store them immediately after serving to maintain the pie’s texture and flavor.
Tips for reheating or freezing
If you want to save a piece for later, you can refreeze it without losing its quality. Just ensure it’s wrapped well. Remember that when it’s time to enjoy that slice again, you should let it thaw slightly for about 10 minutes at room temperature for better slicing. Note: Do not attempt to reheat this pie in the oven or microwave as that will spoil the texture of the ice cream and the ganache.
Tips to Make Ice Cream Cone Pie
Common mistakes to avoid
One common mistake people make is not letting the ice cream soften slightly before spreading it in the crust. This can lead to a lumpy ice cream layer and makes it difficult to achieve a smooth finish. Additionally, be careful not to let the heavy cream boil when making the ganache; heating it just to a simmer allows the chocolate to melt evenly without burning.
Helpful tips for better results
To ensure your pie is a hit, try using high-quality chocolate chips for the ganache. They will melt smoothly and give a richer flavor. If the crust feels too soft after pressing, you can bake it for about 5–7 minutes at 350°F (175°C) to help it set before adding the ice cream. For added depth of flavor, consider mixing some crushed cookies into the crust or even layering different flavors of ice cream if you want to get creative with the recipe.
Variation of Ice Cream Cone Pie
Suggested variations or twists on the recipe
Feel free to play with the flavors of your Ice Cream Cone Pie. For a minty twist, use mint chocolate chip ice cream and add crushed Andes mints on top of the ganache. If you’re a fan of caramel, swirl some caramel sauce into the ice cream before freezing and sprinkle crushed cookie bits on top instead of peanuts. You can also experiment with different nuts, like cashews or walnuts, or even mix in crushed candy bars for a fun treat.
Adjustments for dietary preferences
If you’re preparing this dessert for those with dietary restrictions, consider using gluten-free sugar cones and graham crackers. There are also plenty of non-dairy ice creams available on the market to cater to those who are lactose intolerant or vegan. Ensure that any chocolates used are dairy-free if needed. You can even seek out alternative sweeteners if you’re looking to cut down on sugar.
FAQs
What can I do if the dish isn’t turning out right?
If your Ice Cream Cone Pie isn’t setting properly, it might be due to using ice cream that was too soft or warm during assembly. Ensure your ingredients are at the right temperature and that the pie has had enough time in the freezer to firm up completely. If the ganache separates or doesn’t blend well, whisk it again over low heat while gently stirring until the chocolate is smooth.
Can I make this ahead of time?
Absolutely! Ice Cream Cone Pie is a great make-ahead dessert. You can assemble it a day or two in advance and keep it frozen until you are ready to serve. This makes it a convenient option for parties and get-togethers.
What can I substitute for ingredients?
If you don’t have graham crackers, you can use crushed cookies like Oreos or digestive biscuits for a different flavor. For the sugar cones, waffle cones can also make a great alternative. If you’re avoiding sugar, consider using sugar-free ice cream and sweeteners for the crust.
In conclusion, Ice Cream Cone Pie is a fun and delicious dessert that combines the best elements of ice cream and pie. With its simple ingredients, straightforward steps, and endless possibilities for variations, this recipe is bound to delight everyone who tries it. Whether you serve it at a gathering or simply enjoy it on a quiet evening, each bite is sure to bring joy!
Print
Ice Cream Cone Pie
- Total Time: 4 hours 30 minutes (including freezing)
- Yield: 8 servings 1x
- Diet: Vegetarian
Description
Ice Cream Cone Pie is a delightful dessert combining creamy vanilla ice cream, rich chocolate ganache, and crunchy sugar cone and graham cracker crust. Perfect for summer or any special occasion, this pie offers nostalgic flavors with a delicious adult twist.
Ingredients
- 6 sugar cones
- 6 graham crackers
- 6 tablespoons melted butter
- 1 tablespoon granulated sugar
- Pinch of salt
- 1 quart vanilla ice cream (softened slightly)
- 7 additional sugar cones (divided)
- 3/4 cup heavy cream
- 3/4 cup semisweet chocolate chips
- 1/4 cup chopped roasted peanuts
Instructions
- Make the ganache: Heat heavy cream until bubbles form around edges (do not boil), pour over chocolate chips in a bowl, let sit 5 minutes, then whisk until smooth and glossy. Set aside to cool.
- Prepare crust: Pulse sugar cones and graham crackers in food processor until fine crumbs. Combine crumbs with melted butter, sugar, and salt. Press mixture firmly into bottom and sides of a greased 9-inch pie dish.
- Layer ice cream: Spread softened vanilla ice cream evenly in crust, press gently smooth. Optionally, chop some sugar cones and sprinkle over ice cream. Freeze for 30 minutes.
- Add ganache and toppings: Remove pie from freezer, drizzle cooled ganache over ice cream, spread slightly if needed. Sprinkle chopped roasted peanuts and remaining crushed sugar cones on top. Freeze until solid, about 4 hours.
- Before serving, let pie sit at room temperature 10–15 minutes for easier slicing. Use a sharp knife, wiping clean between slices for neat cuts.
Latest Amazon Finds


Notes
- Do not boil heavy cream when making ganache; just simmer to melt chocolate evenly.
- Let ice cream soften slightly before spreading to avoid lumps.
- If crust feels too soft, bake at 350°F (175°C) for 5–7 minutes before adding ice cream.
- Use high-quality chocolate chips for smoother ganache and richer flavor.
- Wrap pie tightly to prevent freezer burn when storing.
- Prep Time: 25 minutes
- Cook Time: 5-7 minutes (optional crust baking)
- Category: Dessert
- Method: No-bake, chilling, mixing
- Cuisine: American
Nutrition
- Serving Size: 1 slice (1/8 pie)
- Calories: Approximately 320
- Sugar: 28g
- Sodium: 150mg
- Fat: 15g
- Saturated Fat: 9g
- Unsaturated Fat: 4g
- Trans Fat: 0g
- Carbohydrates: 35g
- Fiber: 2g
- Protein: 4g
- Cholesterol: 40mg
Keywords: Ice cream cone pie, no-bake dessert, chocolate ganache pie, summer dessert, ice cream pie