

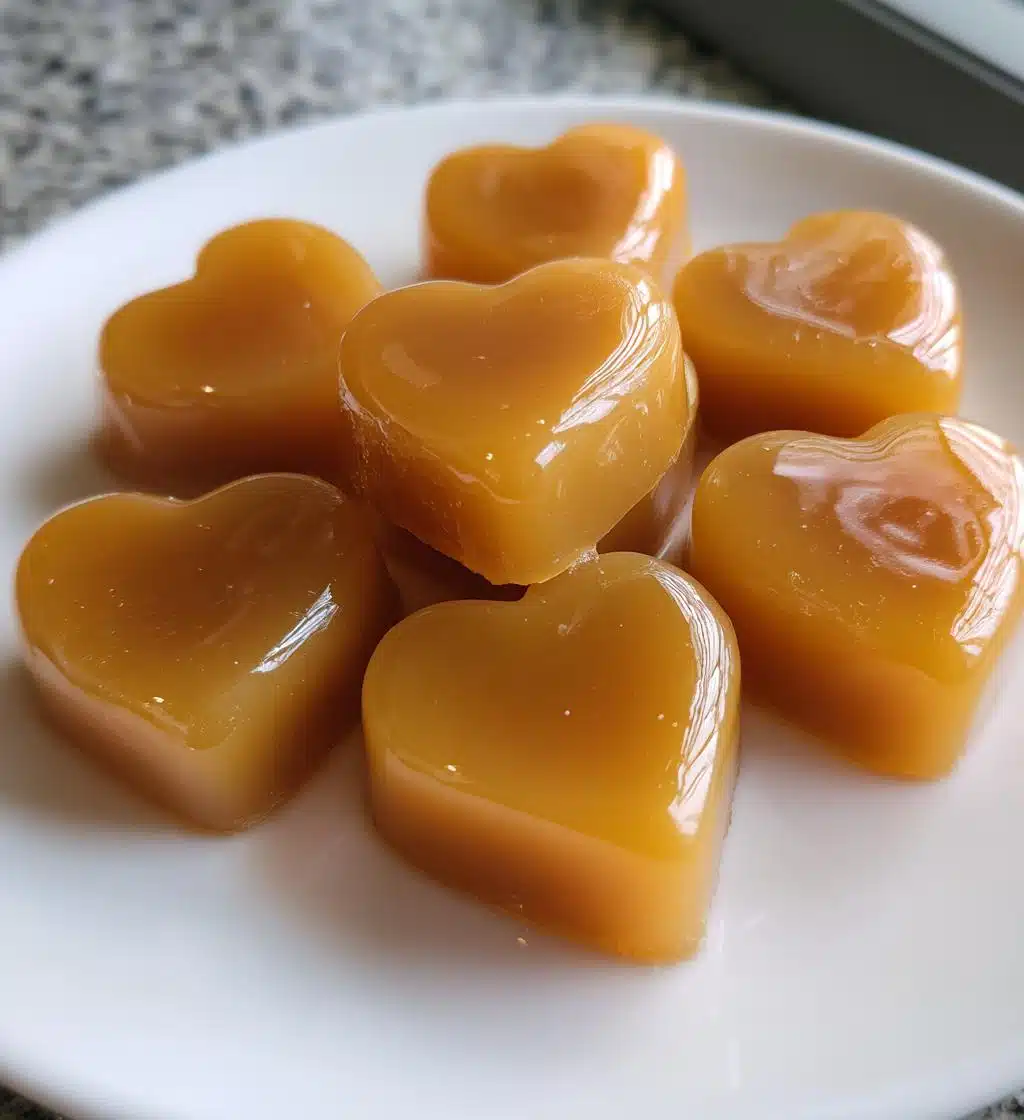
Oh my goodness, let me tell you about maple syrup candies! These little bites of heaven are not just any sweet treat; they’re made from pure maple syrup, which gives them that rich, deep flavor that’s simply irresistible. I remember the first time I tried making them; I was amazed at how easy it was! With just a few simple ingredients and a little patience, you can create your very own homemade candy that tastes like a dream. The way they melt in your mouth is just pure magic! Plus, they’re fun to customize. You can use a variety of molds to create shapes that are perfect for any occasion—think hearts for Valentine’s Day or leaves for fall! Trust me, once you start making these maple syrup candies, you’ll be hooked. They’re perfect for sharing (or keeping all to yourself, no judgment here!).
Ingredients for Maple Syrup Candies
To make the most delicious maple syrup candies, you only need three simple ingredients. But don’t let the simplicity fool you—using high-quality ingredients is key to achieving that rich, authentic flavor. Here’s what you’ll need:
- 2 cups pure maple syrup: Make sure it’s the real deal! The flavor of pure maple syrup is what makes these candies so special, so steer clear of imitation syrups.
- 1/4 cup unsalted butter: This adds a lovely creaminess and helps with that melt-in-your-mouth texture. Unsalted is best so you can control the sweetness perfectly.
- 1/2 teaspoon vanilla extract: This is optional, but I love adding a splash of vanilla for an extra depth of flavor. It complements the maple beautifully!
Gather these ingredients, and you’ll be well on your way to whipping up a batch of delightful candies that will have everyone asking for seconds!
How to Prepare Maple Syrup Candies
Making maple syrup candies is surprisingly straightforward, and I promise you’ll be amazed at how quickly they come together! Just follow these simple steps, and you’ll be well on your way to candy heaven.
Step-by-Step Instructions
- Start by grabbing a medium saucepan and combining 2 cups of pure maple syrup and 1/4 cup of unsalted butter. Stir them together gently to mix.
- Next, place the saucepan over medium heat and bring the mixture to a boil. Keep a close eye on it because we want to avoid any splatters—trust me, it can get messy!
- Once it’s boiling, you’ll want to let it bubble away until it reaches 240°F (115°C) on a candy thermometer. This step is super important because the temperature determines the texture of your candies. It’ll take about 10-15 minutes, so be patient and keep stirring occasionally.
- As soon as it hits that magical temperature, remove the saucepan from the heat and stir in 1/2 teaspoon of vanilla extract. This is where the magic really begins as the aroma fills your kitchen!
- Let the mixture cool for a couple of minutes—just until it’s safe to handle—then pour it into your candy molds. You can use any shape you fancy, so have fun with it!
- Finally, let the candies set at room temperature until they’re firm. This usually takes about 1-2 hours, but I find it hard to resist checking on them more frequently!
And that’s it! You’ve just made your very own maple syrup candies. I can’t wait for you to taste them—they’re absolutely delightful!
Why You’ll Love This Recipe
Oh, let me tell you why making these maple syrup candies is an absolute must! They’re not just delicious; they’re also a joy to whip up in your kitchen. Here are a few reasons why you’ll adore this recipe:
- Super easy to make: With just three ingredients and a few simple steps, you’ll feel like a candy-making pro in no time!
- Incredible flavor: The rich taste of pure maple syrup shines through, making each bite a sweet, melt-in-your-mouth experience.
- Customizable shapes: Use different molds to create fun shapes for any occasion—perfect for gifts or celebrations!
- Perfect for sharing: These candies make great treats for friends and family, but honestly, you might want to keep them all to yourself!
- Versatile enjoyment: They’re wonderful on their own, but you can also use them as toppings for ice cream or desserts to add that extra maple touch.
Seriously, once you try making these, you’ll wonder why you didn’t do it sooner! They’re a delightful treat that’s sure to impress everyone around you.
Tips for Success
Now that you’re all set to make your maple syrup candies, here are some pro tips to ensure your candy-making adventure is a total success!
- Check your thermometer: A precise candy thermometer is a must! If it’s off, your candies might end up too soft or too hard. Take a moment to calibrate it before you start.
- Stir gently: When combining the ingredients, stir gently to avoid bubbles. Once it’s boiling, resist the urge to stir too much—let it bubble away and do its thing!
- Choose the right molds: Silicone molds are fantastic for this recipe because they make it easy to pop the candies out once they’re set. But don’t be afraid to get creative! You can use candy molds in fun shapes or even ice cube trays for a different look.
- Let it cool: Allow the mixture to cool slightly before pouring it into the molds. If it’s too hot, it could warp your molds or create uneven shapes.
- Be patient: Let the candies set completely at room temperature! Rushing this process can lead to gooey candies that don’t hold their shape. It’s worth the wait!
- Troubleshoot texture: If your candies end up too hard, they may have been cooked too long. If they’re too soft, they probably didn’t reach the right temperature. Keep practicing, and you’ll find that perfect balance!
With these tips in your back pocket, you’re all set to create the most delightful maple syrup candies. Enjoy the process, and happy candy making!
Storage & Reheating Instructions
Once you’ve made your delicious maple syrup candies, you’ll want to make sure they stay fresh and tasty! Here’s how to store them properly:
- Store in an airtight container: Keep your candies in an airtight container at room temperature. This helps maintain their texture and flavor. They should stay good for up to two weeks, but trust me, they won’t last that long!
- Avoid moisture: Be sure to keep them away from humidity and moisture, as this can make them sticky or affect their consistency. If you live in a particularly humid area, it might be best to keep them in the fridge.
- Freezing for longer storage: If you want to keep them longer, you can freeze them! Just place the candies in a single layer on a baking sheet to freeze them individually, then transfer them to a freezer-safe bag or container. They’ll keep for about three months. When you’re ready to enjoy, simply let them thaw at room temperature.
Now, if you find yourself needing to reheat them—maybe to soften them up a bit—here’s my go-to method:
- Microwave gently: Pop them in the microwave for just a few seconds at a time, checking frequently. You don’t want to melt them completely, just soften them enough to enjoy!
- Warm water bath: Alternatively, you can place them in a bowl and set that bowl in a larger bowl of warm water for a gentle heat. This method is great for keeping their shape intact while warming them up.
With these storage and reheating tips, your maple syrup candies will be ready to enjoy whenever the craving strikes! Happy snacking!
Nutritional Information
Let’s talk about the numbers behind these delightful maple syrup candies! Each candy is a sweet little treat, and while they’re definitely indulgent, they’re also a fun way to enjoy pure maple flavor. Here’s the estimated nutritional breakdown per serving (that’s one candy):
- Calories: 50
- Fat: 2g
- Saturated Fat: 1g
- Unsaturated Fat: 1g
- Trans Fat: 0g
- Sodium: 0mg
- Sugar: 10g
- Carbohydrates: 12g
- Fiber: 0g
- Protein: 0g
- Cholesterol: 5mg
Keep in mind that these values are estimates and can vary based on the exact ingredients you use. But hey, a little treat now and then is all part of the fun, right? Enjoy your candies without guilt—they’re a sweet way to celebrate the goodness of maple syrup!
FAQ Section
Got questions about making these scrumptious maple syrup candies? Don’t worry, I’ve got you covered! Here are some of the most common questions I hear, along with my answers:
Can I use different types of syrup?
While pure maple syrup is definitely the star of the show for these candies, you can experiment with other syrups like agave or honey. Just keep in mind that the flavor and texture will vary, so it might not be quite the same maple experience!
What if I don’t have a candy thermometer?
No problem! If you don’t have a candy thermometer, you can perform the cold water test. Drop a small amount of the boiling mixture into a glass of cold water. If it forms a soft ball that holds its shape when you pinch it, you’re good to go!
Can I add flavors or mix-ins?
Absolutely! You can get creative by adding a pinch of sea salt for a salted caramel vibe or even some chopped nuts for a delightful crunch. Just make sure the additions don’t interfere with the setting process.
How can I use these candies in desserts?
These candies are perfect for adding a touch of maple magic to your desserts! Crumble them over ice cream, mix them into cookie dough, or use them as a fun topping for cupcakes. The possibilities are endless!
Can I make these vegan?
To make a vegan version, you can substitute the unsalted butter with coconut oil or a vegan butter alternative. Just make sure your maple syrup is sourced ethically, and you’re all set!
How long do these candies last?
If stored properly in an airtight container, your maple syrup candies should last up to two weeks at room temperature. But honestly, they’re so delicious, they probably won’t last that long!
I hope this FAQ section helps answer your burning questions! If you have more, feel free to reach out. Happy candy making!
Print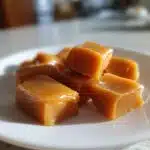
Homemade Maple Syrup Candies: 5 Sweet Comforts to Enjoy
- Total Time: 25 minutes
- Yield: 20 candies 1x
- Diet: Vegetarian
Description
Maple syrup candies are sweet treats made from pure maple syrup.
Ingredients
- 2 cups pure maple syrup
- 1/4 cup unsalted butter
- 1/2 teaspoon vanilla extract
Instructions
- In a saucepan, combine maple syrup and butter.
- Heat over medium heat until boiling.
- Continue boiling until the mixture reaches 240°F on a candy thermometer.
- Remove from heat and stir in vanilla extract.
- Let cool slightly, then pour into candy molds.
- Allow to set at room temperature until firm.
Notes
- Use pure maple syrup for best flavor.
- Store candies in an airtight container.
- Experiment with different molds for fun shapes.
- Prep Time: 10 minutes
- Cook Time: 15 minutes
- Category: Dessert
- Method: Stovetop
- Cuisine: American
Nutrition
- Serving Size: 1 candy
- Calories: 50
- Sugar: 10g
- Sodium: 0mg
- Fat: 2g
- Saturated Fat: 1g
- Unsaturated Fat: 1g
- Trans Fat: 0g
- Carbohydrates: 12g
- Fiber: 0g
- Protein: 0g
- Cholesterol: 5mg
Keywords: maple syrup candies, sweet treats, homemade candy