Welcome to the delightful world of baking! Today, we’re diving into a special treat that captures the essence of autumn and Halloween: the Haunted Forest Pine Nut Cookies. These cookies are not just any ordinary dessert; they bring a unique twist to your traditional cookie recipes. With their rich flavors and enchanting appearance, they are perfect for fall gatherings or spooky celebrations.
What Makes the Haunted Forest Pine Nut Cookies Unique?
What sets the Haunted Forest Pine Nut Cookies apart from other cookies? First, it’s the combination of sweet and nutty flavors. The pine nuts add a delightful crunch and a hint of earthiness that pairs beautifully with the sweetness of the sugars. This unique flavor profile makes each bite a little adventure!
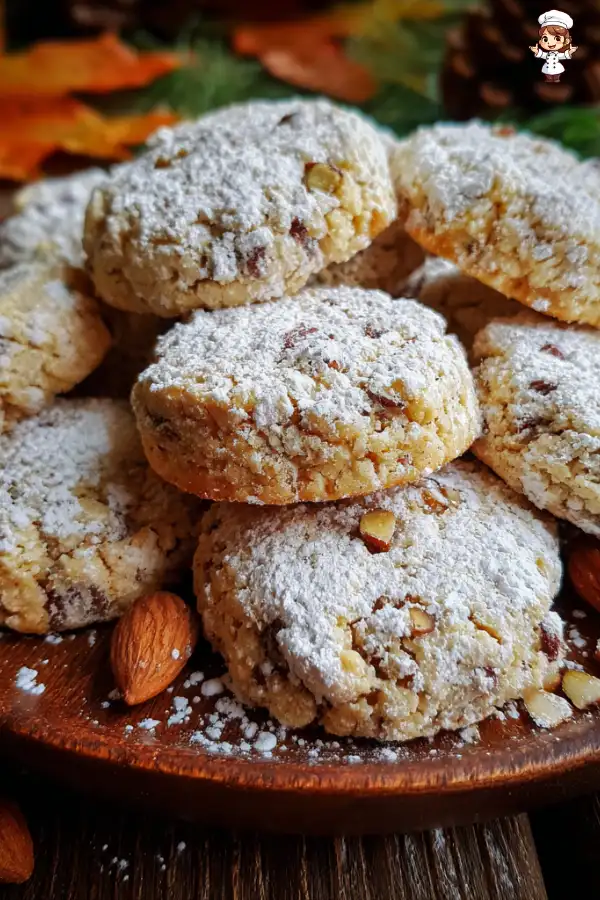
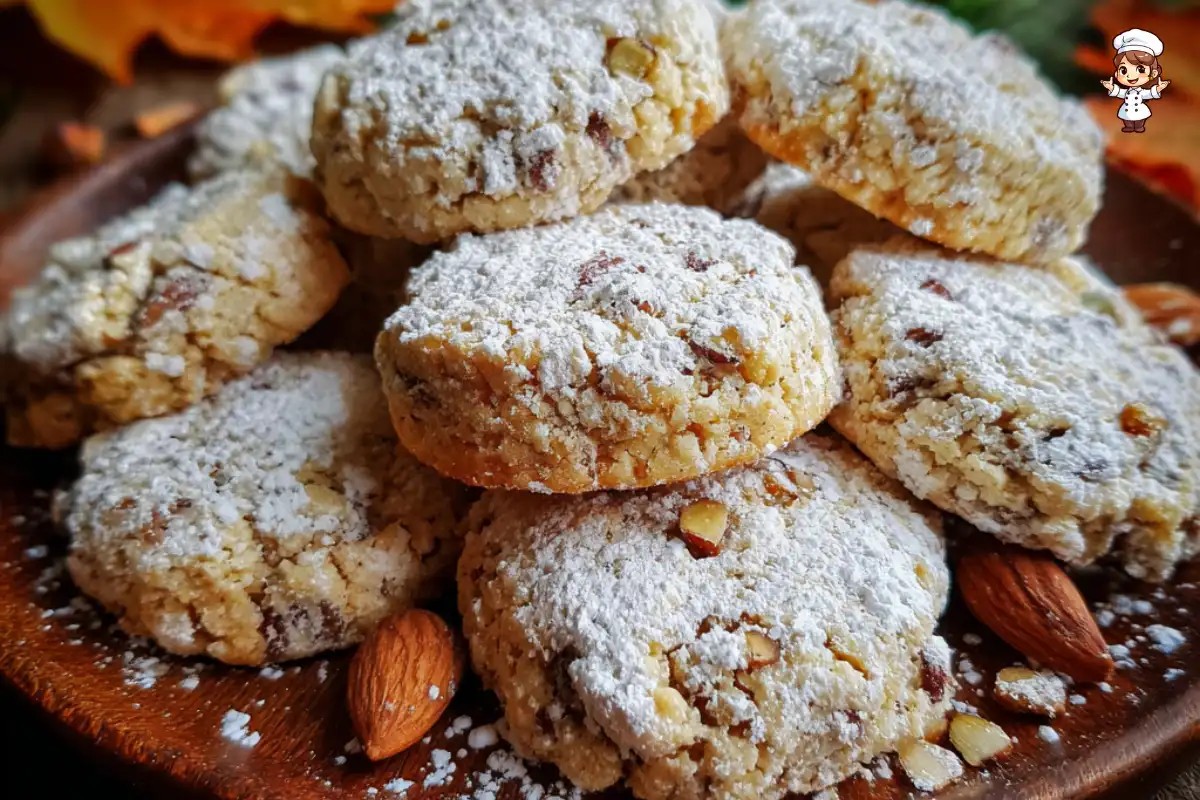
Moreover, the presentation of these cookies is simply magical. A light dusting of powdered sugar gives them a ghostly appearance, making them a perfect fit for Halloween-themed parties. Imagine serving these cookies on a dark wooden platter, surrounded by pine needles and autumn leaves. It creates an inviting atmosphere that will impress your guests.
Additionally, the recipe is easy to follow, making it accessible for bakers of all skill levels. Whether you’re a seasoned baker or just starting, you’ll find joy in creating these cookies. Plus, the aroma that fills your kitchen while they bake is sure to bring smiles to everyone around.
So, gather your ingredients and get ready to embark on a baking adventure with the Haunted Forest Pine Nut Cookies Recipe. Let’s make some delicious memories!
Ingredients for Haunted Forest Pine Nut Cookies Recipe
Before you start baking, it’s essential to gather all the necessary ingredients for your Haunted Forest Pine Nut Cookies. Each ingredient plays a vital role in creating the perfect cookie, so let’s take a closer look at what you’ll need:
- 1 cup unsalted butter, softened (approximately 227 grams) – This is the base of your cookie dough, providing richness and flavor.
- 1 cup granulated sugar (approximately 200 grams) – This adds sweetness and helps create a lovely texture.
- 1 cup brown sugar, packed (approximately 220 grams) – Brown sugar brings moisture and a hint of caramel flavor.
- 2 large eggs – Eggs bind the ingredients together and contribute to the cookie’s structure.
- 1 teaspoon vanilla extract – This adds a warm, sweet aroma that enhances the overall flavor.
- 3 cups all-purpose flour (approximately 360 grams) – Flour is the main dry ingredient that gives the cookies their shape.
- 1 teaspoon baking soda – This leavening agent helps the cookies rise and become fluffy.
- 1/2 teaspoon salt – A pinch of salt balances the sweetness and enhances the flavors.
- 1 cup pine nuts (approximately 140 grams) – These nuts add a delightful crunch and a unique flavor to the cookies.
- Powdered sugar – For dusting, this gives the cookies a beautiful, ghostly finish.
With these ingredients on hand, you’re all set to create your Haunted Forest Pine Nut Cookies. Each component contributes to the deliciousness and charm of this recipe. Now, let’s move on to the next step and prepare the dough!
Step-by-Step Preparation of Haunted Forest Pine Nut Cookies Recipe

Step 1: Gather Your Ingredients
Before you start baking, it’s important to have everything ready. Gather all your ingredients in one place. This makes the process smoother and more enjoyable. Make sure you have your butter softened, sugars measured, and pine nuts at hand. Having everything organized will help you focus on creating delicious cookies!
Step 2: Prepare the Dough for Haunted Forest Pine Nut Cookies
Now, let’s get to the fun part! In a large mixing bowl, use an electric mixer to cream together the softened butter, granulated sugar, and brown sugar. Beat them until the mixture is light and fluffy, which should take about 2-3 minutes. This step is crucial as it incorporates air into the dough, making your cookies soft and chewy.
Next, add the eggs one at a time, mixing well after each addition. This ensures that the eggs are fully incorporated. Then, stir in the vanilla extract. The sweet aroma will fill your kitchen, making it feel cozy and inviting.
In a separate bowl, whisk together the all-purpose flour, baking soda, and salt. Gradually add this dry mixture to the wet ingredients. Mix just until combined; be careful not to overmix. Overmixing can lead to tough cookies, and we want them to be soft and delightful!
Step 3: Shape the Cookies
Once your dough is ready, it’s time to shape the cookies. Using a cookie scoop or a tablespoon, drop rounded balls of dough onto the prepared baking sheets. Make sure to space them about 2 inches apart. This allows room for the cookies to spread while baking. The anticipation of seeing them grow is part of the fun!
Step 4: Bake the Haunted Forest Pine Nut Cookies
Now, it’s time to bake! Place the baking sheets in your preheated oven and bake for 10-12 minutes. Keep an eye on them; you want the edges to be golden brown while the centers remain soft. This contrast in texture is what makes these cookies so special. The smell of baking cookies will surely make your mouth water!
Step 5: Cool and Serve
After baking, remove the cookies from the oven and let them cool on the baking sheets for about 5 minutes. This allows them to set before transferring them to a wire rack. Once they are completely cool, lightly dust them with powdered sugar. This gives them that ghostly appearance, perfect for Halloween!
Finally, arrange your Haunted Forest Pine Nut Cookies on a dark wooden platter. For an enchanting touch, scatter some pine needles and autumn leaves around them. Your cookies are now ready to be enjoyed at any fall gathering or spooky celebration!
Tips for Perfect Haunted Forest Pine Nut Cookies Recipe
Common Mistakes to Avoid
When baking your Haunted Forest Pine Nut Cookies, it’s easy to make a few common mistakes. Here are some tips to help you avoid them:
- Overmixing the Dough: Mixing too much can lead to tough cookies. Mix just until the ingredients are combined.
- Incorrect Oven Temperature: Always preheat your oven. An oven that’s too hot can burn the edges, while one that’s too cool can lead to flat cookies.
- Not Measuring Ingredients Accurately: Use a kitchen scale for precise measurements. This ensures your cookies turn out perfectly every time.
- Skipping the Cooling Time: Allowing cookies to cool on the baking sheet helps them set properly. Don’t rush this step!
- Using Cold Butter: Make sure your butter is softened. Cold butter won’t cream well with the sugars, affecting the texture.
By keeping these tips in mind, you’ll be on your way to baking the perfect Haunted Forest Pine Nut Cookies that everyone will love!
Storage Tips for Haunted Forest Pine Nut Cookies
To keep your Haunted Forest Pine Nut Cookies fresh and delicious, follow these storage tips:
- Airtight Container: Store cookies in an airtight container at room temperature. This keeps them soft and prevents them from drying out.
- Layering with Parchment Paper: If stacking cookies, place parchment paper between layers. This prevents them from sticking together.
- Freezing for Later: You can freeze unbaked cookie dough. Scoop the dough onto a baking sheet, freeze until solid, then transfer to a freezer bag. Bake from frozen, adding a couple of extra minutes to the baking time.
- Consume Within a Week: For the best taste, enjoy your cookies within a week. They’re best when fresh!
With these storage tips, your Haunted Forest Pine Nut Cookies will stay delightful and ready to impress at any gathering!
Variation of Haunted Forest Pine Nut Cookies Recipe
Alternative Ingredients for Haunted Forest Pine Nut Cookies
If you want to switch things up a bit, there are several alternative ingredients you can use in your Haunted Forest Pine Nut Cookies. These substitutions can cater to dietary preferences or simply add a new twist to the classic recipe. Here are some ideas:
- Nut Alternatives: If pine nuts aren’t your favorite, try using chopped walnuts or pecans. They will still provide a nice crunch and flavor.
- Gluten-Free Flour: For a gluten-free version, substitute all-purpose flour with a gluten-free flour blend. Make sure it contains xanthan gum for the best texture.
- Maple Syrup: Replace some of the granulated sugar with maple syrup for a unique flavor. Just reduce the amount of butter slightly to balance the moisture.
- Dark Chocolate Chips: Add dark chocolate chips for a rich, sweet contrast to the nutty flavor. This will make your cookies even more indulgent!
- Coconut Flakes: For a tropical twist, mix in some unsweetened coconut flakes. This adds a chewy texture and a hint of sweetness.
These alternative ingredients can help you create a version of Haunted Forest Pine Nut Cookies that suits your taste or dietary needs. Feel free to experiment and find your favorite combination!
Creative Twists on the Haunted Forest Pine Nut Cookies Recipe
Looking to add a little creativity to your Haunted Forest Pine Nut Cookies? Here are some fun twists that can elevate your baking experience:
- Spiced Cookies: Add a teaspoon of cinnamon or nutmeg to the dry ingredients for a warm, spiced flavor that complements the autumn theme.
- Stuffed Cookies: Create stuffed cookies by placing a small piece of caramel or chocolate in the center of each dough ball before baking. This will create a gooey surprise!
- Decorative Icing: After dusting with powdered sugar, use royal icing to create spooky designs on top of the cookies. This adds a festive touch for Halloween.
- Cookie Sandwiches: Make cookie sandwiches by spreading a layer of cream cheese frosting or chocolate ganache between two cookies. This adds richness and makes them extra special.
- Mini Cookies: For bite-sized treats, scoop smaller amounts of dough and bake mini cookies. They’re perfect for sharing at parties!
These creative twists will not only make your Haunted Forest Pine Nut Cookies unique but also impress your friends and family. Enjoy experimenting with flavors and presentations!
FAQs about Haunted Forest Pine Nut Cookies Recipe
Can I use other nuts in the Haunted Forest Pine Nut Cookies Recipe?
Absolutely! While pine nuts give these cookies a unique flavor, you can easily substitute them with other nuts. Chopped walnuts, pecans, or even almonds can work wonderfully. Each nut brings its own taste and texture, so feel free to experiment. Just make sure to chop larger nuts into smaller pieces for even distribution in the dough.
How do I make the Haunted Forest Pine Nut Cookies gluten-free?
Making your Haunted Forest Pine Nut Cookies gluten-free is simple! Just replace the all-purpose flour with a gluten-free flour blend. Look for a blend that contains xanthan gum, as it helps mimic the texture of regular flour. This way, you can enjoy the same delicious cookies without gluten. Always check the labels to ensure all other ingredients are gluten-free as well.
What is the best way to store Haunted Forest Pine Nut Cookies?
To keep your Haunted Forest Pine Nut Cookies fresh, store them in an airtight container at room temperature. This helps maintain their softness and flavor. If you want to keep them for longer, consider freezing them. Just make sure to layer them with parchment paper to prevent sticking. When you’re ready to enjoy them, simply thaw at room temperature or warm them in the oven for a few minutes.
How long do Haunted Forest Pine Nut Cookies last?
Your Haunted Forest Pine Nut Cookies will stay fresh for about a week when stored properly in an airtight container. If you freeze them, they can last for up to three months. Just remember to label your container with the date, so you know when to enjoy them at their best!
Print
Haunted Forest Pine Nut Cookies
- Total Time: 32 minutes
- Yield: 24 cookies 1x
- Diet: Vegetarian
Description
Haunted Forest Pine Nut Cookies are a delightful treat that captures the essence of autumn and Halloween with their unique combination of sweet and nutty flavors, perfect for fall gatherings or spooky celebrations.
Ingredients
- 1 cup unsalted butter, softened (approximately 227 grams)
- 1 cup granulated sugar (approximately 200 grams)
- 1 cup brown sugar, packed (approximately 220 grams)
- 2 large eggs
- 1 teaspoon vanilla extract
- 3 cups all-purpose flour (approximately 360 grams)
- 1 teaspoon baking soda
- 1/2 teaspoon salt
- 1 cup pine nuts (approximately 140 grams)
- Powdered sugar (for dusting)
Instructions
- Gather all your ingredients in one place.
- In a large mixing bowl, cream together the softened butter, granulated sugar, and brown sugar until light and fluffy.
- Add the eggs one at a time, mixing well after each addition, then stir in the vanilla extract.
- In a separate bowl, whisk together the all-purpose flour, baking soda, and salt. Gradually add this dry mixture to the wet ingredients, mixing just until combined.
- Using a cookie scoop or tablespoon, drop rounded balls of dough onto prepared baking sheets, spacing them about 2 inches apart.
- Bake in a preheated oven for 10-12 minutes until the edges are golden brown and the centers remain soft.
- Remove from the oven and let cool on the baking sheets for about 5 minutes before transferring to a wire rack.
- Lightly dust with powdered sugar and serve on a dark wooden platter with pine needles and autumn leaves.
Latest Amazon Finds
Notes
- Airtight container for storage keeps cookies soft.
- Layer cookies with parchment paper if stacking.
- Unbaked dough can be frozen for later use.
- Best consumed within a week for optimal taste.
- Prep Time: 20 minutes
- Cook Time: 12 minutes
- Category: Dessert
- Method: Baking
- Cuisine: American
Nutrition
- Serving Size: 1 cookie
- Calories: 150
- Sugar: 10g
- Sodium: 100mg
- Fat: 7g
- Saturated Fat: 4g
- Unsaturated Fat: 2g
- Trans Fat: 0g
- Carbohydrates: 20g
- Fiber: 1g
- Protein: 2g
- Cholesterol: 30mg
Keywords: Haunted Forest Pine Nut Cookies, Halloween cookies, fall baking, spooky treats


