

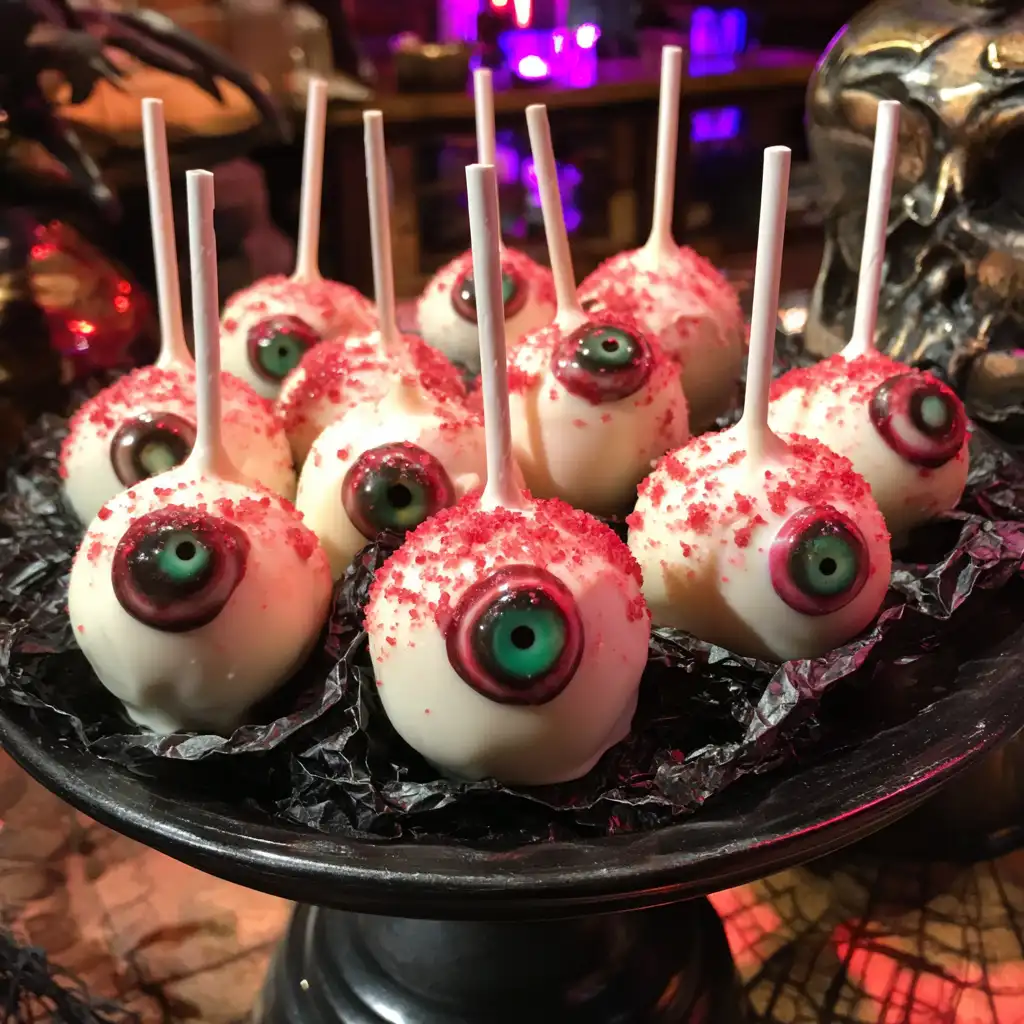
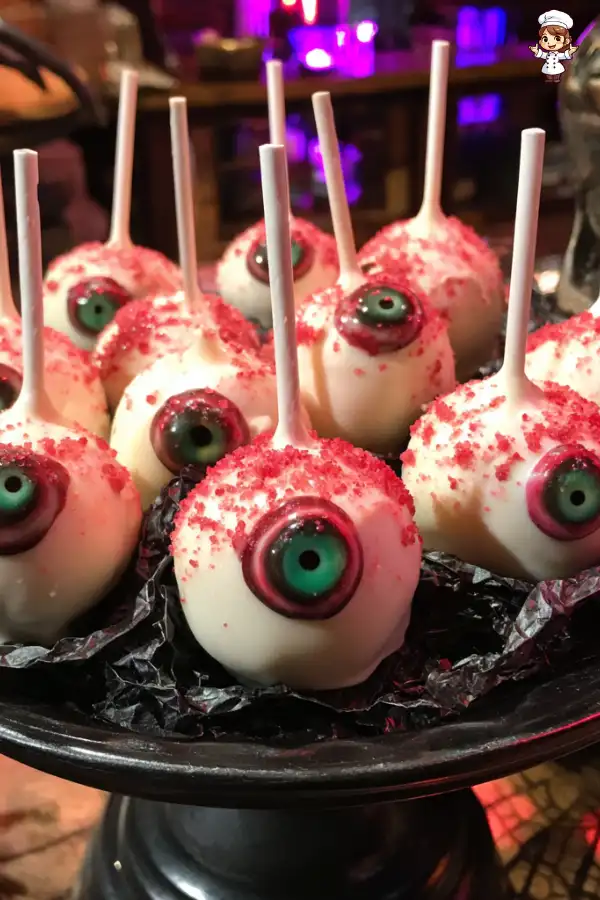
Eyeball Cake Pops are a fun and spooky treat perfect for Halloween or any festive gathering. These delightful cake pops are made by combining crumbled cake with frosting, shaping them into balls, and coating them in white chocolate. The real magic happens when you decorate them to look like eyeballs! With a swirl of red and green edible colors, plus optional candy eyes, these cake pops are sure to impress your guests. They are not only delicious but also a creative way to add a touch of whimsy to your dessert table.
Why You Should Try This Eyeball Cake Pops Recipe
There are many reasons to try this Eyeball Cake Pops Recipe. First, they are easy to make, even for beginners. The steps are simple, and you can involve your kids in the fun! Second, they are customizable. You can choose any cake flavor you like, making them suitable for everyone’s taste. Plus, the decorating options are endless! You can get creative with colors and designs, making each cake pop unique.
Moreover, these cake pops are perfect for parties. They are bite-sized, making them easy to serve and eat. Their spooky appearance adds a festive touch to any celebration. Lastly, they are a great way to use leftover cake or frosting, reducing waste while creating something delightful. So, gather your ingredients and get ready to make these charming Eyeball Cake Pops!
Ingredients for Eyeball Cake Pops Recipe
To create your spooky Eyeball Cake Pops, you will need a few simple ingredients. Here’s a list to help you gather everything you need:
- 1 box of cake mix (any flavor, about 15.25 oz) – Choose your favorite flavor to make these cake pops truly yours.
- 1 cup of frosting (store-bought or homemade) – This will help bind the cake crumbs together and add sweetness.
- 12 oz white chocolate chips – These will be melted and used to coat the cake pops, giving them a smooth finish.
- 1 tablespoon coconut oil – This helps to thin the chocolate, making it easier to dip the cake pops.
- Red edible food coloring – Use this to create a spooky swirl effect on your eyeballs.
- Green edible food coloring – This will add a vibrant touch to your cake pops, enhancing the eyeball design.
- Lollipop sticks (12) – These will hold your cake pops and make them easy to eat.
- Black crinkled paper – Use this for presentation, adding a dramatic flair to your spooky treats.
- Optional: candy eyes or chocolate chips – These can be used for extra decoration, making your eyeballs even more realistic.
With these ingredients, you’re all set to start making your Eyeball Cake Pops. Each item plays a crucial role in creating a delicious and visually appealing treat. So, gather your supplies and let’s move on to the preparation!


Preparation of Eyeball Cake Pops Recipe
Step 1: Bake the Cake
First, preheat your oven according to the instructions on the cake mix box. This is an important step to ensure your cake bakes evenly. Next, prepare the cake mix as directed. Pour the batter into a 9×13 inch pan and bake it until a toothpick inserted in the center comes out clean. Once baked, let the cake cool completely on a wire rack. This cooling process is crucial, as it prevents the cake from crumbling too much when you start to mix it with frosting.
Step 2: Crumble the Cake
After the cake has cooled, it’s time to crumble it. Use your hands or a fork to break the cake into fine crumbs. Aim for a texture that resembles sand. This step is essential because the finer the crumbs, the better they will mix with the frosting. Make sure there are no large chunks left, as they can make it difficult to form the cake balls later.
Step 3: Mix with Frosting
Now, add the frosting to the crumbled cake. Start with a little frosting and mix it in. You want the mixture to be moist enough to hold together but not too wet. If you find it’s too dry, add more frosting gradually. Mix until everything is well combined. This step is where the magic happens, as the frosting binds the cake crumbs together, making it easy to shape them into balls.
Step 4: Shape the Cake Balls
Using your hands, scoop out about 1 tablespoon of the cake mixture. Roll it into a ball, making sure it’s compact. Repeat this process until all the mixture is shaped into balls. Place the cake balls on a baking sheet lined with parchment paper. This will prevent them from sticking and make cleanup easier. Try to keep the size consistent for even coating and presentation.
Step 5: Chill the Cake Balls
Next, it’s time to chill the cake balls. Place the baking sheet in the refrigerator for at least 30 minutes. Chilling helps the cake balls firm up, making them easier to dip in chocolate later. This step is crucial, as it prevents the cake pops from falling apart when you coat them.
Step 6: Melt the Chocolate
While the cake balls are chilling, prepare the chocolate coating. In a microwave-safe bowl, combine the white chocolate chips and coconut oil. Microwave the mixture in 30-second intervals, stirring in between until it’s completely melted and smooth. The coconut oil helps to thin the chocolate, making it easier to dip the cake pops. Be careful not to overheat the chocolate, as it can burn easily.
Step 7: Dip the Cake Balls
Once the chocolate is melted, it’s time to dip the cake balls. Start by dipping the end of a lollipop stick into the melted chocolate. This helps the stick stay in place when inserted into the cake ball. Then, insert the stick halfway into a cake ball. After all the sticks are inserted, dip each cake pop into the melted chocolate, ensuring it’s fully coated. Allow any excess chocolate to drip off before moving to the next step.
Step 8: Decorate the Eyeball Cake Pops
While the chocolate coating is still wet, it’s time to get creative! Use a toothpick to swirl in the red and green edible colors, creating a spooky eyeball design. You can also add candy eyes or chocolate chips for extra decoration. This is where you can let your imagination run wild! Once decorated, place the cake pops upright in a styrofoam block or a decorated container to allow the chocolate to set completely. If you prefer, arrange some pops on a bed of crinkled black paper for a dramatic effect.
Tips for Perfect Eyeball Cake Pops Recipe
Choosing the Right Cake Flavor
When it comes to making Eyeball Cake Pops, the flavor of the cake is essential. You can choose any cake mix you like, but some flavors work better than others. For a classic taste, vanilla or chocolate cake mixes are popular choices. However, if you want to surprise your guests, consider using fun flavors like red velvet or lemon. These unique flavors can add an exciting twist to your cake pops. Remember, the frosting should complement the cake flavor. For example, cream cheese frosting pairs wonderfully with red velvet cake!
Best Chocolate for Dipping
The type of chocolate you use for coating your cake pops can make a big difference. White chocolate is the traditional choice, as it provides a nice contrast to the colorful decorations. However, you can also use milk or dark chocolate for a richer flavor. Just make sure to use high-quality chocolate chips for the best results. If you find that the chocolate is too thick, adding a bit of coconut oil, as mentioned in the recipe, will help achieve a smooth consistency. This will make dipping easier and give your cake pops a beautiful finish.
How to Achieve the Perfect Shape
Getting the right shape for your cake pops is crucial for a professional look. When rolling the cake mixture into balls, make sure to apply even pressure. This helps create a smooth surface. If you notice any cracks, gently roll the ball between your palms to smooth it out. Additionally, keeping the cake balls chilled before dipping will help maintain their shape. If they start to soften, they may lose their form during the dipping process. So, remember to chill them well before coating!
Variation of Eyeball Cake Pops Recipe
Different Flavors for Eyeball Cake Pops
While the classic Eyeball Cake Pops are delightful, you can easily switch things up by experimenting with different cake flavors. For instance, try using a chocolate cake mix for a rich, decadent treat. If you prefer something fruity, a strawberry or lemon cake mix can add a refreshing twist. You can even go for a funfetti cake mix to add colorful sprinkles to your cake pops, making them even more festive!
Another exciting option is to use a red velvet cake mix. This not only gives a unique flavor but also adds a striking red color to your cake pops. Pair it with cream cheese frosting for a delicious combination. The possibilities are endless! Just remember to choose a frosting that complements your cake flavor for the best results.
Alternative Decorations for Eyeball Cake Pops
When it comes to decorating your Eyeball Cake Pops, the sky’s the limit! While the red and green swirl design is spooky and fun, you can also try other creative ideas. For a more classic look, use melted chocolate to create a simple drizzle over the white chocolate coating. This adds a touch of elegance to your cake pops.
Additionally, consider using colored sprinkles or edible glitter to give your cake pops a magical sparkle. You can also use mini chocolate chips for pupils or even gummy candies for a playful touch. If you want to make them extra creepy, try adding a bit of black icing to create veins on the eyeballs. These alternative decorations will make your Eyeball Cake Pops stand out at any gathering!
FAQs About Eyeball Cake Pops Recipe
How long do Eyeball Cake Pops last?
Eyeball Cake Pops can last for about 1 week when stored properly. To keep them fresh, place them in an airtight container. Make sure to store them in a cool, dry place. If you live in a warm climate, it’s best to keep them in the refrigerator. This will help prevent the chocolate from melting and maintain their delicious taste.
Can I make Eyeball Cake Pops in advance?
Absolutely! You can make Eyeball Cake Pops in advance, which is perfect for busy schedules. You can prepare the cake balls and chill them a day or two before decorating. Just remember to keep them in the refrigerator until you’re ready to dip them in chocolate. Once coated, they can also be made a few days ahead of your event. Just store them in an airtight container to keep them fresh.
What can I use instead of chocolate for dipping?
If you prefer not to use chocolate, there are several alternatives you can try. Candy melts are a popular choice, as they come in various colors and flavors. They melt easily and provide a smooth coating. You can also use yogurt coating or even colored icing for a fun twist. Just ensure that whatever you choose can be melted and will harden after dipping.
Are Eyeball Cake Pops suitable for kids?
Yes, Eyeball Cake Pops are perfect for kids! They are fun, colorful, and easy to eat. Kids will love the spooky design and the delicious taste. Just be mindful of any allergies, especially if you’re using candy decorations. You can also involve your kids in the decorating process, making it a fun family activity. They’ll enjoy creating their own unique eyeball designs!
Print
Eyeball Cake Pops Recipe
- Total Time: 1 hour
- Yield: 12 cake pops 1x
- Diet: Vegetarian
Description
Eyeball Cake Pops are a fun and spooky treat perfect for Halloween or any festive gathering. These delightful cake pops are made by combining crumbled cake with frosting, shaping them into balls, and coating them in white chocolate.
Ingredients
- 1 box of cake mix (any flavor, about 15.25 oz)
- 1 cup of frosting (store-bought or homemade)
- 12 oz white chocolate chips
- 1 tablespoon coconut oil
- Red edible food coloring
- Green edible food coloring
- Lollipop sticks (12)
- Black crinkled paper
- Optional: candy eyes or chocolate chips
Instructions
- Preheat your oven according to the instructions on the cake mix box.
- Prepare the cake mix as directed and bake in a 9×13 inch pan until a toothpick comes out clean.
- Let the cake cool completely on a wire rack.
- Crumble the cooled cake into fine crumbs.
- Add frosting to the crumbled cake and mix until well combined.
- Shape the mixture into balls and place them on a baking sheet lined with parchment paper.
- Chill the cake balls in the refrigerator for at least 30 minutes.
- Melt the white chocolate chips and coconut oil in a microwave-safe bowl.
- Dip the end of a lollipop stick into the melted chocolate and insert it into a cake ball.
- Dip each cake pop into the melted chocolate, allowing excess to drip off.
- Decorate with red and green edible colors and optional candy eyes.
- Place the decorated cake pops upright to set completely.
Latest Amazon Finds


Notes
- Choose any cake flavor you like for customization.
- Keep the cake balls chilled before dipping to maintain their shape.
- Use high-quality chocolate for the best results.
- Prep Time: 30 minutes
- Cook Time: 30 minutes
- Category: Dessert
- Method: Baking and Dipping
- Cuisine: American
Nutrition
- Serving Size: 1 cake pop
- Calories: 150
- Sugar: 12g
- Sodium: 50mg
- Fat: 7g
- Saturated Fat: 4g
- Unsaturated Fat: 2g
- Trans Fat: 0g
- Carbohydrates: 20g
- Fiber: 1g
- Protein: 2g
- Cholesterol: 10mg
Keywords: Eyeball Cake Pops, Halloween Treats, Cake Pops, Spooky Desserts