

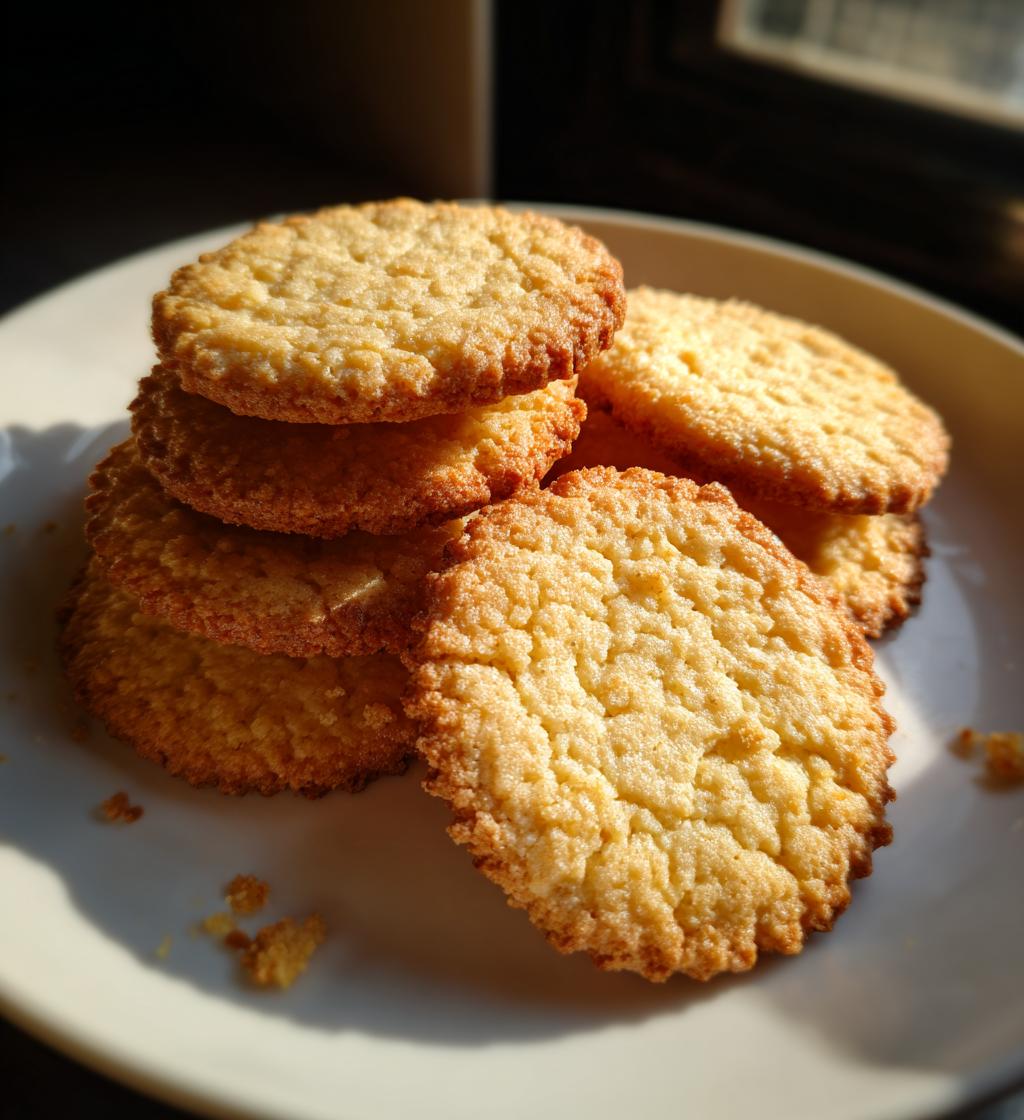
Oh, let me tell you about the absolute joy of vanilla wafers! These delightful little cookies are so light and crisp, with that sweet vanilla flavor that dances on your tongue. They’re perfect for snacking on their own, but they also have this magical ability to elevate any dessert table. I remember the first time I made a trifle for a family gathering, and I used these vanilla wafers as the base. Everyone was raving about how the crunch complemented the creamy layers so beautifully! It was such a hit that I’ve made it my go-to whenever I need to impress guests without a lot of fuss.
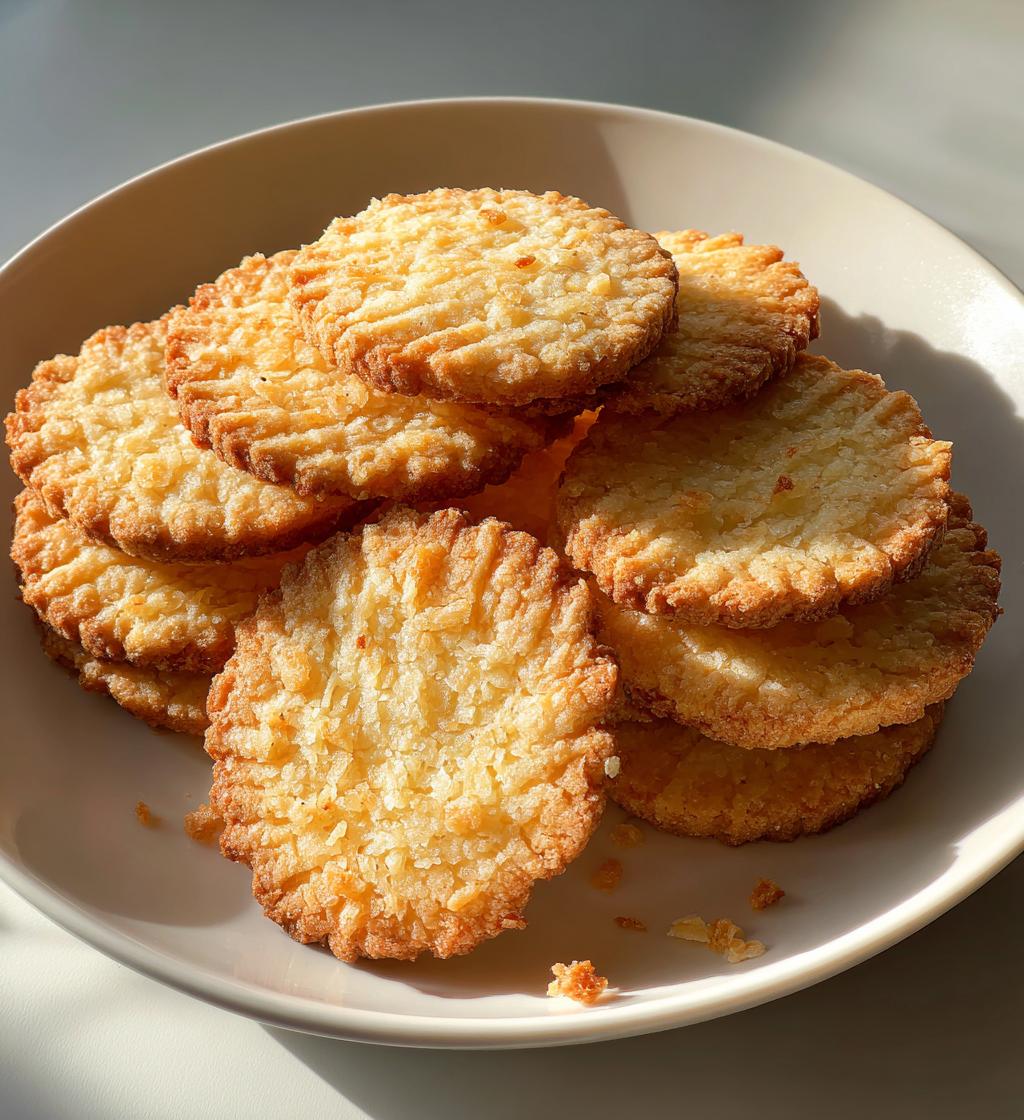
What I love most about making vanilla wafers is how incredibly easy they are to whip up. Seriously, just a few simple ingredients come together effortlessly, and within no time, you’ll have a batch of cookies that not only taste amazing but also look lovely on any platter. Whether you’re hosting a party, bringing a treat to a potluck, or simply craving a sweet snack, these cookies are your perfect companion. Trust me, once you try them, you’ll find all sorts of reasons to make them again and again!
Ingredients for Vanilla Wafers
Gathering the right ingredients is key to making these delightful vanilla wafers. Here’s everything you’ll need to whip up a batch of these scrumptious cookies:
- 1 1/2 cups all-purpose flour
- 1/2 teaspoon baking powder
- 1/4 teaspoon salt
- 1/2 cup unsalted butter, softened
- 3/4 cup granulated sugar
- 1 large egg
- 1 teaspoon vanilla extract
Make sure your butter is softened to room temperature for that perfect creamy texture when you mix it with sugar. And don’t skip the vanilla extract—it’s what gives these cookies that heavenly flavor! Once you have everything laid out, you’re ready to dive into the fun part: baking!


How to Prepare Vanilla Wafers
Alright, let’s get down to the fun part—preparing those dreamy vanilla wafers! It’s super simple, and I promise you’ll be amazed at how quickly they come together. Just follow these steps, and you’ll have a batch of cookies that are sure to impress.
Preheat the Oven
First things first, you’ll want to preheat your oven to 350°F (175°C). This step is crucial because it ensures that your cookies bake evenly and come out perfectly crisp. Just imagine that warm air filling your kitchen as they bake—it’s heavenly!
Mix Dry Ingredients
While the oven is heating up, grab a bowl and whisk together 1 1/2 cups of all-purpose flour, 1/2 teaspoon of baking powder, and 1/4 teaspoon of salt. This may seem simple, but take a moment to really whisk them together thoroughly. You want to make sure that the baking powder is evenly distributed throughout the flour, which will help your wafers rise beautifully as they bake. Trust me, a well-mixed dry ingredient bowl makes all the difference!
Cream Butter and Sugar
Now, let’s move on to the buttery goodness! In another bowl, cream together 1/2 cup of softened unsalted butter and 3/4 cup of granulated sugar. Use an electric mixer or a good old-fashioned wooden spoon—whatever you have on hand. You want to mix this until it’s light and fluffy, which usually takes about 2-3 minutes. The texture should be soft and airy, almost like a cloud. This is where the magic begins, and you’ll start to smell that sweet vanilla aroma coming together!
Incorporate Egg and Vanilla
Next, add in 1 large egg and 1 teaspoon of vanilla extract. Mix these ingredients really well until they’re fully combined. This step is important because the egg and vanilla will add richness and depth to your cookies. You want that vanilla flavor to be evenly spread throughout the batter, so don’t rush this part!
Combine Mixtures
Now it’s time to combine the dry and wet ingredients. Gradually add the flour mixture to your butter-sugar-egg mixture. Do this in batches, mixing gently until everything is just combined. Be careful not to overmix; we want our wafers to stay light and crisp. If you mix too much, they can end up tough, and nobody wants that!
Shape and Bake
Finally, it’s time to get those cookies onto a baking sheet! Using a tablespoon, drop rounded amounts of dough onto a lined baking sheet, spacing them about 2 inches apart. They’ll spread a little, so give them room to breathe! Bake in your preheated oven for about 10-12 minutes, or until the edges are lightly golden. Keep an eye on them—every oven is a bit different, and you want to catch them just as they turn that lovely golden brown. Once they’re out, let them cool on a wire rack before diving in!
Nutritional Information
Alright, let’s talk numbers! While I’m all about enjoying these delicious vanilla wafers, it’s good to know what you’re indulging in. Here’s a rough estimate of the nutritional information per serving, which is about 2 cookies:
- Calories: 100
- Fat: 4g
- Saturated Fat: 2g
- Unsaturated Fat: 1g
- Trans Fat: 0g
- Cholesterol: 15mg
- Sodium: 50mg
- Carbohydrates: 15g
- Fiber: 0g
- Sugar: 5g
- Protein: 1g
Keep in mind that these values are an estimate based on standard ingredients. If you decide to tweak the recipe or swap in different ingredients, the numbers might vary a bit. But hey, a little indulgence now and then is totally worth it, don’t you think?
Tips for Success
Alright, my fellow bakers, let’s talk about how to make those vanilla wafers absolutely perfect! I’ve had my fair share of cookie triumphs and, let’s be real, a few flops too. So, here are some tried-and-true tips that will help you nail this recipe every single time!
- Butter Temperature Matters: Make sure your unsalted butter is at room temperature before you start. This is crucial for achieving that light and fluffy texture when creaming with the sugar. If the butter is too cold, you won’t get that wonderful creaminess, and the cookies might end up too dense.
- Don’t Rush the Mixing: Take your time when mixing the wet ingredients. It may be tempting to just throw everything in and rush through, but mixing thoroughly ensures the flavors meld beautifully. A well-mixed batter makes for a better cookie, so really give it a good mix!
- Watch Your Bake Time: Ovens can be sneaky! Keep an eye on your cookies as they bake. Start checking around the 10-minute mark. You want those edges to be lightly golden but the centers to remain soft. They’ll continue to firm up as they cool, so don’t wait for them to look fully baked in the oven.
- Cool Properly: Letting your cookies cool on a wire rack is essential. This allows air to circulate around them, which helps them maintain their crispness. If you leave them on the baking sheet too long, they might get a bit soggy on the bottom, and we definitely want to avoid that!
- Mix It Up! Feel free to experiment! These vanilla wafers are a great base for creativity. Try adding a pinch of cinnamon for warmth, or toss in some mini chocolate chips for a little extra sweetness. Just remember, any additions should complement that lovely vanilla flavor!
With these tips in your back pocket, you’re all set to make the best vanilla wafers ever! Happy baking, and get ready for some serious cookie love!
Variations of Vanilla Wafers
Once you’ve mastered the classic vanilla wafers, the fun really begins! There are so many delightful ways to jazz them up and make them your own. Here are a few of my favorite variations that will give your cookies a fun twist:
- Chocolate Chip Delight: Who can resist chocolate? Add in a cup of semi-sweet or dark chocolate chips to the dough for a deliciously sweet surprise. The chocolate pairs beautifully with the vanilla, making every bite a decadent treat!
- Nuts for Nuts: If you love a bit of crunch, try folding in some chopped nuts like pecans, walnuts, or even slivered almonds. Not only do they add texture, but they also bring a lovely nutty flavor that complements the sweetness of the cookies.
- Almond Extract Twist: For a delightful change, substitute half of the vanilla extract with almond extract. It adds a lovely, fragrant flavor that’s simply irresistible and gives your wafers a unique flair that will leave everyone guessing!
- Coconut Flake Surprise: Mix in some sweetened or unsweetened coconut flakes to the dough for a tropical vibe. The coconut adds a chewy texture that contrasts beautifully with the crispness of the wafers!
- Spiced Up: Consider adding a teaspoon of cinnamon or nutmeg to the flour mixture for a warm, spiced flavor. These spices bring a cozy feel to the cookies, making them perfect for fall and winter gatherings.
- Fruity Fun: Fold in some dried fruits like cranberries, raisins, or chopped apricots. They add a burst of sweetness and a bit of chewiness that makes each bite a delightful surprise.
Feel free to mix and match these ideas or come up with your own! The beauty of vanilla wafers is their versatility, so let your creativity run wild. Each variation is a new adventure, and I can’t wait for you to discover your favorite way to enjoy these delightful cookies!
Storage & Reheating Instructions
Now that you’ve got a delicious batch of vanilla wafers, let’s make sure they stay fresh and tasty for as long as possible! Proper storage is key to keeping that delightful crunch intact. Here’s how to do it:
First, let your cookies cool completely on a wire rack. This step is super important because if you store them while they’re still warm, they can create moisture in the container, leading to soggy cookies. Once they’re cool, grab an airtight container—this could be a cookie tin or a plastic container with a tight-fitting lid.
Layer your vanilla wafers in the container, making sure to place parchment paper between layers if you have a lot. This helps prevent them from sticking together, so you can enjoy that crisp texture every time you reach for a cookie. You can store them at room temperature for up to a week, but trust me, they’ll likely be gone way before then!
If you want to keep them longer, you can freeze your vanilla wafers! Just make sure they’re completely cool, then wrap them individually in plastic wrap, and place them in a freezer-safe bag or container. They’ll be good for about 2 months in the freezer. When you’re ready to enjoy them, simply let them thaw at room temperature for about 15 minutes. No need to reheat—just dig in and enjoy that delightful crunch!
FAQ Section
Can I use whole wheat flour instead of all-purpose flour?
Absolutely! Using whole wheat flour will give your vanilla wafers a nuttier flavor and a bit more texture. Just keep in mind that the cookies might be a tad denser. If you want to keep the lightness, you can mix half all-purpose flour and half whole wheat flour.
What’s the best way to serve vanilla wafers?
Oh, there are so many delicious ways to enjoy these cookies! You can serve them plain as a delightful snack, or use them as a crunchy layer in desserts like trifle or ice cream parfaits. They also make a fantastic accompaniment to coffee or tea. Trust me, they’ll elevate your afternoon tea time!
Can I make these cookies gluten-free?
Yes! To make gluten-free vanilla wafers, simply substitute the all-purpose flour with a gluten-free flour blend. Just make sure it’s a blend that works well for baking. This way, you can enjoy the same delightful cookies without the gluten!
How can I store leftover cookies if I have some?
If you somehow have leftovers (which is quite the feat!), let your vanilla wafers cool completely, then store them in an airtight container at room temperature for up to a week. For longer storage, you can freeze them—just wrap them individually and enjoy them later!
Can I add flavors like lemon or orange to these cookies?
Definitely! Adding a bit of lemon or orange zest to the dough can give your vanilla wafers a refreshing citrus twist. Just keep the amount light so it doesn’t overpower the lovely vanilla flavor. It’s a fun way to mix things up!
For more baking tips and delicious recipes, check out our blog for inspiration!
Print
Delicious Vanilla Wafers: 5 Tips for Perfect Comfort Cookies
- Total Time: 27 minutes
- Yield: 24 cookies 1x
- Diet: Vegetarian
Description
Vanilla wafers are light, crisp cookies with a sweet vanilla flavor.
Ingredients
- 1 1/2 cups all-purpose flour
- 1/2 teaspoon baking powder
- 1/4 teaspoon salt
- 1/2 cup unsalted butter, softened
- 3/4 cup granulated sugar
- 1 large egg
- 1 teaspoon vanilla extract
Instructions
- Preheat the oven to 350°F (175°C).
- In a bowl, whisk together flour, baking powder, and salt.
- In another bowl, cream the butter and sugar until light and fluffy.
- Add the egg and vanilla extract, and mix well.
- Gradually add the flour mixture to the wet ingredients, mixing until combined.
- Drop tablespoon-sized amounts of dough onto a baking sheet.
- Bake for 10-12 minutes until edges are lightly golden.
- Cool on a wire rack before serving.
Notes
- Store in an airtight container for up to a week.
- Can be used as a base for desserts or eaten alone.
- Prep Time: 15 minutes
- Cook Time: 12 minutes
- Category: Dessert
- Method: Baking
- Cuisine: American
Nutrition
- Serving Size: 2 cookies
- Calories: 100
- Sugar: 5g
- Sodium: 50mg
- Fat: 4g
- Saturated Fat: 2g
- Unsaturated Fat: 1g
- Trans Fat: 0g
- Carbohydrates: 15g
- Fiber: 0g
- Protein: 1g
- Cholesterol: 15mg
Keywords: vanilla wafers, cookies, dessert