

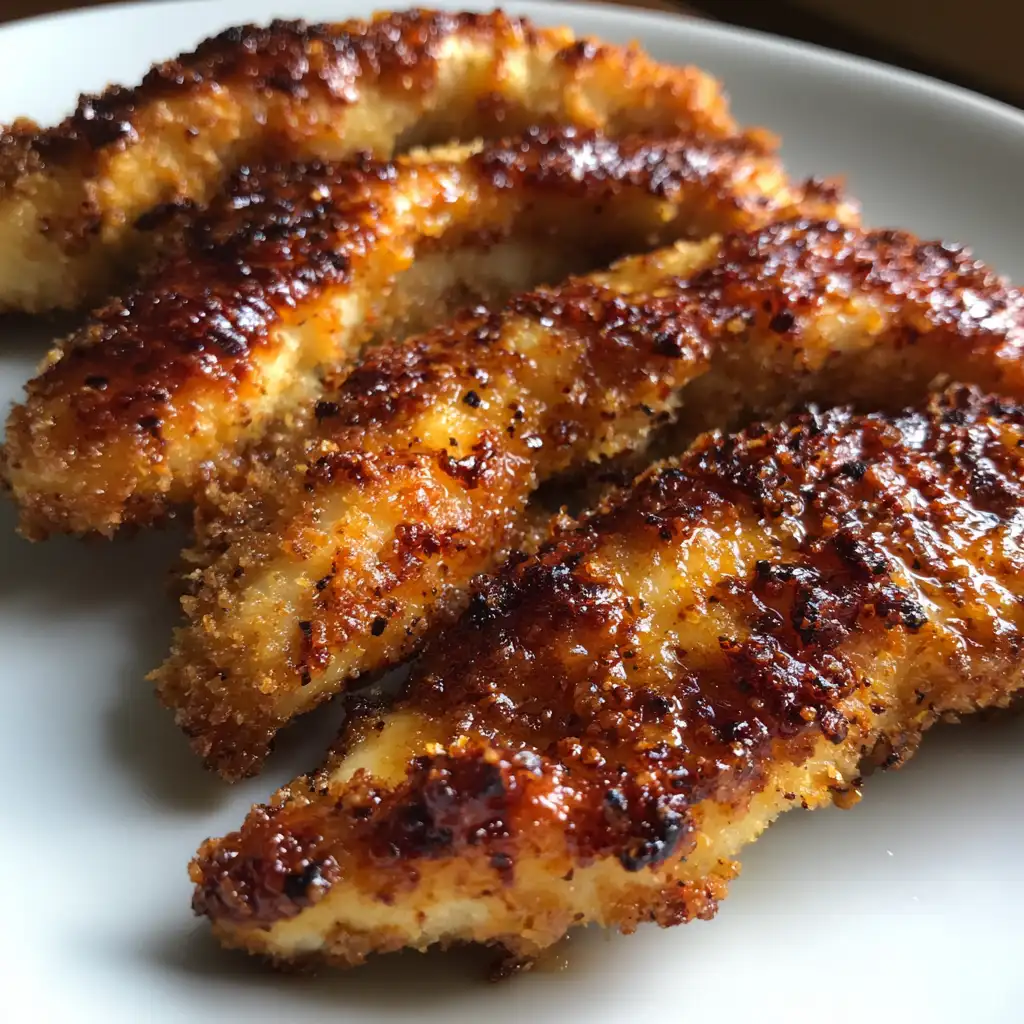
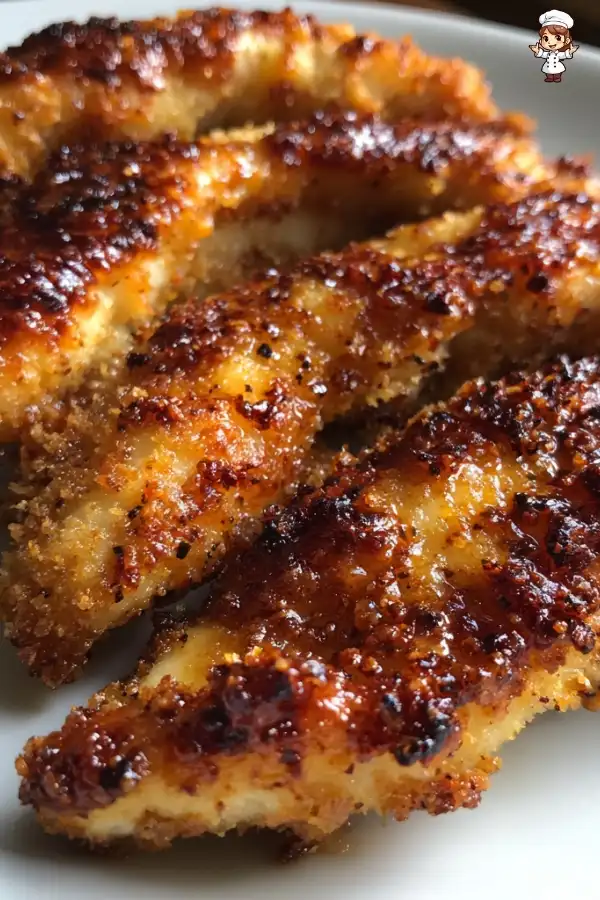
Crispy baked chicken tenders are a delightful dish that brings joy to both kids and adults alike. They are not only easy to make but also incredibly versatile. Whether you’re hosting a family dinner, preparing a snack for game day, or looking for a quick weeknight meal, these tenders fit the bill perfectly. With their golden-brown crust and juicy interior, they are sure to become a staple in your kitchen.
What Makes Crispy Baked Chicken Tenders a Favorite?
One of the main reasons crispy baked chicken tenders are so beloved is their satisfying crunch. The combination of panko breadcrumbs and spices creates a texture that is hard to resist. Additionally, baking instead of frying makes them a healthier option without sacrificing flavor. This means you can enjoy your favorite comfort food guilt-free!
Moreover, the simplicity of the recipe allows for endless customization. You can easily adjust the spices to suit your taste or add different marinades for a unique twist. Kids love them, and they can be served with a variety of dipping sauces, making them perfect for any occasion.
In summary, crispy baked chicken tenders are a favorite for their delicious taste, easy preparation, and versatility. They are a fantastic way to bring everyone together around the dinner table. So, let’s dive into the ingredients and preparation steps to create this mouthwatering dish!
Ingredients for Crispy Baked Chicken Tenders
To create the perfect crispy baked chicken tenders, you’ll need a few simple ingredients. Each component plays a vital role in achieving that delightful crunch and flavor. Here’s what you’ll need:
- 500 grams (1 pound) chicken breast strips: Choose fresh, high-quality chicken for the best taste and texture.
- 100 grams (1 cup) all-purpose flour: This helps create a base layer that allows the egg and breadcrumbs to stick.
- 2 large eggs: Beaten eggs act as a binding agent, ensuring the breadcrumbs adhere well to the chicken.
- 150 grams (1.5 cups) breadcrumbs: Panko breadcrumbs are preferred for their extra crunch, but regular breadcrumbs work too.
- 1 teaspoon garlic powder: This adds a savory flavor that enhances the overall taste of the tenders.
- 1 teaspoon paprika: Paprika gives a subtle smokiness and a beautiful color to the chicken.
- 1 teaspoon salt: Essential for seasoning, it brings out the flavors of the chicken and spices.
- 1/2 teaspoon black pepper: Adds a hint of spice that complements the other flavors.
- 2 tablespoons olive oil: Drizzling olive oil helps achieve that golden-brown finish while keeping the chicken moist.
With these ingredients on hand, you’re well on your way to making delicious crispy baked chicken tenders. Each item contributes to the overall flavor and texture, ensuring a satisfying meal that everyone will love. Now, let’s move on to the preparation steps to bring this dish to life!


Preparation of Crispy Baked Chicken Tenders
Now that you have all your ingredients ready, it’s time to prepare your crispy baked chicken tenders. Following these steps will ensure that your tenders turn out perfectly crispy and delicious. Let’s get started!
Step 1: Preheat the Oven
First things first, preheat your oven to 200°C (400°F). This step is crucial as it ensures that your chicken tenders cook evenly and achieve that golden-brown color. While the oven heats up, you can focus on preparing the chicken and the breading station.
Step 2: Prepare the Chicken
Next, take your chicken breast strips and pat them dry with paper towels. This simple step is important because it helps the coating stick better. A dry surface allows the flour, egg, and breadcrumbs to adhere, resulting in a crispier texture. Once dried, set the chicken aside while you set up your breading station.
Step 3: Create the Breading Station
Now, it’s time to create your breading station. You’ll need three shallow bowls. In the first bowl, add the all-purpose flour. In the second bowl, beat the two large eggs until they are well mixed. In the third bowl, combine the breadcrumbs, garlic powder, paprika, salt, and black pepper. This mixture will give your chicken tenders a burst of flavor!
Step 4: Coat the Chicken
It’s time to coat the chicken! Take one chicken strip and dredge it in the flour, shaking off any excess. Then, dip it into the beaten eggs, allowing any extra egg to drip off. Finally, coat the chicken in the breadcrumb mixture, pressing gently to ensure the crumbs stick well. Repeat this process for all the chicken strips. Make sure each piece is evenly coated for the best results!
Step 5: Bake the Chicken Tenders
Once all the chicken strips are coated, it’s time to bake them. Arrange the coated chicken tenders on a lined baking sheet in a single layer, making sure they don’t touch. This helps them cook evenly. Drizzle the olive oil over the chicken tenders to promote crispiness. Now, place the baking sheet in the preheated oven and bake for 20-25 minutes. For even browning, flip the tenders halfway through the cooking time.
Step 6: Serve and Enjoy
After baking, your crispy baked chicken tenders will be golden brown and delicious! Remove them from the oven and let them cool slightly. Serve them warm with your favorite dipping sauces, like honey mustard, barbecue sauce, or ranch dressing. Enjoy every crunchy bite of your homemade chicken tenders!
Tips for Perfect Crispy Baked Chicken Tenders
To ensure your crispy baked chicken tenders turn out perfectly every time, consider these helpful tips. From selecting the right chicken to achieving that extra crunch, these suggestions will elevate your cooking game!
Choosing the Right Chicken
When it comes to chicken, quality matters. Opt for fresh, high-quality chicken breast strips. They should be firm and have a pinkish hue. Avoid chicken that looks dull or has an off smell. If possible, choose organic or free-range chicken for better flavor and texture. Additionally, cutting your chicken into uniform strips ensures even cooking. This way, every piece will be tender and juicy!
Secrets to Extra Crispiness
Everyone loves a crispy texture, and there are a few secrets to achieving that perfect crunch. First, consider using panko breadcrumbs instead of regular ones. Panko is lighter and airier, which results in a crispier coating. Another tip is to let the coated chicken sit for about 10 minutes before baking. This allows the coating to set, helping it stick better during cooking.
Additionally, don’t skip the olive oil drizzle! It not only adds flavor but also helps the tenders crisp up beautifully. If you want to take it a step further, try using an air fryer. This method circulates hot air around the chicken, creating an even crispier finish. Just remember to adjust the cooking time accordingly!
By following these tips, you’ll be well on your way to making the best crispy baked chicken tenders. Enjoy the process and the delicious results!
Variation of Crispy Baked Chicken Tenders
While the classic recipe for crispy baked chicken tenders is delicious on its own, there are many ways to add your personal touch. By experimenting with different marinades and breading options, you can create unique flavors that will keep everyone coming back for more. Let’s explore some exciting variations!
Flavorful Marinades
Marinating your chicken strips can elevate the flavor profile of your crispy baked chicken tenders. Here are a few marinade ideas to consider:
- Buttermilk Marinade: Soak the chicken strips in buttermilk for at least 2 hours or overnight. This tenderizes the meat and adds a rich flavor.
- Honey Mustard Marinade: Mix equal parts honey and Dijon mustard with a splash of olive oil. Marinate the chicken for 30 minutes for a sweet and tangy taste.
- Spicy Marinade: Combine hot sauce, lime juice, and a bit of garlic powder. Let the chicken soak for 1 hour for a spicy kick.
These marinades not only enhance the taste but also keep the chicken juicy. After marinating, simply follow the breading and baking steps as usual. You’ll be amazed at how a simple marinade can transform your crispy baked chicken tenders!
Alternative Breading Options
If you want to switch things up, consider trying different breading options. Here are some alternatives that can add variety to your crispy baked chicken tenders:
- Almond Flour: For a gluten-free option, use almond flour instead of all-purpose flour. It adds a nutty flavor and a unique texture.
- Cornmeal: Mixing cornmeal with breadcrumbs can give your tenders a delightful crunch and a slightly sweet taste.
- Crushed Chips: Use crushed tortilla chips or potato chips as a breading. This adds a fun twist and extra flavor!
Feel free to mix and match these ideas to create your own signature crispy baked chicken tenders. With a little creativity, you can enjoy a new flavor experience every time you make this dish!
FAQs About Crispy Baked Chicken Tenders
How do I store leftover crispy baked chicken tenders?
Storing leftover crispy baked chicken tenders is easy! First, let them cool completely. Then, place them in an airtight container. You can keep them in the refrigerator for up to 3 days. To reheat, simply pop them in the oven at 180°C (350°F) for about 10-15 minutes. This will help restore their crispiness. Avoid using the microwave, as it can make them soggy.
Can I freeze crispy baked chicken tenders?
Yes, you can freeze crispy baked chicken tenders! After they have cooled, arrange them in a single layer on a baking sheet. Freeze them for about 1-2 hours until they are firm. Then, transfer the tenders to a freezer-safe bag or container. They can be stored in the freezer for up to 3 months. When you’re ready to enjoy them, bake directly from frozen at 200°C (400°F) for about 25-30 minutes, or until heated through.
What dipping sauces pair well with crispy baked chicken tenders?
Crispy baked chicken tenders are delicious on their own, but dipping sauces can take them to the next level! Here are some popular options:
- Honey Mustard: A sweet and tangy classic that complements the crunch.
- Barbecue Sauce: Adds a smoky flavor that pairs perfectly with the chicken.
- Ranch Dressing: Creamy and herby, ranch is a favorite for many.
- Buffalo Sauce: For those who love a spicy kick, buffalo sauce is a great choice.
- Sweet and Sour Sauce: This sauce offers a delightful balance of flavors.
Feel free to mix and match these sauces to find your favorite combination!
How can I make crispy baked chicken tenders gluten-free?
Making crispy baked chicken tenders gluten-free is simple! Start by replacing all-purpose flour with a gluten-free flour blend. You can also use almond flour or coconut flour for a different flavor. For the breadcrumbs, opt for gluten-free panko or crushed gluten-free cereal. Follow the same preparation and baking steps, and you’ll have delicious gluten-free crispy baked chicken tenders that everyone can enjoy!
Print
Crispy baked chicken tenders
- Total Time: 40 minutes
- Yield: 4 servings 1x
- Diet: Gluten Free
Description
Crispy baked chicken tenders are a delightful dish that brings joy to both kids and adults alike. They are easy to make, versatile, and healthier than fried options.
Ingredients
- 500 grams (1 pound) chicken breast strips
- 100 grams (1 cup) all-purpose flour
- 2 large eggs
- 150 grams (1.5 cups) breadcrumbs
- 1 teaspoon garlic powder
- 1 teaspoon paprika
- 1 teaspoon salt
- 1/2 teaspoon black pepper
- 2 tablespoons olive oil
Instructions
- Preheat your oven to 200°C (400°F).
- Pat the chicken breast strips dry with paper towels.
- Create a breading station with three shallow bowls: one with flour, one with beaten eggs, and one with breadcrumbs mixed with garlic powder, paprika, salt, and black pepper.
- Coat each chicken strip in flour, then dip in the beaten eggs, and finally coat with the breadcrumb mixture.
- Arrange the coated chicken tenders on a lined baking sheet and drizzle with olive oil.
- Bake for 20-25 minutes, flipping halfway through for even browning.
- Remove from the oven, let cool slightly, and serve with your favorite dipping sauces.
Latest Amazon Finds


Notes
- For extra crispiness, let the coated chicken sit for 10 minutes before baking.
- Using panko breadcrumbs will yield a crunchier texture.
- Consider marinating the chicken for added flavor.
- Prep Time: 15 minutes
- Cook Time: 25 minutes
- Category: Main Course
- Method: Baking
- Cuisine: American
Nutrition
- Serving Size: 1 serving
- Calories: 350
- Sugar: 1g
- Sodium: 600mg
- Fat: 15g
- Saturated Fat: 2g
- Unsaturated Fat: 10g
- Trans Fat: 0g
- Carbohydrates: 30g
- Fiber: 2g
- Protein: 30g
- Cholesterol: 150mg
Keywords: crispy baked chicken tenders, chicken tenders, comfort food, easy recipe