

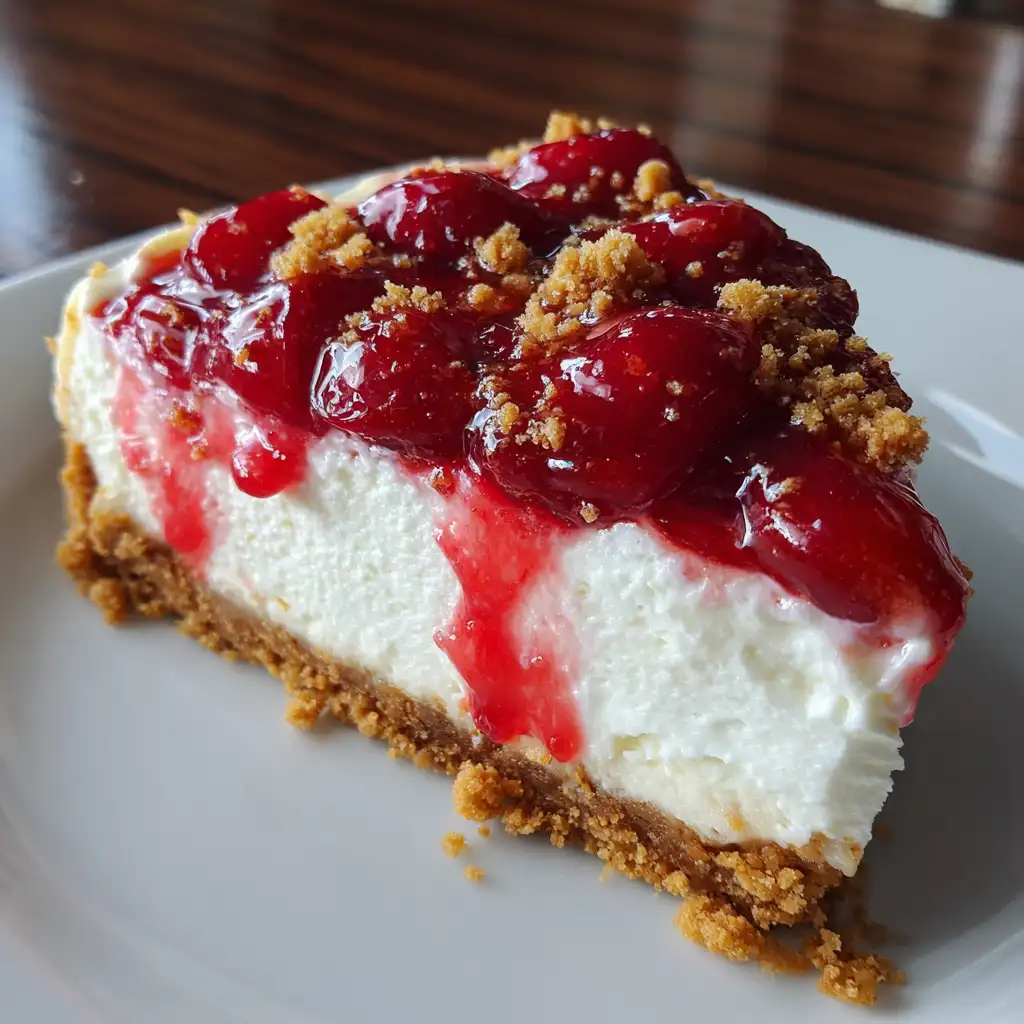
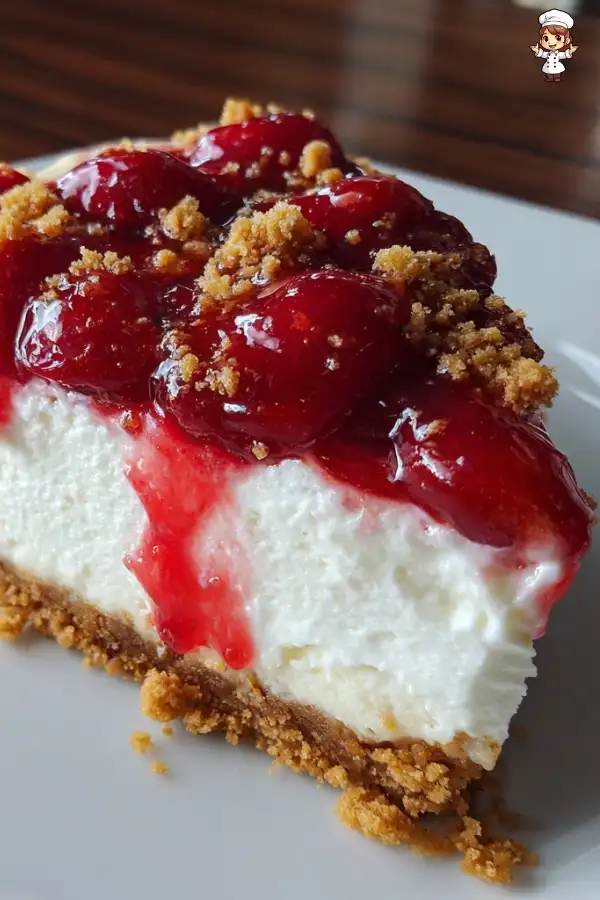
Cherry Yum Yum is a delightful dessert that combines creamy layers with a sweet cherry topping. This no-bake treat is perfect for any occasion, whether it’s a family gathering, a picnic, or just a sweet indulgence after dinner. The combination of cream cheese, whipped topping, and cherry pie filling creates a deliciously rich flavor that everyone will love.
This dessert is not only easy to make but also visually appealing. The vibrant red cherries on top contrast beautifully with the creamy white layers beneath. Plus, the graham cracker crust adds a satisfying crunch that complements the smooth textures of the filling. With just a few simple ingredients, you can whip up this crowd-pleaser in no time!
What makes the Cherry Yum Yum recipe so special is its versatility. You can customize it with different fruit toppings or even make it gluten-free. This means you can enjoy it no matter your dietary preferences. So, if you’re looking for a dessert that is both delicious and easy to prepare, look no further than this Cherry Yum Yum recipe!
Ingredients for Cherry Yum Yum Recipe
To create the perfect Cherry Yum Yum, you’ll need a few simple ingredients. Each component plays a vital role in achieving that delightful balance of flavors and textures. Here’s what you’ll need:
- 8 oz cream cheese, softened: This is the base of your creamy layer. Make sure it’s at room temperature for easy mixing.
- 1 cup powdered sugar: This sweetens the cream cheese layer and gives it a smooth texture.
- 1 cup whipped topping: Using a product like Cool Whip adds lightness and fluffiness to the dessert.
- 1 can (21 oz) cherry pie filling: This is the star of the show! The sweet cherries add a burst of flavor and color.
- 1 ½ cups graham cracker crumbs: These crumbs form the delicious crust that holds everything together.
- ½ cup unsalted butter, melted: This binds the graham cracker crumbs and adds richness to the crust.
With these ingredients on hand, you’re ready to start making your Cherry Yum Yum. Each item contributes to the overall taste, making it a delightful treat for any occasion. Gather your ingredients, and let’s move on to the next step!


Step-by-Step Preparation of Cherry Yum Yum Recipe
Step 1: Preparing the Crust
To kick off your Cherry Yum Yum recipe, start by preparing the crust. In a medium bowl, combine the graham cracker crumbs and melted butter. Mix them together until the crumbs are evenly coated with butter. The mixture should resemble wet sand. This step is crucial as it forms the base of your dessert.
Next, take a 9×13 inch baking dish and evenly press the graham cracker mixture into the bottom. Use the back of a measuring cup or your hands to pack it tightly. This ensures a solid crust that holds everything together. Once you’ve pressed it down firmly, set it aside while you move on to the next step.
Step 2: Making the Cream Cheese Layer
Now, let’s create the creamy layer that makes this dessert so special. In a large mixing bowl, beat the softened cream cheese with an electric mixer until it’s smooth. This should take just a minute or two. Gradually add the powdered sugar, mixing until well combined and creamy. The sweetness of the sugar balances the tanginess of the cream cheese.
Once your mixture is smooth, gently fold in the whipped topping. This step is important as it adds lightness and fluffiness to the cream cheese layer. Be careful not to overmix; you want to keep that airy texture. When fully incorporated, your cream cheese layer is ready!
Step 3: Preparing the Cherry Topping
Now it’s time to prepare the cherry topping. Open your can of cherry pie filling and give it a gentle stir. This helps to distribute the cherries evenly in the sauce. The sweet and tart flavor of the cherries will be the perfect complement to the creamy layers below.
Make sure to have your cherry topping ready to go before you assemble the dessert. This will ensure a smooth and quick assembly process, keeping everything fresh and delicious.
Step 4: Assembling the Cherry Yum Yum
With all your layers prepared, it’s time to assemble your Cherry Yum Yum! Start by spreading the cream cheese mixture evenly over the graham cracker crust in the baking dish. Use a spatula to smooth the top, making sure it’s even.
Next, take the cherry pie filling and spoon it evenly over the cream cheese layer. Spread it out gently to cover the entire surface. The vibrant red cherries will create a beautiful contrast against the creamy white layer, making your dessert visually appealing.
Step 5: Chilling the Dessert
After assembling your Cherry Yum Yum, it’s time to let it chill. Cover the dish with plastic wrap or aluminum foil. Refrigerate for at least 4 hours, or overnight if possible. Chilling allows the layers to set and the flavors to meld together, enhancing the overall taste.
Once chilled, your Cherry Yum Yum will be ready to serve. Cut it into squares and enjoy this delightful dessert cold. It’s perfect for gatherings or as a sweet treat after dinner!
Tips for Perfecting Your Cherry Yum Yum Recipe
Choosing the Right Cherries
When it comes to making the best Cherry Yum Yum, selecting the right cherries is key. While the recipe calls for cherry pie filling, you can enhance the flavor by choosing high-quality brands. Look for fillings that contain real cherries and minimal artificial ingredients. This will ensure a fresher taste and a more vibrant color.
If you prefer a homemade touch, consider using fresh or frozen cherries. If using fresh cherries, pit and slice them before mixing with sugar and a bit of cornstarch to create a thick sauce. For frozen cherries, thaw them and drain excess liquid before adding them to your dessert. This way, you can enjoy a more natural cherry flavor that elevates your Cherry Yum Yum recipe!
Storing Leftovers
After enjoying your Cherry Yum Yum, you might have some leftovers. Storing them properly is essential to maintain their deliciousness. First, cover the dish tightly with plastic wrap or aluminum foil. This prevents the dessert from absorbing any odors from the fridge.
Cherry Yum Yum can be stored in the refrigerator for up to 3 days. However, it’s best enjoyed within the first couple of days for optimal freshness. If you notice any excess moisture on top, gently dab it with a paper towel before serving. This will keep the layers looking neat and appetizing.
For longer storage, you can freeze the dessert. Cut it into squares and place them in an airtight container. Just remember to separate layers with parchment paper to prevent sticking. When you’re ready to enjoy, simply thaw in the refrigerator overnight. This way, you can savor your Cherry Yum Yum even after a few days!
Variations of the Cherry Yum Yum Recipe
Using Different Fruit Toppings
While cherry pie filling is a classic choice for this dessert, you can easily switch things up with different fruit toppings. The beauty of the Cherry Yum Yum recipe lies in its versatility. For instance, you can use blueberry, strawberry, or even peach pie filling. Each fruit brings its unique flavor and color, making your dessert just as delightful.
If you want to get creative, consider using fresh fruits. Sliced strawberries or blueberries can be layered on top of the cream cheese mixture. You can also make a mixed fruit topping by combining several fruits. Just remember to adjust the sweetness if you’re using fresh fruit, as they may not be as sweet as pie filling.
Another fun option is to make a tropical version. Try using crushed pineapple or mango puree as your topping. This will give your Cherry Yum Yum a refreshing twist, perfect for summer gatherings. The possibilities are endless, so feel free to experiment with your favorite fruits!
Gluten-Free Options
If you or your guests are following a gluten-free diet, you can still enjoy this delicious dessert. The key is to substitute the graham cracker crumbs with gluten-free alternatives. Many brands offer gluten-free graham crackers that work perfectly in this recipe.
Alternatively, you can use crushed gluten-free cookies or even almond flour mixed with melted butter to create a crust. This will give you a unique flavor while keeping the dessert gluten-free. Just make sure to check the labels to ensure all ingredients are safe for your dietary needs.
By making these simple adjustments, you can enjoy a delightful Cherry Yum Yum that everyone can savor, regardless of dietary restrictions. So, don’t hesitate to get creative and make this dessert your own!
FAQs About Cherry Yum Yum Recipe
Can I make Cherry Yum Yum ahead of time?
Absolutely! In fact, making Cherry Yum Yum ahead of time is a great idea. This dessert benefits from chilling, as it allows the flavors to meld together beautifully. You can prepare it a day or two in advance and store it in the refrigerator. Just remember to cover it tightly with plastic wrap or aluminum foil to keep it fresh. When you’re ready to serve, simply cut it into squares and enjoy!
What can I substitute for cream cheese in the Cherry Yum Yum recipe?
If you’re looking for a substitute for cream cheese, there are several options available. One popular choice is Greek yogurt, which provides a similar creamy texture with a tangy flavor. You can also use mascarpone cheese for a richer taste. For a dairy-free option, consider using a vegan cream cheese alternative made from nuts or soy. Just keep in mind that the flavor and texture may vary slightly, but your Cherry Yum Yum will still be delicious!
How long does Cherry Yum Yum last in the fridge?
Cherry Yum Yum can last in the refrigerator for up to 3 days. However, for the best taste and texture, it’s recommended to enjoy it within the first couple of days. After that, the layers may start to separate, and the crust could become soggy. If you have leftovers, make sure to cover them well to maintain freshness. If you want to keep it longer, consider freezing it!
Can I use frozen cherries for the Cherry Yum Yum recipe?
Yes, you can definitely use frozen cherries for your Cherry Yum Yum recipe! Just make sure to thaw them first and drain any excess liquid. This will help prevent your dessert from becoming too watery. Frozen cherries can be a great alternative, especially when fresh cherries are out of season. They still provide that sweet and tart flavor that pairs perfectly with the creamy layers!
Print
Cherry Yum Yum recipe
- Total Time: 4 hours 20 minutes
- Yield: 12 servings 1x
- Diet: Vegetarian
Description
Cherry Yum Yum is a delightful no-bake dessert that combines creamy layers with a sweet cherry topping, perfect for any occasion.
Ingredients
- 8 oz cream cheese, softened
- 1 cup powdered sugar
- 1 cup whipped topping
- 1 can (21 oz) cherry pie filling
- 1 ½ cups graham cracker crumbs
- ½ cup unsalted butter, melted
Instructions
- Prepare the crust by combining graham cracker crumbs and melted butter, then press into a 9×13 inch baking dish.
- Make the cream cheese layer by beating softened cream cheese and powdered sugar until smooth, then fold in whipped topping.
- Prepare the cherry topping by gently stirring the cherry pie filling.
- Assemble the dessert by spreading the cream cheese mixture over the crust and topping it with cherry pie filling.
- Chill the dessert for at least 4 hours or overnight before serving.
Latest Amazon Finds


Notes
- Choose high-quality cherry pie filling for better flavor.
- Store leftovers tightly covered in the refrigerator for up to 3 days.
- For gluten-free options, substitute graham cracker crumbs with gluten-free alternatives.
- Prep Time: 20 minutes
- Cook Time: 0 minutes
- Category: Dessert
- Method: No-Bake
- Cuisine: American
Nutrition
- Serving Size: 1 square
- Calories: 250
- Sugar: 20g
- Sodium: 150mg
- Fat: 12g
- Saturated Fat: 7g
- Unsaturated Fat: 3g
- Trans Fat: 0g
- Carbohydrates: 32g
- Fiber: 1g
- Protein: 3g
- Cholesterol: 30mg
Keywords: Cherry Yum Yum, dessert, no-bake, cherry pie filling, cream cheese