

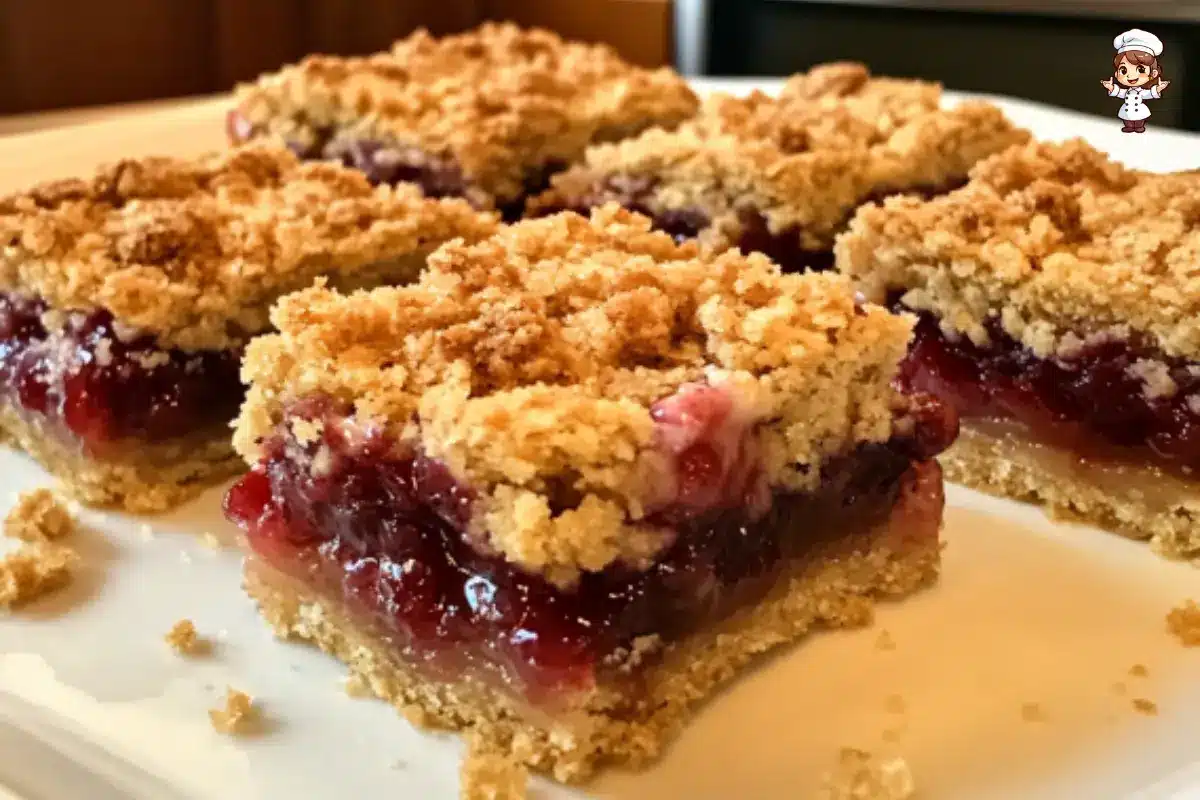
When you’re craving the sweet-tart magic of cherry pie but don’t have time (or patience) to fuss with rolling out crusts and crimping edges, there’s a deliciously simple solution—Cherry Pie Bars. These chewy, crumbly, fruit-packed treats capture everything you love about classic cherry pie, minus the hassle. Perfect for potlucks, picnics, or cozy evenings at home, this recipe transforms humble ingredients into bakery-worthy bars you’ll want to make again and again.
In this guide, you’ll learn exactly what cherry pie bars are, how to make them from scratch (no canned filling here!), and how to tweak the recipe to suit every season or dietary need. We’ll also share expert baking tips, storage tricks, irresistible variations, and answers to all your burning cherry bar questions.
Ingredients That Make Cherry Pie Bars Irresistible
Choosing the Right Cherries: Sour vs. Sweet vs. Canned
The heart and soul of any cherry pie bars recipe is—you guessed it—the cherries. But not all cherries are created equal. For that quintessential cherry pie flavor, sour cherries are your best bet. They pack a tangy punch that perfectly balances the sweetness of the sugar and crumble. Plus, they cook down into that thick, jammy filling that makes each bite unforgettable.
Can’t find sour cherries? Don’t worry! You can substitute with dark sweet cherries, but be sure to cut the sugar a bit and add a splash more lemon juice to even things out. Just avoid canned cherry pie filling—it’s overly sweet and lacks the bright, natural flavor of real fruit. Trust us, using frozen or fresh cherries makes a world of difference.
Key Ingredients in the Crust and Crumble Topping
One of the best parts about cherry pie bars? The buttery crust and crumbly topping are made from the same mixture. That means less mess, fewer dishes, and double the flavor.
Here’s what you’ll need:
- All-purpose flour for structure
- Old-fashioned oats to add texture and heartiness
- Brown sugar, which brings moisture and a subtle molasses note
- Melted butter (yep, no need for a mixer!)
- A touch of lemon zest for brightness and vanilla for warmth
Toss in a little baking powder and salt, and you’ve got a dough that’s crisp, golden, and loaded with flavor. It’s the perfect base—and top—for those juicy cherry layers.
Flavor-Enhancing Extras: Almond Extract, Lemon Zest & More
Don’t skip the almond extract. Seriously. It pairs with cherries like peanut butter does with jelly. Just a tiny splash gives these bars a bakery-level finish. The same goes for lemon juice and zest—they brighten the filling and make the cherries sing.
With the right ingredients, these cherry pie bars become more than just a dessert—they’re a memory in the making.


Step-by-Step Cherry Pie Bars Recipe
Making the 2-in-1 Crust and Crumb Topping
Ready to get baking? Start with the dough that does double duty. In just one bowl—yes, really—you’ll mix flour, oats, brown sugar, baking powder, lemon zest, and salt. Pour in melted butter and vanilla, then stir until it looks like wet sand. That’s your magic mixture.
Press two-thirds of it into a lined 9-inch baking pan. Don’t worry about perfection; just get it even. Pop it into the oven for a quick 10-minute bake. That short pre-bake keeps the crust firm and prevents sogginess once you add the filling.
The remaining third of the dough? That’s your crumble topping. Add a couple tablespoons of oats for extra texture and set it aside for now.
Preparing a Jammy Cherry Pie Filling from Scratch
Now for the cherry pie bar showstopper—the filling. In a saucepan, toss your frozen sour cherries with sugar and lemon juice. Let them heat gently until they release their juices. This step is key—it brings out that deep, fruity flavor.
To thicken things up, whisk some of that cherry juice into cornstarch. Stir this slurry back into the pot and let it bubble until thick and glossy. Finally, turn off the heat and add a splash of almond extract. That’s your cherry magic right there.
Assembly and Baking Tips for Perfect Bars
Spread the warm filling over your slightly cooled crust. It’ll be thick, shiny, and smell amazing. Crumble the reserved topping evenly over the cherries, pressing lightly so it sticks.
Bake for 40–50 minutes, or until the top is golden and the filling peeks through in shiny bubbles. Let the bars cool completely—yes, this part is tough, but slicing them while hot leads to a gooey mess.
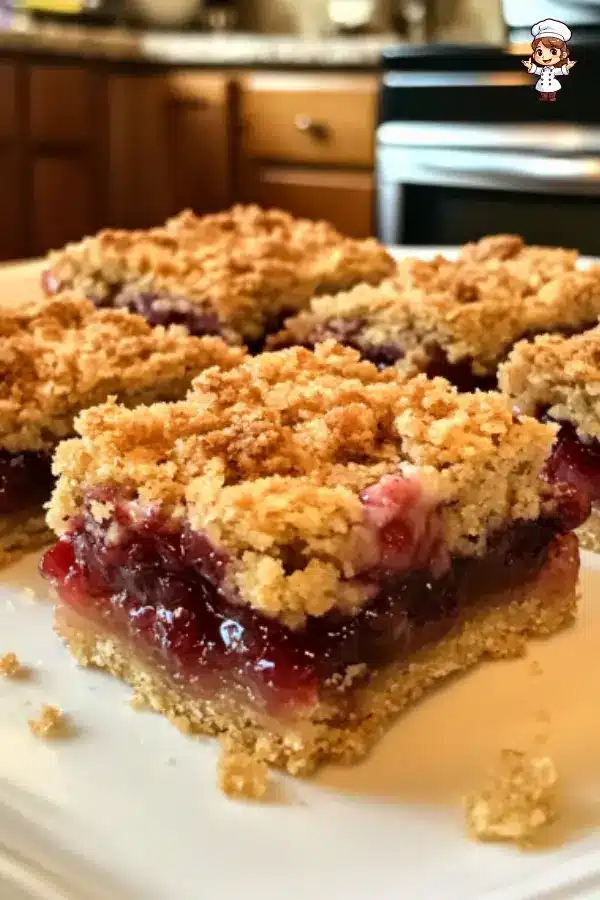
Once cool, cut into squares and admire your creation. These cherry pie bars are rustic, charming, and taste like summer on a plate.
Baking Tips, Tricks & Common Mistakes
How to Avoid Soggy Bottoms and Dry Toppings
There’s nothing sadder than biting into cherry pie bars only to find a soggy crust or crumb topping as dry as sand. But with a few simple tricks, you can avoid both.
First, always pre-bake the crust. Even just 10 minutes in the oven gives it a head start and ensures it won’t turn mushy once you add the cherry filling. Don’t skip this—it makes a big difference!
Second, let your cherry filling thicken properly before spreading it onto the base. If it’s still watery, it’ll seep into the crust and ruin the texture. A well-cooked, jammy filling keeps things tidy and tasty.
As for the topping, don’t overbake. Once it turns golden brown and the cherries bubble around the edges, it’s time to take it out. Overdoing it dries out the crumble and steals that melt-in-your-mouth magic.
Cooling, Slicing, and Serving Like a Pro
Once your cherry pie bars come out of the oven, patience is key. Let them cool completely in the pan. Cutting too early results in a messy situation—bars that fall apart and lose their beautiful layers.
For clean cuts, use a sharp knife and wipe it between slices. If you like your bars chilled, pop them in the fridge for an hour before cutting.
Looking for another fruity dessert bar to master? Try this apple pie bars recipe—it’s just as delicious and easy to make!
Variations and Substitutions for Every Season
Berry Good! Try Blueberry, Raspberry, or Mixed Berries
While cherry pie bars are a crowd favorite, you don’t have to stop there. This flexible recipe works beautifully with other fruits too. Try swapping cherries for blueberries, raspberries, or even blackberries. These berries give the same juicy, jam-like effect and pair perfectly with the oat crumble topping.
In fact, mixed berry bars are a fun twist—especially in summer when fresh berries are everywhere. Just remember to adjust the sugar depending on the sweetness of your fruit. Taste as you go!
Vegan or Gluten-Free Options That Actually Work
Want to make your cherry pie bars more inclusive? You totally can. For a vegan version, replace butter with plant-based margarine or coconut oil. Make sure your sugar is certified vegan too.
Gluten-free? Swap the flour with a reliable gluten-free blend and use certified GF oats. Keep an eye on texture—the crumble should still hold together and bake golden.
These simple changes don’t compromise flavor, so everyone at the table can enjoy. Whether you’re baking for dietary needs or just exploring new flavors, these bars are endlessly adaptable.
For another delightful cherry-inspired dessert, check out this easy cherry cheesecake recipe—it’s creamy, dreamy, and perfect for special occasions.
Storage, Freezing & Make-Ahead Instructions
How to Store Cherry Pie Bars Without Losing Flavor
Once your cherry pie bars are fully cooled and sliced, storage is a breeze. To keep them fresh, place them in an airtight container. They’ll stay soft and flavorful at room temperature for up to two days. But if your kitchen runs warm—or you want to stretch their shelf life—pop them in the fridge.
Refrigerated bars last about a week. Just let them come to room temp before serving, so the crumble softens and the flavors shine.
Freezer-Friendly Tips for Batch Baking
Got leftovers or planning ahead? These bars freeze like champs. Wrap each square in parchment paper, then store them in a freezer-safe bag or container. When you’re ready to enjoy, let them thaw overnight in the fridge—or for a few hours on the counter.
They hold up beautifully for up to three months. The crumble stays crisp, and the cherry filling remains thick and rich.
If you love freezer-friendly desserts, consider trying this no-bake cherry cheesecake—it’s another cherry-filled favorite that stores well for days!
Pairing Ideas: What to Serve with Cherry Pie Bars
Perfect Drinks & Ice Cream Flavors for Cherry Desserts
Let’s talk pairings. Cherry pie bars are already amazing, but when you serve them with the right extras? Pure bliss.
Try a scoop of vanilla or almond ice cream on the side—it melts right into those warm, crumbly layers. If you’re feeling fancy, a drizzle of chocolate or cherry sauce takes it up a notch.
As for drinks, these bars pair well with cold milk, black coffee, or even a sparkling rosé. Want to go all out? Serve them with cherry-infused cocktails at your next gathering.
Serving Cherry Pie Bars at Parties & Potlucks
Because they’re easy to slice and transport, cherry pie bars are ideal for parties, picnics, and potlucks. Arrange them on a platter, stack them in a tin, or even wrap them as sweet little gifts.
They’re the kind of dessert that disappears fast—so maybe make a double batch!
Frequently Asked Questions (FAQ)
Can I Use Canned Cherry Pie Filling Instead?
Technically, yes—but homemade filling truly makes cherry pie bars shine. Canned filling tends to be overly sweet and lacks the fresh, tangy depth you get from sour cherries cooked from scratch. If you’re short on time, though, it can be a quick alternative. Just reduce the sugar in the crust slightly to avoid a sugar overload.
Why Are My Bars Falling Apart When I Slice Them?
Chances are, you’re slicing them too soon. These bars need to cool completely—yes, we know it’s hard to wait! If they’re even a little warm, the filling won’t be set, and the crumb won’t hold. For super clean cuts, refrigerate them for an hour and wipe your knife between each slice.
Can I Use a 9×13 Pan for This Recipe?
You can, but you’ll need to double the ingredients and slightly adjust the bake time. Expect the crust to take a few more minutes to pre-bake, and the full pan may need about 55–60 minutes in the oven.
What’s the Best Way to Cut Clean Squares?
Use a sharp, non-serrated knife. Wipe it clean after every cut—this keeps those cherry layers neat and gorgeous. If your bars are chilled, let them sit for 5–10 minutes before slicing.
Is Almond Extract Necessary for Cherry Pie Bars?
Nope, it’s optional—but it adds a lovely bakery-style flavor. Almond and cherry are besties in the dessert world. If you don’t have it, vanilla works too, or skip it entirely and let the fruit do the talking.
Print
Cherry Pie Bars
- Total Time: 1 hour 10 minutes
- Yield: 16 bars 1x
- Diet: Vegetarian
Description
These cherry pie bars feature a buttery oat crust, a jammy homemade cherry filling, and a sweet almond drizzle. Easier than traditional pie, this recipe is perfect for gatherings, make-ahead desserts, or a cozy treat at home.
Ingredients
- 1 and 1/2 cups (188g) all-purpose flour
- 1 cup (85g) + 2 Tablespoons (11g) old-fashioned rolled oats
- 1/2 cup (100g) packed light or dark brown sugar
- 1 teaspoon baking powder
- 1 teaspoon lemon zest
- 1/8 teaspoon salt
- 10 Tablespoons (142g) unsalted butter, melted
- 1 teaspoon pure vanilla extract
- 1 and 1/2 Tablespoons (11g) cornstarch
- 3 and 1/2 cups (525g) frozen sour cherries (do not thaw)
- 1/2 cup (100g) granulated sugar
- 1 teaspoon fresh lemon juice
- 1/4 teaspoon almond extract
- 1 cup (120g) confectioners’ sugar (optional icing)
- 2 Tablespoons (30ml) milk (optional icing)
- 1/4 teaspoon almond extract (optional icing)
Instructions
- Preheat oven to 350°F (177°C). Line a 9-inch square baking pan with parchment paper.
- In a bowl, mix flour, 1 cup oats, brown sugar, baking powder, lemon zest, and salt.
- Add melted butter and vanilla; stir until crumbly and moist.
- Press two-thirds of the mixture into the pan as crust and bake for 10 minutes. Let cool slightly.
- In a saucepan over medium heat, cook cherries, sugar, and lemon juice until juices are released (4–6 mins).
- Whisk some hot cherry juice with cornstarch, then return to saucepan. Cook until thickened (about 10 mins). Stir in almond extract.
- Spread the cherry filling over the baked crust.
- Add remaining oats to the leftover crumb mixture, sprinkle over the cherry filling, and lightly press.
- Bake for 40–50 minutes until golden and bubbly.
- Cool completely in the pan. Refrigerate to speed up cooling if desired.
- Optional: Mix confectioners’ sugar, milk, and almond extract for icing. Drizzle over cooled bars.
- Lift bars from the pan, slice, and serve.
Latest Amazon Finds


Notes
- Cool completely before slicing for neat bars.
- Use sour cherries for the most authentic flavor.
- Freeze leftover bars for up to 3 months.
- Optional icing adds sweetness and almond flavor.
- Substitute dark sweet cherries if sour cherries aren’t available, adjusting sugar and lemon juice.
- Prep Time: 20 minutes
- Cook Time: 50 minutes
- Category: Dessert
- Method: Baking
- Cuisine: American
Nutrition
- Serving Size: 1 bar
- Calories: 210
- Sugar: 15g
- Sodium: 45mg
- Fat: 9g
- Saturated Fat: 5g
- Unsaturated Fat: 3g
- Trans Fat: 0g
- Carbohydrates: 30g
- Fiber: 2g
- Protein: 2g
- Cholesterol: 20mg
Keywords: cherry pie bars, cherry dessert bars, oat crumble bars, homemade cherry filling, easy cherry bars