

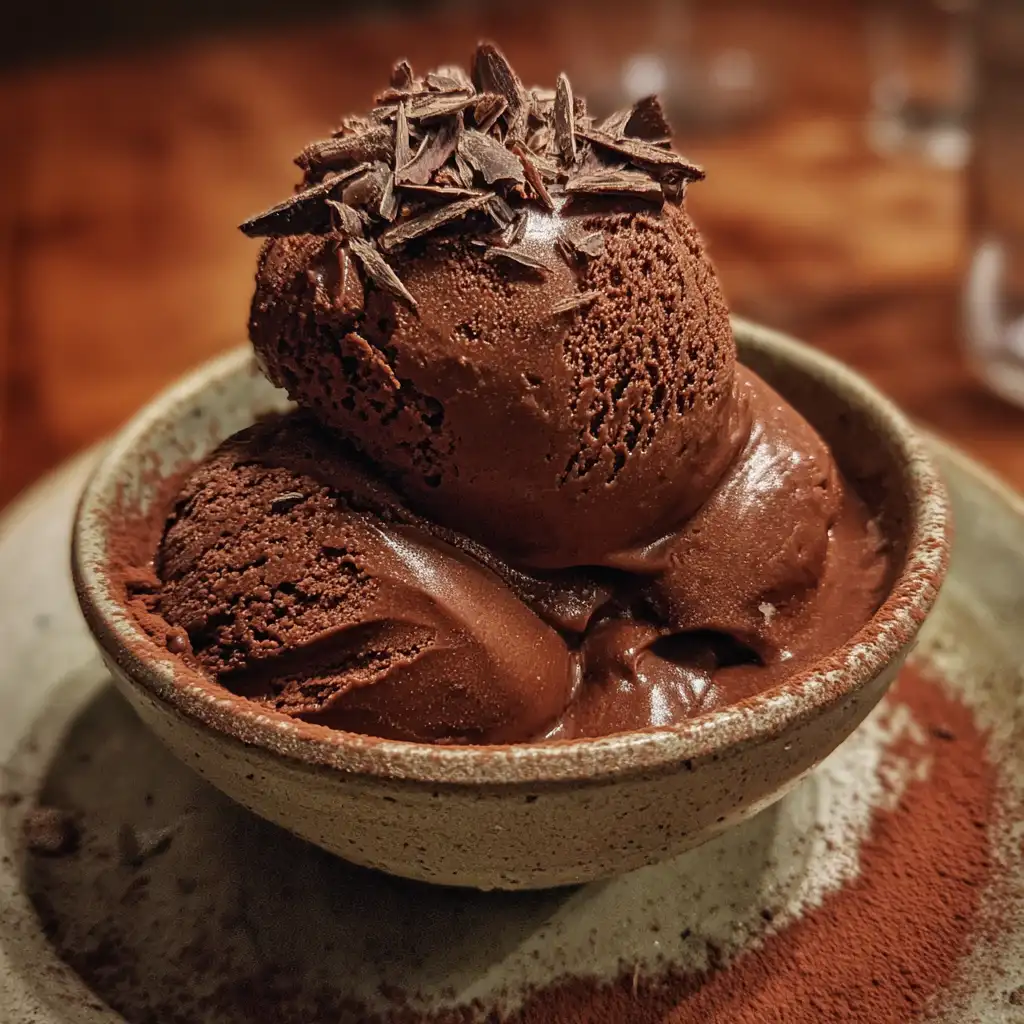
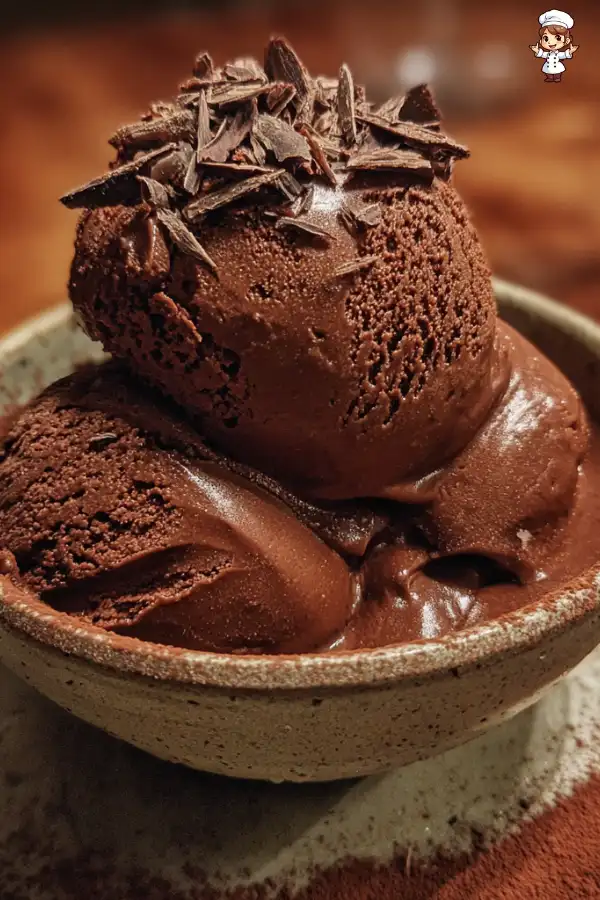
There’s something truly special about homemade chocolate ice cream. It’s not just a dessert; it’s a delightful experience that brings joy to every scoop. Making your own ice cream allows you to control the ingredients, ensuring a rich and creamy treat that’s free from artificial additives. Plus, the satisfaction of creating something delicious from scratch is hard to beat!
Why Make Homemade Chocolate Ice Cream?
First and foremost, homemade chocolate ice cream is incredibly customizable. You can adjust the sweetness, richness, and even add your favorite mix-ins. Want a hint of coffee? Go for it! Prefer a nutty crunch? Toss in some chopped nuts. The possibilities are endless, and that’s what makes it so fun.
Moreover, making ice cream at home can be a wonderful activity to share with family and friends. Imagine gathering everyone in the kitchen, measuring ingredients, and churning the mixture together. It’s a great way to bond and create lasting memories. Plus, who doesn’t love a delicious reward at the end?
Another reason to whip up this homemade chocolate ice cream recipe is the quality of ingredients. You can choose high-quality cocoa powder and chocolate, ensuring a rich flavor that store-bought options often lack. This means you can enjoy a decadent dessert that’s not only tasty but also made with love.
Finally, making your own ice cream can be a healthier option. You can control the sugar content and use natural ingredients, making it a guilt-free indulgence. So, whether you’re treating yourself or hosting a gathering, this homemade chocolate ice cream recipe is sure to impress!
Ingredients for Homemade Chocolate Ice Cream Recipe
To create the perfect homemade chocolate ice cream, you’ll need a few simple yet essential ingredients. Each component plays a vital role in achieving that creamy, rich texture and delightful chocolate flavor. Here’s what you’ll need:
- 2 cups heavy cream (480 ml): This is the base of your ice cream, providing a rich and creamy texture.
- 1 cup whole milk (240 ml): Whole milk adds creaminess and balances the richness of the heavy cream.
- 3/4 cup granulated sugar (150 g): Sugar sweetens the ice cream and helps create a smooth texture.
- 1 cup unsweetened cocoa powder (100 g): This is the star ingredient, giving your ice cream that deep chocolate flavor.
- 1 teaspoon pure vanilla extract: Vanilla enhances the overall flavor, making it more delicious.
- 1/2 cup semi-sweet chocolate chips (90 g): These add extra chocolatey goodness and a delightful texture.
- A pinch of salt: Salt balances the sweetness and enhances the chocolate flavor.
Gathering these ingredients is the first step in your ice cream-making adventure. Make sure to use high-quality cocoa powder and chocolate chips for the best results. The better the ingredients, the more delicious your homemade chocolate ice cream will be!


Step-by-Step Preparation of Homemade Chocolate Ice Cream Recipe
Step 1: Gather Your Ingredients
Before you start making your homemade chocolate ice cream, it’s essential to gather all your ingredients. This makes the process smoother and more enjoyable. Make sure you have everything listed in the ingredients section ready to go. Having your ingredients measured and prepared will save you time and help you focus on creating that delicious treat!
Step 2: Prepare the Base for Homemade Chocolate Ice Cream Recipe
Now that you have your ingredients, it’s time to prepare the base. In a medium mixing bowl, whisk together the granulated sugar, unsweetened cocoa powder, and a pinch of salt. This step is crucial as it ensures that the dry ingredients are well combined. Once mixed, set this bowl aside.
Next, take a large bowl and combine the heavy cream, whole milk, and pure vanilla extract. Stir gently to mix these wet ingredients. This creamy mixture will form the base of your ice cream, so make sure it’s well blended. Once both mixtures are ready, you can move on to the next step!
Step 3: Mix in the Chocolate
It’s time to add that rich chocolate flavor! Gradually add the dry mixture to the wet mixture. Whisk continuously as you pour in the dry ingredients. This helps dissolve the sugar and cocoa powder, creating a smooth and creamy mixture. Once everything is well combined, it should have a rich, deep brown color.
Now, let’s melt the semi-sweet chocolate chips. Place them in a microwave-safe bowl and heat them in the microwave in 20-second intervals. Stir in between until the chocolate is melted and smooth. Allow it to cool slightly before adding it to your ice cream mixture. Pour the melted chocolate into the bowl and whisk until fully combined. Your mixture should now be a luscious chocolate delight!
Step 4: Churn the Mixture
After mixing in the chocolate, it’s time to chill the mixture. Cover the bowl with plastic wrap and refrigerate it for at least 2 hours. This step is important as it ensures your ice cream will have the right texture. Once chilled, pour the mixture into your ice cream maker. Churn according to the manufacturer’s instructions, usually about 20-25 minutes. You’ll know it’s ready when it reaches a soft-serve consistency.
Step 5: Freeze the Ice Cream
Now comes the final step before you can enjoy your homemade chocolate ice cream! Transfer the churned ice cream into an airtight container. Use a spatula to smooth the top and cover it with a lid. Place the container in the freezer for at least 4 hours, or until it’s firm. This step allows the ice cream to set properly, giving you that perfect scoop when you’re ready to serve.
Once frozen, your homemade chocolate ice cream is ready to be enjoyed! Scoop it into bowls and savor the rich, creamy goodness you’ve created. Don’t forget to add your favorite toppings for an extra special treat!
Tips for Perfecting Your Homemade Chocolate Ice Cream Recipe
Choosing the Right Chocolate
When it comes to making the best homemade chocolate ice cream, the type of chocolate you choose can make a big difference. Opt for high-quality semi-sweet chocolate chips for a rich flavor. Brands that use real cocoa butter will give your ice cream a smoother texture and a more intense chocolate taste.
If you want to experiment, consider using dark chocolate for a deeper flavor. You can also try milk chocolate for a sweeter, creamier result. Just remember, the chocolate you select will influence the overall taste of your ice cream. So, choose wisely!
Additionally, if you’re feeling adventurous, you can mix different types of chocolate. Combining dark and milk chocolate can create a unique flavor profile that’s sure to impress your family and friends. The key is to find a balance that suits your taste buds!
Storage Tips for Homemade Chocolate Ice Cream Recipe
Storing your homemade chocolate ice cream properly is essential to maintain its creamy texture and delicious flavor. After freezing, make sure to keep the ice cream in an airtight container. This helps prevent ice crystals from forming, which can ruin the smoothness of your treat.
For best results, place a piece of parchment paper directly on the surface of the ice cream before sealing the container. This extra layer can help keep air out and maintain the ice cream’s quality. When stored correctly, your homemade chocolate ice cream can last for up to two weeks in the freezer.
However, it’s best enjoyed fresh! So, try to finish it within a week for the best taste and texture. If you notice any changes in flavor or texture, it might be time to whip up a new batch. After all, nothing beats the joy of freshly made homemade chocolate ice cream!
Variations on the Homemade Chocolate Ice Cream Recipe
Adding Mix-Ins to Your Homemade Chocolate Ice Cream Recipe
One of the best parts about making homemade chocolate ice cream is the chance to get creative with mix-ins! You can easily customize your ice cream to suit your taste. Here are some fun ideas to consider:
- Chopped Nuts: Add a crunchy texture by mixing in chopped almonds, walnuts, or pecans. They pair wonderfully with chocolate!
- Chocolate Chips: For an extra chocolatey treat, toss in some mini chocolate chips. They’ll add delightful bursts of flavor.
- Fruits: Fresh fruits like raspberries or strawberries can add a refreshing twist. Just chop them up and fold them in gently.
- Cookie Crumbles: Crushed cookies, like Oreos or chocolate chip cookies, can create a fun cookie dough effect in your ice cream.
- Swirls of Sauce: Drizzle in some caramel or fudge sauce right before freezing. This creates beautiful swirls and adds extra sweetness.
Feel free to mix and match these ideas! Just remember to keep the total amount of mix-ins to about 1 to 1.5 cups. This way, your ice cream remains creamy and smooth. Enjoy experimenting with different flavors and textures!
Dairy-Free Options for Homemade Chocolate Ice Cream Recipe
If you’re looking for a dairy-free version of this delicious treat, you’re in luck! Making homemade chocolate ice cream without dairy is simple and just as tasty. Here’s how to do it:
- Coconut Milk: Use full-fat coconut milk instead of heavy cream and whole milk. It gives a rich, creamy texture and a hint of coconut flavor.
- Almond Milk: Unsweetened almond milk can be a lighter option. Combine it with a bit of coconut cream for creaminess.
- Cashew Milk: This nut milk is naturally creamy and works well in ice cream recipes. It’s a great alternative for a rich flavor.
- Sweeteners: You can use maple syrup or agave nectar instead of granulated sugar for a natural sweetener.
Follow the same steps as the original recipe, substituting the dairy ingredients with your chosen alternatives. You’ll end up with a delightful dairy-free chocolate ice cream that everyone can enjoy!
FAQs
How long does it take to make homemade chocolate ice cream?
Making homemade chocolate ice cream is a delightful process that typically takes about 6 to 8 hours from start to finish. This includes preparation time, chilling the mixture, churning, and freezing. The actual hands-on time is much shorter, around 30 minutes. Most of the time is spent waiting for the mixture to chill and freeze. So, plan ahead and enjoy the anticipation of your delicious treat!
Can I use cocoa powder instead of chocolate in the homemade chocolate ice cream recipe?
Absolutely! In fact, the recipe already includes unsweetened cocoa powder as a key ingredient. Cocoa powder provides that rich chocolate flavor without the added fat of chocolate bars. If you prefer a more intense chocolate taste, you can increase the amount of cocoa powder slightly. Just remember to balance it with the right amount of sugar to keep your ice cream sweet and delicious!
What is the best way to store homemade chocolate ice cream?
To keep your homemade chocolate ice cream fresh and creamy, store it in an airtight container. This prevents ice crystals from forming, which can affect the texture. For added protection, place a piece of parchment paper directly on the surface of the ice cream before sealing the container. This helps keep air out. When stored properly, your ice cream can last up to two weeks in the freezer, but it’s best enjoyed within a week for optimal flavor and texture!
How can I make my homemade chocolate ice cream creamier?
To achieve a creamier texture in your homemade chocolate ice cream, consider a few tips. First, use high-fat dairy products like heavy cream and whole milk, as they contribute to a richer mouthfeel. Additionally, make sure to chill your mixture thoroughly before churning. This helps create a smoother texture. Lastly, churning the mixture in an ice cream maker until it reaches a soft-serve consistency is crucial. The more air you incorporate during churning, the creamier your ice cream will be!
Print
Homemade Chocolate Ice Cream Recipe
- Total Time: 6-8 hours
- Yield: Approximately 1 quart 1x
- Diet: Vegetarian
Description
A delightful homemade chocolate ice cream recipe that is rich, creamy, and customizable with various mix-ins.
Ingredients
- 2 cups heavy cream (480 ml)
- 1 cup whole milk (240 ml)
- 3/4 cup granulated sugar (150 g)
- 1 cup unsweetened cocoa powder (100 g)
- 1 teaspoon pure vanilla extract
- 1/2 cup semi-sweet chocolate chips (90 g)
- A pinch of salt
Instructions
- Gather your ingredients.
- Prepare the base by whisking together sugar, cocoa powder, and salt in a medium bowl, then combine heavy cream, milk, and vanilla in a large bowl.
- Mix the dry ingredients into the wet ingredients and whisk until smooth. Melt the chocolate chips and add to the mixture.
- Chill the mixture in the refrigerator for at least 2 hours, then churn in an ice cream maker according to the manufacturer’s instructions.
- Transfer the churned ice cream to an airtight container and freeze for at least 4 hours before serving.
Latest Amazon Finds


Notes
- Use high-quality cocoa powder and chocolate chips for the best flavor.
- Store in an airtight container to prevent ice crystals.
- For dairy-free options, substitute coconut milk or almond milk.
- Prep Time: 30 minutes
- Cook Time: 0 minutes
- Category: Dessert
- Method: Churning
- Cuisine: American
Nutrition
- Serving Size: 1/2 cup
- Calories: 250
- Sugar: 20g
- Sodium: 50mg
- Fat: 15g
- Saturated Fat: 9g
- Unsaturated Fat: 4g
- Trans Fat: 0g
- Carbohydrates: 30g
- Fiber: 2g
- Protein: 3g
- Cholesterol: 50mg
Keywords: chocolate ice cream, homemade ice cream, dessert recipe