


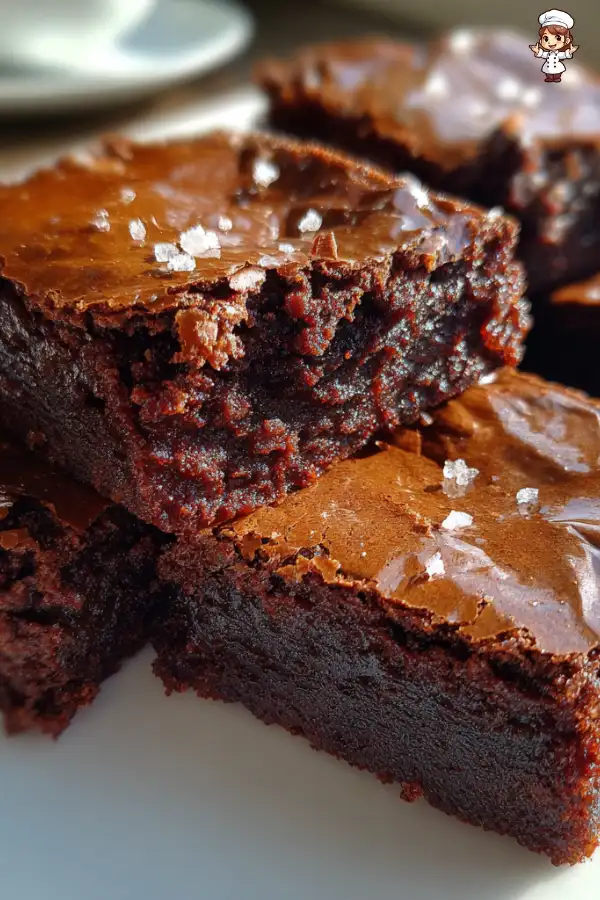
Miso brownies are not your typical dessert. They combine the rich, chocolatey goodness of traditional brownies with the umami flavor of miso. This unique ingredient adds a depth of flavor that surprises and delights the taste buds. The sweetness of the sugars balances perfectly with the savory notes of miso, creating a harmonious blend. Each bite offers a chewy texture and a hint of saltiness, making these brownies truly special.
Moreover, miso is a fermented soybean paste that is packed with nutrients. It contains probiotics, which are great for gut health. So, indulging in these brownies can be a little treat for your body as well! The addition of miso not only enhances the flavor but also elevates the nutritional profile of this classic dessert.
The Rise of Miso in Desserts
In recent years, miso has gained popularity in the world of desserts. Chefs and home bakers alike are experimenting with this versatile ingredient. It’s no longer just for savory dishes like soups and marinades. Miso adds a unique twist to cookies, cakes, and even ice creams. The trend reflects a growing interest in fusion cuisine, where traditional flavors meet modern techniques.
People are becoming more adventurous with their taste preferences. They seek out new experiences, and miso brownies fit the bill perfectly. The combination of sweet and savory is appealing to many. Plus, the use of miso in desserts showcases creativity in the kitchen. It encourages bakers to think outside the box and try new flavors.
So, if you’re looking to impress your friends or family, these miso brownies are a fantastic choice. They’re not just delicious; they’re also a conversation starter. Get ready to share the joy of this unique dessert!
Ingredients for Miso Brownies Recipe
Essential Ingredients
To create the perfect batch of miso brownies, you’ll need a few essential ingredients. These components work together to provide the rich flavor and delightful texture that make these brownies so special. Here’s what you’ll need:
- Granulated Sugar: 1 cup (200g) adds sweetness.
- Brown Sugar: 1/2 cup (100g) gives moisture and a hint of caramel flavor.
- Unsalted Butter: 1/2 cup (115g), melted, for richness.
- Eggs: 2 large eggs help bind the ingredients.
- Vanilla Extract: 1 teaspoon enhances the overall flavor.
- White Miso Paste: 1/4 cup (60ml) is the star ingredient, adding umami.
- All-Purpose Flour: 1/2 cup (65g) provides structure.
- Cocoa Powder: 1/3 cup (40g) gives that rich chocolate taste.
- Baking Powder: 1/4 teaspoon helps the brownies rise.
- Salt: 1/4 teaspoon balances the sweetness.
- Semi-Sweet Chocolate Chips: 1/2 cup (90g) for extra chocolatey goodness.
- Sea Salt Flakes: for topping, adding a delightful crunch.
Optional Ingredients for Extra Flavor
If you want to take your miso brownies to the next level, consider adding some optional ingredients. These can enhance the flavor and texture, making your brownies even more delightful:
- Dark Chocolate Chips: Swap semi-sweet for dark chocolate for a richer taste.
- Nuts: Chopped walnuts or pecans can add a nice crunch.
- Espresso Powder: A teaspoon can intensify the chocolate flavor.
- Mint Extract: A few drops can give a refreshing twist.
- Caramel Swirls: Drizzle some caramel sauce into the batter for a sweet surprise.
Feel free to mix and match these optional ingredients to create your own signature miso brownies. The possibilities are endless, and experimenting can lead to delicious discoveries!


Preparation of Miso Brownies Recipe
Step-by-Step Instructions
Step 1: Preheat the Oven
First things first, preheat your oven to 350°F (175°C). This step is crucial for ensuring your brownies bake evenly. While the oven heats up, you can prepare your baking pan.
Step 2: Prepare the Baking Pan
Next, grease an 8×8-inch (20×20 cm) baking pan. Alternatively, you can line it with parchment paper. This makes it easier to remove the brownies once they’re baked. A well-prepared pan is key to achieving that perfect brownie texture!
Step 3: Mix the Dry Ingredients
In a separate bowl, sift together the all-purpose flour, cocoa powder, baking powder, and salt. Sifting helps aerate the dry ingredients, ensuring they mix well. This step is important for achieving a light and fluffy brownie.
Step 4: Combine the Wet Ingredients
In a large mixing bowl, combine the granulated sugar, brown sugar, and melted butter. Whisk them together until well combined. Then, add the eggs, vanilla extract, and white miso paste. Whisk until the mixture is smooth and creamy. This is where the magic begins!
Step 5: Blend Wet and Dry Mixtures
Now, it’s time to combine the wet and dry ingredients. Gradually add the dry mixture to the wet mixture. Stir gently until just combined. Be careful not to overmix, as this can lead to dense brownies. Finally, fold in the semi-sweet chocolate chips for that extra chocolatey goodness.
Step 6: Pour into the Pan and Bake
Pour the brownie batter into the prepared baking pan. Spread it evenly to ensure uniform baking. Bake in the preheated oven for about 25-30 minutes. To check for doneness, insert a toothpick into the center. It should come out with a few moist crumbs, not wet batter.
Step 7: Cool and Serve
Once baked, remove the brownies from the oven. Let them cool in the pan for about 10-15 minutes. Then, transfer them to a wire rack to cool completely. Once cooled, cut them into neat squares. Before serving, sprinkle a light pinch of sea salt flakes over the top. This adds a delightful flavor contrast to the sweetness!
Tips for Perfecting Your Miso Brownies Recipe
Common Mistakes to Avoid
Making miso brownies can be a fun and rewarding experience. However, there are a few common mistakes that can affect the final result. Here are some tips to help you avoid them:
- Overmixing the Batter: It’s tempting to mix until everything is perfectly smooth. However, overmixing can lead to dense brownies. Mix just until combined for a lighter texture.
- Not Measuring Ingredients Accurately: Baking is a science. Use a kitchen scale for precise measurements, especially for flour and sugar. This ensures consistent results every time.
- Skipping the Cooling Time: Patience is key! Allow the brownies to cool completely before cutting. This helps them set and makes slicing easier.
- Using Cold Ingredients: Make sure your eggs and butter are at room temperature. This helps them blend better, resulting in a smoother batter.
- Not Checking for Doneness: Every oven is different. Start checking your brownies a few minutes before the suggested baking time. A toothpick should come out with a few moist crumbs.
Storage Tips for Miso Brownies
Once you’ve baked your delicious miso brownies, you’ll want to keep them fresh. Here are some storage tips to help maintain their flavor and texture:
- Room Temperature: Store brownies in an airtight container at room temperature for up to 3 days. This keeps them soft and chewy.
- Refrigeration: If you want to keep them longer, place the brownies in the refrigerator. They can last up to a week this way. Just remember to let them come to room temperature before serving for the best taste.
- Freezing: For longer storage, freeze the brownies. Wrap them tightly in plastic wrap and then in aluminum foil. They can last for up to 3 months in the freezer. Thaw them in the fridge overnight before enjoying.
- Reheating: If you prefer warm brownies, you can reheat them in the microwave for a few seconds. This will bring back their gooey texture!
By following these tips, you can ensure that your miso brownies remain delicious and enjoyable for days to come!
Variation of Miso Brownies Recipe
Gluten-Free Miso Brownies
If you’re looking for a gluten-free option, you can easily adapt the miso brownies recipe. Simply replace the all-purpose flour with a gluten-free flour blend. Many brands offer blends that work well in baking. Here’s how to make gluten-free miso brownies:
- Choose a Gluten-Free Flour Blend: Look for a blend that includes xanthan gum, as this helps mimic the texture of regular flour.
- Follow the Same Instructions: Use the same steps as the original recipe. Just swap the flour, and you’re good to go!
- Check for Cross-Contamination: Ensure all your ingredients are certified gluten-free to avoid any cross-contamination.
These gluten-free miso brownies will still be rich and delicious, with that unique umami flavor shining through. Enjoy them without worry!
Vegan Miso Brownies
For those following a vegan diet, you can also make miso brownies without any animal products. Here’s how to create vegan miso brownies:
- Replace Eggs: Use flax eggs instead of regular eggs. To make one flax egg, mix 1 tablespoon of ground flaxseed with 2.5 tablespoons of water. Let it sit for a few minutes until it thickens.
- Use Vegan Butter: Substitute the unsalted butter with a plant-based butter or coconut oil. This keeps the richness while making it vegan-friendly.
- Check Chocolate Chips: Ensure the semi-sweet chocolate chips are dairy-free. Many brands offer vegan chocolate chips that work perfectly.
These vegan miso brownies will be just as fudgy and flavorful as the original recipe. They’re a great way to enjoy a classic dessert while sticking to your dietary preferences!
FAQs About Miso Brownies Recipe
Can I use different types of miso in the Miso Brownies Recipe?
Absolutely! You can experiment with different types of miso to find your favorite flavor. White miso is the most common choice for its mild taste. However, you can also use yellow or even red miso for a stronger flavor. Just keep in mind that darker miso varieties may add a more pronounced umami taste. Adjust the amount slightly if you prefer a subtler flavor. Each type of miso will give your brownies a unique twist!
How do I know when the Miso Brownies are done baking?
Knowing when your miso brownies are done is key to achieving that perfect texture. Start checking them around the 25-minute mark. Insert a toothpick into the center of the brownies. If it comes out with a few moist crumbs, they’re ready! If it comes out with wet batter, give them a few more minutes. Remember, they will continue to cook slightly after you take them out of the oven, so don’t overbake!
What can I serve with Miso Brownies?
Miso brownies are delicious on their own, but you can elevate your dessert experience by pairing them with various accompaniments. A scoop of vanilla ice cream adds a creamy contrast to the rich chocolate. You can also serve them with fresh berries for a fruity touch. Drizzling warm caramel or chocolate sauce on top can make them even more indulgent. Whipped cream or a dollop of yogurt can also enhance the flavors beautifully!
How long do Miso Brownies last?
Once baked, miso brownies can last quite a while if stored properly. At room temperature, they will stay fresh for up to 3 days in an airtight container. If you want to keep them longer, refrigerate them for up to a week. For even longer storage, you can freeze them. Wrapped tightly, they can last for up to 3 months. Just remember to let them thaw in the fridge overnight before enjoying them again!
Print
Miso Brownies
- Total Time: 45 minutes
- Yield: 16 brownies
- Diet: Vegetarian
Description
Miso brownies are a unique dessert that combines the rich, chocolatey goodness of traditional brownies with the umami flavor of miso, creating a delightful blend of sweet and savory.
Ingredients
- Granulated Sugar: 1 cup (200g)
- Brown Sugar: 1/2 cup (100g)
- Unsalted Butter: 1/2 cup (115g), melted
- Eggs: 2 large
- Vanilla Extract: 1 teaspoon
- White Miso Paste: 1/4 cup (60ml)
- All-Purpose Flour: 1/2 cup (65g)
- Cocoa Powder: 1/3 cup (40g)
- Baking Powder: 1/4 teaspoon
- Salt: 1/4 teaspoon
- Semi-Sweet Chocolate Chips: 1/2 cup (90g)
- Sea Salt Flakes: for topping
Instructions
- Preheat your oven to 350°F (175°C).
- Grease an 8×8-inch (20×20 cm) baking pan or line it with parchment paper.
- Sift together the all-purpose flour, cocoa powder, baking powder, and salt in a separate bowl.
- In a large mixing bowl, combine the granulated sugar, brown sugar, and melted butter. Whisk until well combined, then add the eggs, vanilla extract, and white miso paste, whisking until smooth.
- Gradually add the dry mixture to the wet mixture, stirring gently until just combined. Fold in the semi-sweet chocolate chips.
- Pour the batter into the prepared baking pan and spread it evenly. Bake for 25-30 minutes, checking for doneness with a toothpick.
- Let the brownies cool in the pan for 10-15 minutes, then transfer to a wire rack to cool completely. Cut into squares and sprinkle with sea salt flakes before serving.
Latest Amazon Finds


Notes
- Avoid overmixing the batter to keep brownies light and fluffy.
- Use a kitchen scale for accurate measurements.
- Allow brownies to cool completely before cutting for easier slicing.
- Ensure eggs and butter are at room temperature for better blending.
- Check for doneness a few minutes before the suggested baking time.
- Prep Time: 15 minutes
- Cook Time: 30 minutes
- Category: Dessert
- Method: Baking
- Cuisine: Fusion
Nutrition
- Serving Size: 1 brownie
- Calories: 180
- Sugar: 15g
- Sodium: 150mg
- Fat: 8g
- Saturated Fat: 5g
- Unsaturated Fat: 3g
- Trans Fat: 0g
- Carbohydrates: 25g
- Fiber: 1g
- Protein: 2g
- Cholesterol: 30mg
Keywords: Miso Brownies, Unique Dessert, Chocolate Brownies, Fusion Cuisine