


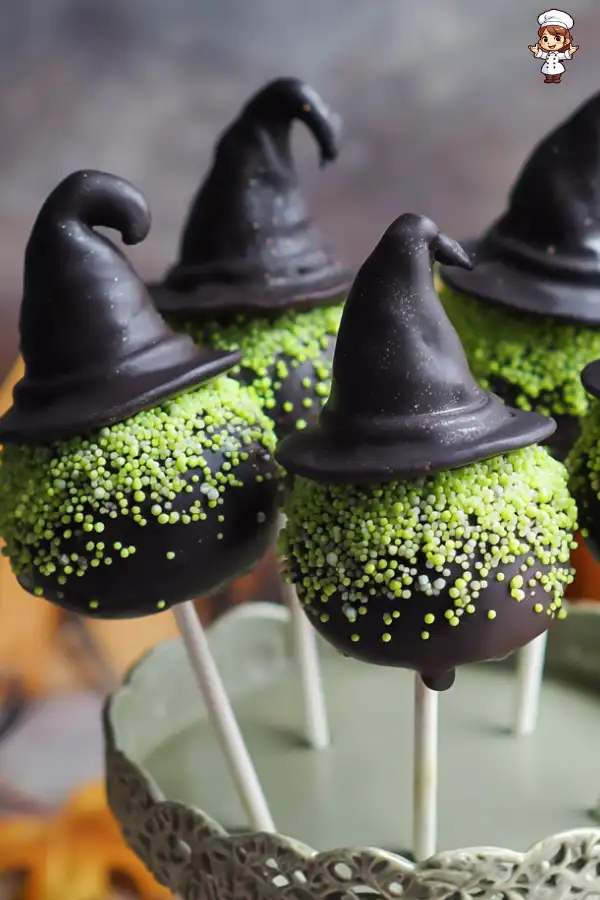
Witch Hat Cake Pops are delightful treats that combine the fun of cake pops with a spooky Halloween twist. These cake pops are shaped like witch hats, making them a perfect addition to any Halloween celebration. They are made from crumbled chocolate cake mixed with frosting, then coated in smooth candy melts. The result is a deliciously moist cake pop that looks as good as it tastes. With their playful design and rich flavors, these treats are sure to enchant both kids and adults alike!
Why You Should Make Witch Hat Cake Pops This Halloween
Halloween is a time for creativity and fun, and what better way to celebrate than with Witch Hat Cake Pops? These treats are not only easy to make, but they also add a festive touch to your gatherings. They are perfect for parties, school events, or even as a fun activity with family. Plus, you can customize them with different flavors and decorations to suit your style. Imagine the smiles on your guests’ faces when they see these whimsical cake pops! So, roll up your sleeves and get ready to create a magical treat that everyone will love.
Ingredients for Witch Hat Cake Pops
To create your own Witch Hat Cake Pops, you’ll need a few simple ingredients. Each component plays a vital role in achieving that delightful taste and spooky appearance. Here’s what you’ll need:
- 1 box of chocolate cake mix: This will be the base of your cake pops. Follow the instructions on the box for the best results. You’ll also need the ingredients listed on the box, usually eggs, oil, and water.
- 1 cup of chocolate frosting: This adds moisture and sweetness to the crumbled cake, helping to bind it together.
- 12 oz of black candy melts: These will coat the cake pops, giving them that classic witch hat look.
- 4 oz of green candy melts: Use these to create the brim of the witch’s hat, adding a pop of color.
- Lollipop sticks (12): These are essential for holding your cake pops and making them easy to eat.
- Edible glitter or sprinkles (optional): For a festive touch, sprinkle some on top while the chocolate is still wet.
- Wax paper: This will be used for cooling the cake pops and preventing them from sticking.
Gathering these ingredients will set you on the right path to making your Witch Hat Cake Pops. Each item contributes to the overall flavor and presentation, ensuring your treats are both delicious and visually appealing. Now that you have everything you need, let’s move on to the preparation steps!


Preparation of Witch Hat Cake Pops
Step 1: Bake the Cake
First things first, you need to bake the cake! Preheat your oven according to the instructions on the cake mix box. This usually means setting it to around 350°F (175°C). Prepare the cake batter as directed on the box, adding the required ingredients like eggs, oil, and water. Pour the batter into a greased cake pan and bake until a toothpick inserted in the center comes out clean. This usually takes about 25 to 30 minutes. Once baked, allow the cake to cool completely on a wire rack. This step is crucial, as a warm cake can crumble too easily.
Step 2: Crumble the Cake
After your cake has cooled, it’s time to crumble it! Take the cooled cake and break it into pieces in a large mixing bowl. You can use your hands or a fork to crumble it until it resembles fine crumbs. The finer the crumbs, the better your cake pops will hold together. This step is essential for achieving that perfect texture, so take your time to ensure it’s well crumbled.
Step 3: Mix with Frosting
Now, it’s time to add some sweetness! Take your crumbled cake and add in the chocolate frosting. Mix thoroughly until the cake crumbs are fully coated and the mixture is moist enough to hold its shape. You might need to adjust the amount of frosting based on how dry or wet your cake crumbs are. The goal is to create a mixture that can easily be rolled into shapes without falling apart.
Step 4: Shape the Cake Pops
With your cake and frosting mixture ready, it’s time to shape the cake pops! Take small portions of the mixture and roll them into cone shapes, resembling witch hats. Make sure the base is wider than the tip to create that iconic pointed shape. Place each shaped cake pop on a baking sheet lined with wax paper. This will help keep them from sticking and make cleanup easier later on.
Step 5: Dip in Chocolate
Next, it’s time for the fun part—dipping! Melt the black candy melts in a microwave-safe bowl. Heat them in 30-second intervals, stirring in between until they are smooth and glossy. Once melted, take each chilled cake pop and dip it into the black candy melts, ensuring it is fully coated. Allow any excess chocolate to drip off before placing the pops back on the wax paper. This step gives your cake pops that classic witch hat look!
Step 6: Decorate with Candy
Finally, let’s add some flair! Melt the green candy melts in a separate bowl using the same microwave method. Once melted, dip the base of each cake pop into the green candy melts to create the brim of the witch’s hat. Allow the excess to drip off, then while the chocolate is still wet, sprinkle edible glitter or sprinkles on top for a festive touch. Let the cake pops sit at room temperature until the chocolate hardens completely. This will ensure your decorations stay in place and look fabulous!
Tips for Perfect Witch Hat Cake Pops
Choosing the Right Cake
When it comes to making Witch Hat Cake Pops, the cake you choose can make a big difference. While chocolate cake is a classic choice, don’t be afraid to experiment! You can use red velvet for a spooky twist or vanilla for a lighter flavor. Just remember to match the frosting to your cake flavor. For example, cream cheese frosting pairs wonderfully with red velvet. This way, you’ll create a delicious treat that everyone will enjoy. Plus, using different flavors can make your cake pops even more exciting!
Best Chocolate for Dipping
The type of chocolate you use for dipping is crucial for achieving that smooth, glossy finish. Candy melts are a popular choice because they melt easily and harden well. However, you can also use high-quality chocolate chips. Just make sure to add a little vegetable oil or shortening to the chocolate to help it melt smoothly. This will give your cake pops a beautiful coating that not only looks great but also tastes amazing. Remember, the better the chocolate, the better your Witch Hat Cake Pops will be!
How to Achieve the Perfect Shape
Shaping your cake pops into perfect witch hats can be a fun challenge! To get that iconic cone shape, start with small portions of the cake mixture. Roll them gently in your hands, making sure the base is wider than the tip. If you find the mixture is too crumbly, add a bit more frosting to help it hold together. Chilling the shaped cake pops in the refrigerator for about 30 minutes before dipping can also help them maintain their shape. This way, you’ll have perfectly pointed witch hats that are ready for decorating!
Variation of Witch Hat Cake Pops
Alternative Flavors for Cake Pops
While chocolate cake is a favorite for Witch Hat Cake Pops, there are many other flavors you can try! For a unique twist, consider using red velvet cake. Its rich color and flavor will make your cake pops stand out. Pair it with cream cheese frosting for a delicious combination. Vanilla cake is another great option, offering a lighter taste that can be paired with chocolate or even strawberry frosting. If you want to get adventurous, try lemon cake for a refreshing flavor. The bright yellow color can add a fun contrast to the dark chocolate coating. No matter which flavor you choose, your Witch Hat Cake Pops will be a hit!
Different Decorations for Witch Hat Cake Pops
Decorating your Witch Hat Cake Pops is where your creativity can shine! While the classic black and green colors are festive, you can mix it up with different decorations. For instance, use orange candy melts for a vibrant brim, or even purple for a spooky touch. You can also add fun edible eyes to make your cake pops look like friendly witches. Instead of sprinkles, consider using crushed cookies or nuts for a crunchy texture. Edible glitter can add a magical sparkle, making your cake pops even more enchanting. The possibilities are endless, so let your imagination run wild and create a variety of Witch Hat Cake Pops that everyone will love!
FAQs About Witch Hat Cake Pops
How long do Witch Hat Cake Pops last?
Witch Hat Cake Pops can last up to a week when stored properly. Keep them in an airtight container at room temperature. This will help maintain their freshness and flavor. If you live in a warm climate, consider refrigerating them to prevent melting. Just remember to let them sit at room temperature for a bit before serving, as this will enhance their taste and texture.
Can I make Witch Hat Cake Pops in advance?
Absolutely! You can make Witch Hat Cake Pops in advance, which is perfect for busy schedules. Prepare them a day or two before your event. Just make sure to store them in an airtight container to keep them fresh. If you want to prepare them even earlier, you can shape the cake pops and freeze them before dipping. When you’re ready, simply thaw them in the fridge and dip them in chocolate. This way, you can enjoy the fun of decorating without the last-minute rush!
What can I use instead of chocolate for dipping?
If you’re looking for alternatives to chocolate for dipping, there are several options! You can use yogurt melts or candy coating, which come in various colors and flavors. These options are great for adding a fun twist to your Witch Hat Cake Pops. Additionally, you can try using white chocolate or colored candy melts for a different look. Just remember to melt them properly for a smooth coating. Each alternative will give your cake pops a unique taste and appearance!
Are Witch Hat Cake Pops suitable for kids?
Yes, Witch Hat Cake Pops are perfect for kids! They are fun, festive, and easy to eat. The playful design and delicious flavors make them a hit at Halloween parties or school events. Plus, kids can even help with the decorating process, making it a fun family activity. Just be mindful of any allergies, especially if you’re using different types of chocolate or decorations. Overall, these cake pops are a delightful treat that kids will love!
Print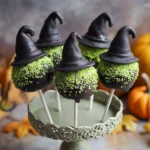
Witch Hat Cake Pops
- Total Time: 1 hour
- Yield: 12 cake pops 1x
- Diet: Vegetarian
Description
Witch Hat Cake Pops are delightful treats that combine the fun of cake pops with a spooky Halloween twist, shaped like witch hats and made from crumbled chocolate cake mixed with frosting, coated in candy melts.
Ingredients
- 1 box of chocolate cake mix
- 1 cup of chocolate frosting
- 12 oz of black candy melts
- 4 oz of green candy melts
- Lollipop sticks (12)
- Edible glitter or sprinkles (optional)
- Wax paper
Instructions
- Preheat your oven according to the instructions on the cake mix box and bake the cake.
- Allow the cake to cool completely on a wire rack.
- Crumble the cooled cake into fine crumbs in a large mixing bowl.
- Add chocolate frosting to the crumbled cake and mix until fully coated.
- Shape the mixture into cone shapes resembling witch hats and place on wax paper.
- Melt black candy melts and dip each cake pop, allowing excess to drip off.
- Melt green candy melts and dip the base of each cake pop to create the brim, then add decorations if desired.
- Let the cake pops sit at room temperature until the chocolate hardens completely.
Latest Amazon Finds


Notes
- Experiment with different cake flavors like red velvet or vanilla.
- Use high-quality chocolate for dipping for better taste and finish.
- Chill shaped cake pops before dipping to maintain their shape.
- Prep Time: 30 minutes
- Cook Time: 30 minutes
- Category: Dessert
- Method: Baking and Dipping
- Cuisine: American
Nutrition
- Serving Size: 1 cake pop
- Calories: 150
- Sugar: 12g
- Sodium: 50mg
- Fat: 7g
- Saturated Fat: 4g
- Unsaturated Fat: 2g
- Trans Fat: 0g
- Carbohydrates: 20g
- Fiber: 1g
- Protein: 2g
- Cholesterol: 20mg
Keywords: Witch Hat Cake Pops, Halloween treats, cake pops, spooky desserts