

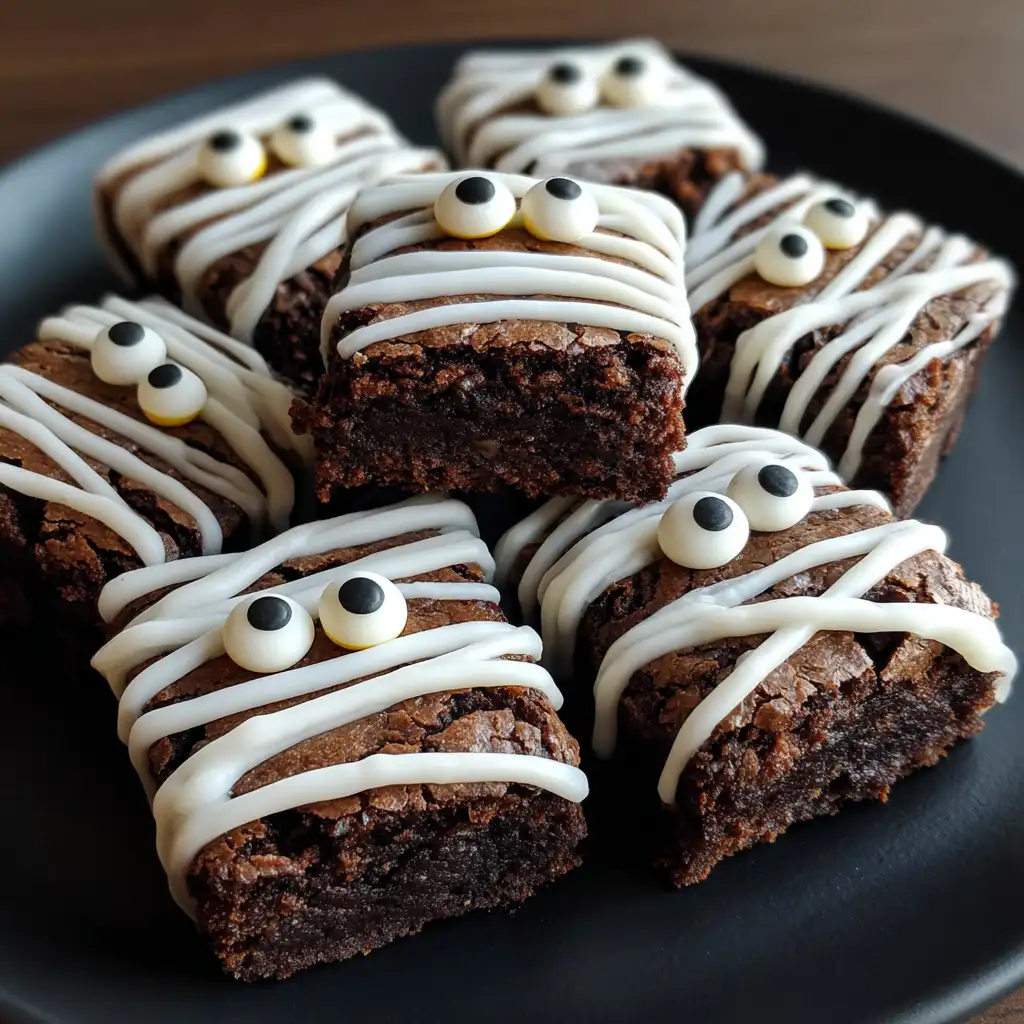
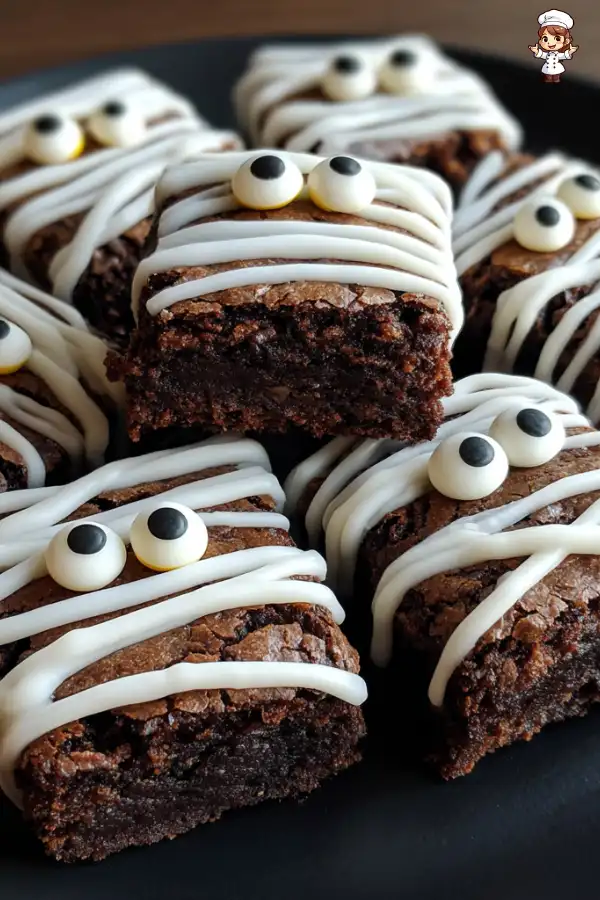
Mummy Wrapped Brownie Bites are a delightful treat that combines the rich, fudgy goodness of brownies with a fun Halloween twist. These bite-sized desserts are perfect for parties, gatherings, or simply to enjoy at home. The brownies are wrapped in white icing, resembling mummy bandages, and topped with cute candy eyes. This playful presentation makes them a hit among kids and adults alike!
Not only are these treats visually appealing, but they also pack a punch of chocolate flavor. The combination of sweet icing and rich brownie creates a delicious contrast that will leave your taste buds dancing. Plus, they are easy to make, making them a great choice for both novice and experienced bakers. Whether you’re hosting a Halloween party or just want to add some festive fun to your dessert table, Mummy Wrapped Brownie Bites are sure to impress.
In this article, we will guide you through the ingredients and step-by-step preparation of this delightful recipe. You’ll also find tips for perfecting your brownie bites and creative variations to try. So, roll up your sleeves and get ready to whip up some spooky treats that everyone will love!
Ingredients for Mummy Wrapped Brownie Bites Recipe
To create your Mummy Wrapped Brownie Bites, you’ll need a few simple ingredients. These items are easy to find and will help you whip up a batch of these delightful treats in no time. Here’s what you’ll need:
- 1 cup (200 g) granulated sugar: This sweetener gives the brownies their delicious sweetness.
- 1/2 cup (115 g) unsalted butter, melted: Butter adds richness and moisture to the brownies.
- 2 large eggs: Eggs help bind the ingredients together and create a fudgy texture.
- 1 teaspoon vanilla extract: This adds a lovely flavor that enhances the chocolate.
- 1/3 cup (40 g) unsweetened cocoa powder: Cocoa powder is essential for that deep chocolate flavor.
- 1/2 cup (65 g) all-purpose flour: Flour provides structure to the brownies.
- 1/4 teaspoon salt: A pinch of salt balances the sweetness and enhances flavor.
- 1/4 teaspoon baking powder: This helps the brownies rise slightly, making them light and fluffy.
- 1 cup (240 ml) white icing: You can use store-bought or homemade icing to create the mummy effect.
- 12-24 candy eyes: These fun decorations bring your mummies to life!
- Optional: Dark chocolate or chocolate chips for garnish, if you want to add an extra chocolatey touch.
Gather these ingredients, and you’ll be ready to start making your Mummy Wrapped Brownie Bites. Each component plays a vital role in creating the perfect balance of flavor and texture. Now, let’s move on to the step-by-step preparation!


Step-by-Step Preparation of Mummy Wrapped Brownie Bites Recipe
Step 1: Prepare the Brownie Batter
To kick off your Mummy Wrapped Brownie Bites, start by preparing the brownie batter. In a mixing bowl, combine the melted butter and granulated sugar. Stir them together until they are well mixed. Next, add the eggs one at a time, mixing thoroughly after each addition. This step is crucial as it helps create a smooth batter. After that, stir in the vanilla extract for an extra layer of flavor. The mixture should be glossy and well combined.
Step 2: Bake the Brownies
Now that your batter is ready, it’s time to bake! Pour the brownie mixture into your prepared baking pan. Spread it evenly to ensure uniform baking. Place the pan in your preheated oven at 350°F (175°C). Bake for about 20-25 minutes. To check if they are done, insert a toothpick into the center. If it comes out with a few moist crumbs, your brownies are perfect! Once baked, remove them from the oven and let them cool completely in the pan.
Step 3: Cool and Cut the Brownies
After the brownies have cooled, it’s time to cut them into bite-sized pieces. Carefully remove the brownies from the pan and place them on a cutting board. Use a sharp knife to cut them into squares or rectangles, about 1-2 inches in size. This size is perfect for snacking and makes them easy to wrap. Make sure to cut them evenly so that each piece looks great!
Step 4: Wrap the Brownies
With your brownie bites ready, it’s time to wrap them up like mummies! Take your white icing and create thin strips to wrap around each brownie piece. You can use a piping bag for precision or a zip-top bag with a corner snipped off. Start at one end and wrap the icing around the brownie, leaving some space in between to mimic mummy bandages. This step adds a fun and spooky touch to your treats!
Step 5: Decorate the Mummy Wrapped Brownie Bites
Finally, it’s time to bring your mummies to life! Place 1-2 candy eyes on each brownie bite. Gently press them into the icing to secure them in place. This little detail makes your Mummy Wrapped Brownie Bites even more adorable. Once decorated, arrange them on a dark plate for a spooky presentation. These treats are now ready to be enjoyed at your Halloween party or festive gathering!
Tips for Perfecting Your Mummy Wrapped Brownie Bites Recipe
Choosing the Right Brownie Mix
When it comes to making Mummy Wrapped Brownie Bites, the choice of brownie mix can make a big difference. If you prefer a homemade touch, opt for a classic brownie recipe that yields a fudgy texture. Look for recipes that use melted chocolate or cocoa powder, as these will give you that rich chocolate flavor everyone loves.
If you’re short on time, a store-bought brownie mix can work just as well. Choose a mix that promises a fudgy result rather than a cake-like texture. This will ensure your brownie bites stay moist and delicious. Always check the ingredients; some mixes may contain additives that can affect the taste. For the best results, follow the package instructions closely, and consider adding a splash of vanilla extract for extra flavor.
Best Practices for Wrapping
Wrapping your brownie bites like mummies is where the fun really begins! To achieve the best results, here are some helpful tips:
- Use a piping bag: For precise control, a piping bag is ideal. If you don’t have one, a zip-top bag with a small corner cut off works just as well.
- Keep it light: When applying the icing, use a light hand. Too much icing can make the mummies look messy. Aim for thin, even strips to mimic bandages.
- Vary the wrapping: Don’t be afraid to mix up the wrapping style! Some mummies can have more bandages than others, creating a fun variety on your plate.
- Let the icing set: After wrapping, allow the icing to set for a few minutes. This will help it hold its shape and make it easier to add the candy eyes.
By following these tips, you’ll create Mummy Wrapped Brownie Bites that not only look fantastic but taste amazing too. Now, let’s explore some creative variations to make your treats even more exciting!
Creative Variations of Mummy Wrapped Brownie Bites Recipe
Alternative Wrapping Options
While the classic white icing gives your Mummy Wrapped Brownie Bites a spooky look, you can get creative with your wrapping options! Here are some fun ideas to try:
- Chocolate Ganache: Instead of white icing, use a rich chocolate ganache. This will not only enhance the chocolate flavor but also create a darker, more mysterious mummy. Simply melt chocolate with heavy cream, let it cool slightly, and drizzle it over the brownie bites.
- Colored Icing: Get festive by using colored icing! You can make green or orange icing for a Halloween theme. This adds a playful twist and makes your mummies stand out on the dessert table.
- Fondant Wraps: For a more polished look, consider using fondant. Roll out the fondant and cut it into strips to wrap around the brownie bites. This method gives a smooth finish and can be tinted to match your theme.
- Peanut Butter Drizzle: If you love peanut butter, drizzle some melted peanut butter over the brownies before adding the icing. This adds a delicious flavor and a fun texture contrast.
These alternative wrapping options can make your Mummy Wrapped Brownie Bites even more exciting and delicious. Feel free to mix and match these ideas to create your unique version!
Flavor Variations for Brownie Bites
Why stop at the classic brownie flavor? You can easily customize your Mummy Wrapped Brownie Bites with different flavors. Here are some tasty variations to consider:
- Mint Chocolate: Add a few drops of peppermint extract to your brownie batter for a refreshing minty twist. Top with green icing for a fun look!
- Nutty Brownies: Fold in chopped nuts, like walnuts or pecans, into the brownie batter. This adds a delightful crunch and enhances the overall flavor.
- Caramel Swirl: Before baking, swirl in some caramel sauce into the brownie batter. This creates gooey pockets of caramel that will surprise your guests!
- Spicy Pumpkin: For a fall-inspired treat, mix in pumpkin puree and pumpkin spice into the brownie batter. This will give your brownies a warm, cozy flavor perfect for Halloween.
These flavor variations can elevate your Mummy Wrapped Brownie Bites to a whole new level. Experiment with different combinations to find your favorite! Now that you have some creative ideas, let’s move on to the frequently asked questions about this delightful recipe.
Frequently Asked Questions About Mummy Wrapped Brownie Bites Recipe
Can I use homemade brownie mix for the Mummy Wrapped Brownie Bites Recipe?
Absolutely! Using a homemade brownie mix is a fantastic option for your Mummy Wrapped Brownie Bites. In fact, many bakers prefer homemade recipes because they can control the ingredients and flavors. Just ensure your brownie mix yields a fudgy texture, as this will enhance the overall taste of your treats. Follow your favorite brownie recipe, and then proceed with the wrapping and decorating steps as outlined in this article. Your homemade brownies will be a hit!
How long do Mummy Wrapped Brownie Bites last?
Mummy Wrapped Brownie Bites can last for up to three days when stored properly. Keep them in an airtight container at room temperature to maintain their freshness. If you live in a warm climate, consider refrigerating them to prevent the icing from melting. However, be aware that refrigeration may slightly change the texture of the brownies. For the best taste and texture, enjoy them within the first couple of days!
Can I make Mummy Wrapped Brownie Bites ahead of time?
Yes, you can definitely make Mummy Wrapped Brownie Bites ahead of time! In fact, preparing them a day in advance can save you time on the day of your event. Simply bake and cut the brownies, then store them in an airtight container without the icing. When you’re ready to serve, wrap them in icing and add the candy eyes. This way, your treats will look fresh and festive for your guests!
What are some serving suggestions for Mummy Wrapped Brownie Bites?
Serving Mummy Wrapped Brownie Bites can be as fun as making them! Here are some creative ideas:
- Spooky Platter: Arrange the brownie bites on a dark plate or a Halloween-themed platter. Add some fake spider webs or plastic spiders for an extra spooky touch.
- Pair with Milk: Serve your brownie bites with a glass of cold milk. This classic combination is always a crowd-pleaser!
- Halloween Treat Bags: Package individual brownie bites in clear treat bags tied with orange or black ribbons. These make great party favors for guests to take home.
- Decorative Stands: Use tiered cake stands to display your Mummy Wrapped Brownie Bites. This adds height and visual interest to your dessert table.
With these serving suggestions, your Mummy Wrapped Brownie Bites will not only taste great but also look fantastic at your Halloween celebration!
Print
Mummy Wrapped Brownie Bites Recipe
- Total Time: 40 minutes
- Yield: 12–24 brownie bites 1x
- Diet: Vegetarian
Description
Mummy Wrapped Brownie Bites are a delightful treat that combines the rich, fudgy goodness of brownies with a fun Halloween twist, wrapped in white icing and topped with candy eyes.
Ingredients
- 1 cup (200 g) granulated sugar
- 1/2 cup (115 g) unsalted butter, melted
- 2 large eggs
- 1 teaspoon vanilla extract
- 1/3 cup (40 g) unsweetened cocoa powder
- 1/2 cup (65 g) all-purpose flour
- 1/4 teaspoon salt
- 1/4 teaspoon baking powder
- 1 cup (240 ml) white icing
- 12–24 candy eyes
- Optional: Dark chocolate or chocolate chips for garnish
Instructions
- Prepare the brownie batter by mixing melted butter and sugar, then adding eggs and vanilla.
- Bake the brownie mixture in a preheated oven at 350°F (175°C) for 20-25 minutes.
- Cool the brownies completely and cut them into bite-sized pieces.
- Wrap each brownie piece with white icing to resemble mummy bandages.
- Decorate with candy eyes and arrange on a plate for serving.
Latest Amazon Finds


Notes
- Use a piping bag for precise icing application.
- Allow icing to set before adding candy eyes.
- Store in an airtight container for up to three days.
- Can be made ahead of time without icing.
- Prep Time: 15 minutes
- Cook Time: 25 minutes
- Category: Dessert
- Method: Baking
- Cuisine: American
Nutrition
- Serving Size: 1 brownie bite
- Calories: 150
- Sugar: 12g
- Sodium: 100mg
- Fat: 7g
- Saturated Fat: 4g
- Unsaturated Fat: 2g
- Trans Fat: 0g
- Carbohydrates: 20g
- Fiber: 1g
- Protein: 2g
- Cholesterol: 30mg
Keywords: Mummy Wrapped Brownie Bites, Halloween treats, spooky desserts, chocolate brownies