

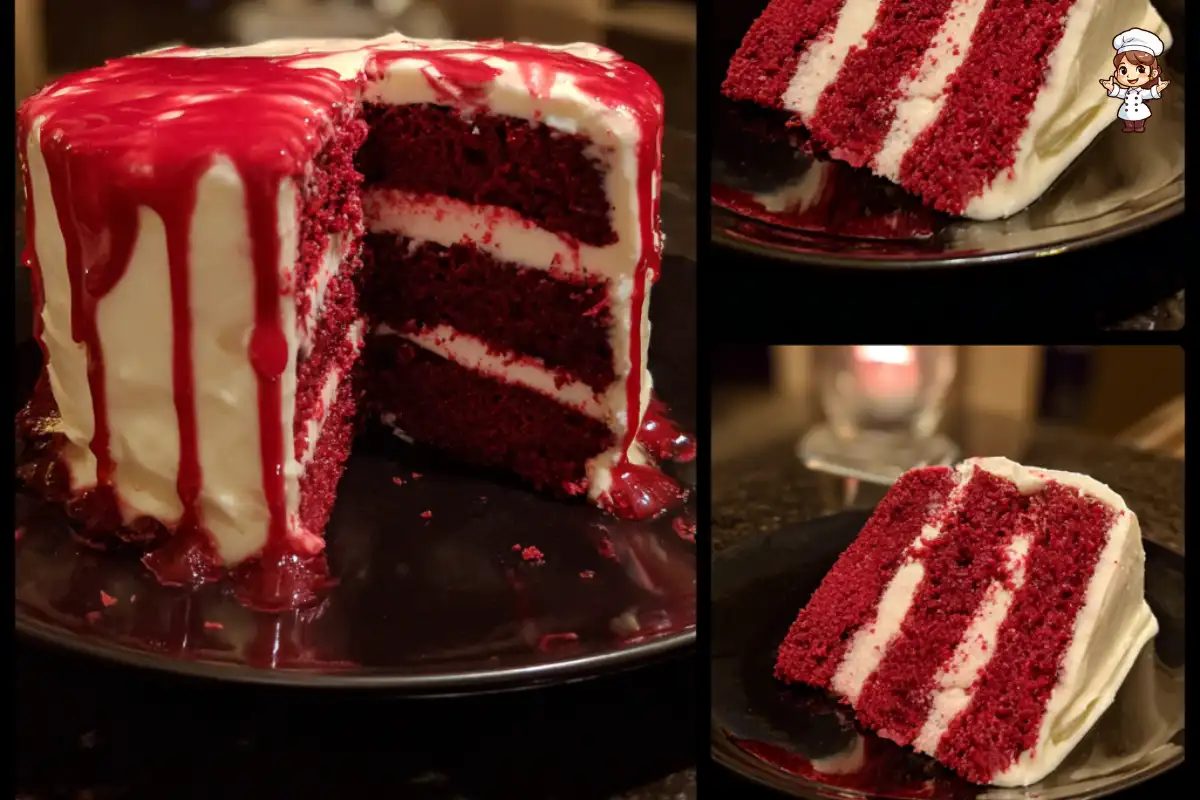
Are you ready to impress your friends and family with a stunning dessert? The Blood Drip Red Velvet Cake Recipe is not just a treat for the taste buds; it’s a feast for the eyes! This cake combines the classic flavors of red velvet with a dramatic red drip that makes it perfect for any celebration, especially Halloween or themed parties. With its rich color and creamy frosting, this cake is sure to be the star of the show.
What Makes Blood Drip Red Velvet Cake Unique?
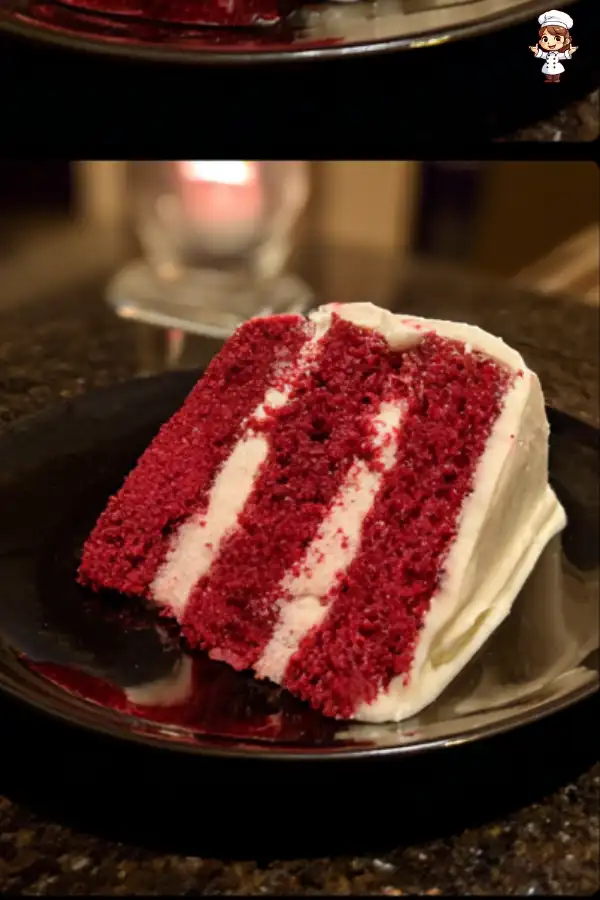
What sets the Blood Drip Red Velvet Cake apart from other cakes? First, it features the beloved red velvet flavor, which is a delightful mix of cocoa and vanilla. The cake is moist and tender, thanks to the buttermilk and vegetable oil. But the real showstopper is the eye-catching red drip made from candy melts. This adds a fun and spooky element, making it visually striking.
Moreover, the cream cheese frosting complements the cake perfectly. Its tangy flavor balances the sweetness, creating a harmonious taste experience. The combination of the rich red color, the smooth frosting, and the dripping effect makes this cake not just a dessert, but a centerpiece. Whether you’re celebrating a birthday, an anniversary, or just want to treat yourself, this cake is a fantastic choice!
In the following sections, we will dive into the ingredients and preparation steps to help you create this masterpiece in your own kitchen. Get ready to bake and enjoy the delightful flavors of this unique cake!
Ingredients for Blood Drip Red Velvet Cake Recipe
Essential Ingredients for the Cake
To create the perfect Blood Drip Red Velvet Cake, you need a few essential ingredients. Each one plays a vital role in achieving that rich flavor and moist texture. Here’s what you’ll need:
- 2 ½ cups all-purpose flour: This forms the base of your cake, giving it structure.
- 1 ½ cups granulated sugar: Sugar adds sweetness and helps the cake rise.
- 1 teaspoon baking soda: This is your leavening agent, making the cake light and fluffy.
- 1 teaspoon salt: A pinch of salt enhances the flavors in your cake.
- 1 teaspoon cocoa powder: This adds a subtle chocolate flavor, which is key to red velvet.
- 1 ½ cups vegetable oil: Oil keeps the cake moist and tender.
- 1 cup buttermilk: Buttermilk adds richness and helps activate the baking soda.
- 2 large eggs: Eggs provide structure and moisture.
- 2 tablespoons red food coloring: This gives the cake its signature red hue.
- 1 teaspoon vanilla extract: Vanilla adds a lovely flavor that complements the cake.
- 1 teaspoon white vinegar: Vinegar reacts with the baking soda for a lighter cake.
Ingredients for the Blood Drip Topping
The red drip topping is what makes this cake truly special. It adds a dramatic flair that is sure to impress. Here’s what you need for the blood drip:
- ½ cup red candy melts or red chocolate: This is the main ingredient for your drip, providing that vibrant color.
- 2 tablespoons vegetable oil: Oil helps to thin the candy melts, making them easier to drizzle.
With these ingredients on hand, you’re well on your way to creating a stunning Blood Drip Red Velvet Cake. Each component contributes to the overall flavor and appearance, ensuring that your cake will be a hit at any gathering!


Preparation of Blood Drip Red Velvet Cake Recipe
Step 1: Preparing the Cake Batter
Now that you have all your ingredients ready, it’s time to prepare the cake batter. Start by preheating your oven to 350°F (175°C). This ensures that your cake bakes evenly. Next, grease and flour two 9-inch round cake pans to prevent sticking.
In a large mixing bowl, sift together the dry ingredients: flour, sugar, baking soda, salt, and cocoa powder. Sifting helps to aerate the flour, making your cake lighter. In another bowl, whisk together the wet ingredients: vegetable oil, buttermilk, eggs, red food coloring, vanilla extract, and white vinegar. Mixing these well ensures that the food coloring is evenly distributed, giving your cake that vibrant red color.
Now, gradually add the wet mixture to the dry ingredients. Stir gently until just combined. Be careful not to overmix, as this can make your cake dense. Once combined, your batter is ready for baking!
Step 2: Baking the Cake Layers
With your batter prepared, it’s time to bake! Divide the batter evenly between the two prepared cake pans. Place them in the preheated oven and bake for 25-30 minutes. To check if they’re done, insert a toothpick into the center of the cakes. If it comes out clean, they’re ready!
Once baked, remove the pans from the oven and let them cool for about 10 minutes. This cooling period allows the cakes to firm up slightly, making them easier to remove from the pans. After 10 minutes, carefully transfer the cakes to wire racks to cool completely. This step is crucial, as frosting a warm cake can lead to melting and sliding.
Step 3: Making the Cream Cheese Frosting
While your cakes are cooling, let’s prepare the delicious cream cheese frosting. In a large mixing bowl, beat the softened butter and cream cheese together until smooth and creamy. This combination creates a rich and tangy frosting that pairs perfectly with the sweet cake.
Gradually add the powdered sugar and vanilla extract, mixing until well combined. If your frosting is too thick, don’t worry! Just add heavy cream one tablespoon at a time until you reach your desired consistency. You want it to be spreadable but not too runny.
Step 4: Assembling the Cake
Once your cakes are completely cool, it’s time to assemble! Place one layer on a serving plate. Spread a generous amount of cream cheese frosting on top. This layer of frosting adds flavor and moisture. Then, carefully place the second layer on top.
Now, frost the top and sides of the cake with the remaining cream cheese frosting. Make sure to cover it evenly for a beautiful finish. You can use a spatula or a knife to create swirls and patterns if you like!
Step 5: Creating the Blood Drip Effect
The final touch is the eye-catching blood drip! In a microwave-safe bowl, melt the red candy melts with vegetable oil. Do this in 30-second intervals, stirring until smooth. Be patient, as this will ensure a nice, even melt.
Once melted, let the mixture cool slightly. Using a spoon or a squeeze bottle, carefully drizzle the melted red candy over the edges of the frosted cake. Allow it to drip down the sides for that dramatic effect. This step is what makes your Blood Drip Red Velvet Cake truly unique!
And there you have it! Your cake is now ready to be served. Slice it up and enjoy the delightful flavors and stunning appearance. This cake is sure to be a hit at any gathering!
Tips for Perfecting Your Blood Drip Red Velvet Cake Recipe
Common Mistakes to Avoid
When baking your Blood Drip Red Velvet Cake, it’s easy to make a few common mistakes. Here are some tips to help you avoid them:
- Overmixing the Batter: Mixing too much can lead to a dense cake. Stir until just combined for a light texture.
- Not Measuring Ingredients Accurately: Baking is a science! Use measuring cups and spoons for precision.
- Skipping the Cooling Time: Frosting a warm cake can cause the frosting to melt. Always let your cakes cool completely.
- Using Cold Ingredients: Make sure your eggs and buttermilk are at room temperature. This helps the batter mix better.
- Ignoring the Oven Temperature: Every oven is different. Use an oven thermometer to ensure accurate baking temperatures.
By avoiding these mistakes, you’ll be on your way to creating a stunning and delicious cake that everyone will love!
Storage Tips for Leftover Cake
If you have any leftover Blood Drip Red Velvet Cake, you’ll want to store it properly to keep it fresh. Here are some easy tips:
- Refrigerate: Place the cake in an airtight container. It can last up to 3 days in the fridge.
- Freeze for Longer Storage: If you want to keep it longer, wrap slices in plastic wrap and place them in a freezer-safe bag. It can last up to 3 months!
- Thawing: When ready to enjoy, thaw the cake in the refrigerator overnight. This keeps it moist.
- Freshen Up: If the cake seems a bit dry after storage, a light drizzle of simple syrup can help restore moisture.
With these storage tips, you can enjoy your delicious cake even after the celebration is over!
Variation of Blood Drip Red Velvet Cake Recipe
Alternative Frosting Options
If you want to switch things up, there are several alternative frosting options for your Blood Drip Red Velvet Cake. While cream cheese frosting is a classic choice, you can explore other flavors to match your taste or theme. Here are a few ideas:
- Buttercream Frosting: A simple vanilla buttercream can be a delightful alternative. Just beat together softened butter, powdered sugar, vanilla extract, and a splash of milk until creamy.
- Chocolate Ganache: For a rich twist, try a chocolate ganache. Melt equal parts chocolate and heavy cream, then let it cool slightly before pouring it over the cake.
- Whipped Cream Frosting: Light and fluffy, whipped cream frosting is perfect for a lighter dessert. Whip heavy cream with sugar and vanilla until soft peaks form.
- Peanut Butter Frosting: If you love peanut butter, mix it with butter and powdered sugar for a nutty flavor that pairs well with red velvet.
These alternative frostings can add a unique touch to your cake, making it even more special for your occasion!
Adding Flavor Variations
Want to take your Blood Drip Red Velvet Cake to the next level? Consider adding flavor variations to the cake batter. Here are some fun ideas:
- Chocolate Chips: Fold in mini chocolate chips for a sweet surprise in every bite.
- Spices: Add a pinch of cinnamon or nutmeg to the dry ingredients for a warm, cozy flavor.
- Citrus Zest: Incorporate lemon or orange zest into the batter for a refreshing twist.
- Almond Extract: Replace some of the vanilla extract with almond extract for a nutty flavor that complements the red velvet.
These variations can make your cake even more exciting and tailored to your preferences. Feel free to experiment and find the perfect combination that you and your guests will love!
FAQs about Blood Drip Red Velvet Cake Recipe
How can I make the cake less sweet?
If you find the Blood Drip Red Velvet Cake too sweet, there are a few simple adjustments you can make. First, reduce the amount of granulated sugar in the cake batter by about ¼ cup. This will help lower the overall sweetness without affecting the texture too much. Additionally, you can use less powdered sugar in the cream cheese frosting. Another option is to add a pinch of salt to balance the sweetness, enhancing the overall flavor profile.
Can I use a different type of food coloring?
Absolutely! While red food coloring is traditional for a Blood Drip Red Velvet Cake, you can experiment with other colors. Gel food coloring works well, as it provides vibrant hues without adding too much liquid. You could also try natural alternatives like beet juice for a red tint or even matcha powder for a green cake. Just keep in mind that the flavor may change slightly with natural colorings.
How do I store the Blood Drip Red Velvet Cake?
To keep your Blood Drip Red Velvet Cake fresh, store it in an airtight container in the refrigerator. It can last up to 3 days. If you want to keep it longer, consider freezing it. Wrap individual slices in plastic wrap and place them in a freezer-safe bag. This way, you can enjoy your cake for up to 3 months! When you’re ready to eat, simply thaw it in the refrigerator overnight.
What can I substitute for cream cheese in the frosting?
If you need a substitute for cream cheese in the frosting, there are several options. You can use mascarpone cheese for a rich and creamy texture. Another alternative is Greek yogurt, which will give a tangy flavor similar to cream cheese. For a dairy-free option, try using vegan cream cheese or a whipped coconut cream. Each substitute will slightly change the flavor, but they can still create a delicious frosting for your cake!
Print
Blood Drip Red Velvet Cake
- Total Time: 1 hour
- Yield: 12 servings 1x
- Diet: Vegetarian
Description
A stunning dessert that combines classic red velvet flavors with a dramatic red drip, perfect for celebrations.
Ingredients
- 2 ½ cups all-purpose flour
- 1 ½ cups granulated sugar
- 1 teaspoon baking soda
- 1 teaspoon salt
- 1 teaspoon cocoa powder
- 1 ½ cups vegetable oil
- 1 cup buttermilk
- 2 large eggs
- 2 tablespoons red food coloring
- 1 teaspoon vanilla extract
- 1 teaspoon white vinegar
- ½ cup red candy melts or red chocolate
- 2 tablespoons vegetable oil (for drip)
Instructions
- Preheat your oven to 350°F (175°C) and grease and flour two 9-inch round cake pans.
- Sift together the dry ingredients: flour, sugar, baking soda, salt, and cocoa powder.
- In another bowl, whisk together the wet ingredients: vegetable oil, buttermilk, eggs, red food coloring, vanilla extract, and white vinegar.
- Gradually add the wet mixture to the dry ingredients and stir gently until just combined.
- Divide the batter evenly between the two prepared cake pans and bake for 25-30 minutes.
- Let the cakes cool in the pans for 10 minutes, then transfer to wire racks to cool completely.
- Prepare the cream cheese frosting by beating softened butter and cream cheese until smooth, then gradually add powdered sugar and vanilla extract.
- Assemble the cake by placing one layer on a serving plate, frosting it, and then adding the second layer on top.
- Frost the top and sides of the cake with the remaining cream cheese frosting.
- Melt the red candy melts with vegetable oil, let cool slightly, and drizzle over the edges of the frosted cake to create the blood drip effect.
Latest Amazon Finds


Notes
- Avoid overmixing the batter to keep the cake light.
- Ensure all ingredients are at room temperature for better mixing.
- Use an oven thermometer to check the baking temperature.
- Store leftover cake in an airtight container in the fridge for up to 3 days.
- Consider alternative frostings like buttercream or chocolate ganache for variety.
- Prep Time: 30 minutes
- Cook Time: 30 minutes
- Category: Dessert
- Method: Baking
- Cuisine: American
Nutrition
- Serving Size: 1 slice
- Calories: 450
- Sugar: 35g
- Sodium: 300mg
- Fat: 20g
- Saturated Fat: 5g
- Unsaturated Fat: 15g
- Trans Fat: 0g
- Carbohydrates: 60g
- Fiber: 2g
- Protein: 5g
- Cholesterol: 50mg
Keywords: Red Velvet Cake, Blood Drip Cake, Halloween Cake, Dessert Recipe