

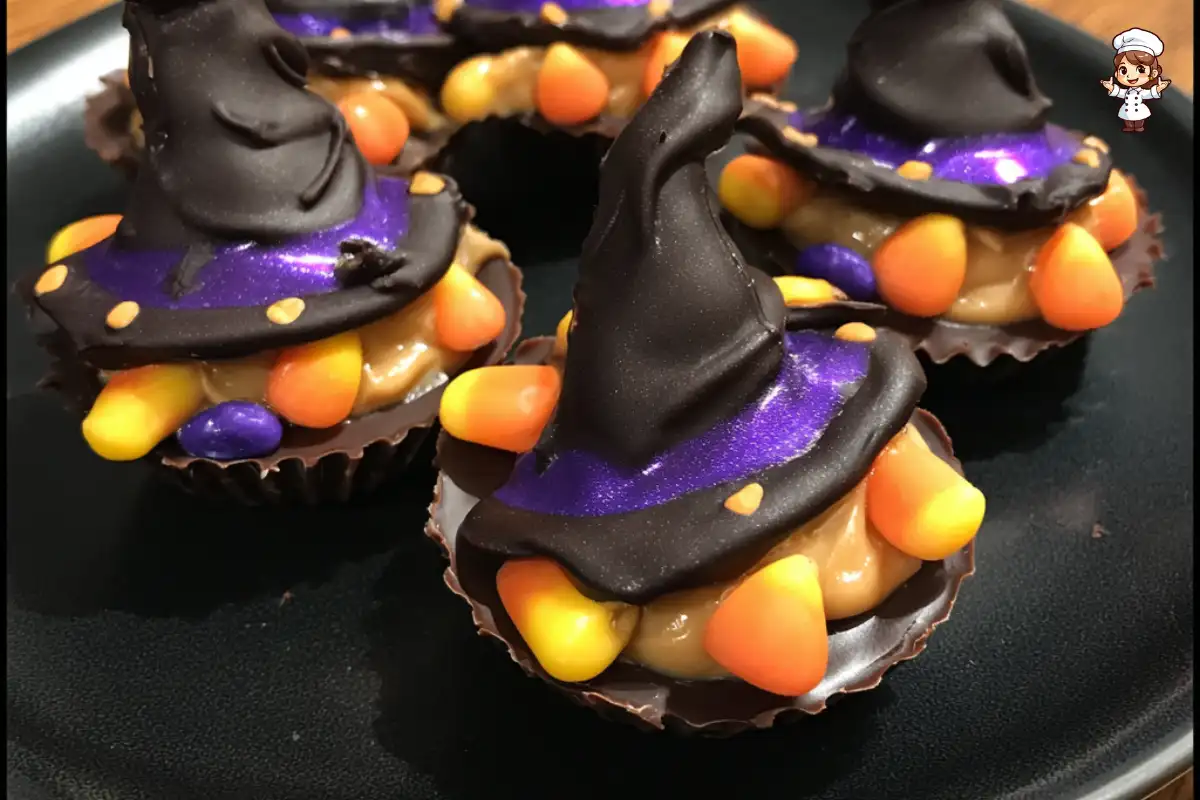
Witch Hat Peanut Butter Cups are a delightful treat that combines the rich flavors of creamy peanut butter and dark chocolate. These fun, festive candies are perfect for Halloween celebrations. Shaped like whimsical witch hats, they not only taste amazing but also add a playful touch to any spooky gathering.
Imagine biting into a smooth, chocolatey shell that reveals a sweet and creamy peanut butter filling. The combination of textures and flavors makes these treats irresistible. Plus, they are easy to make, which means you can whip them up in no time for your Halloween party or as a fun activity with the kids.
These treats are not just for Halloween, though! You can enjoy them year-round by simply changing the decorations. With a little creativity, you can transform them into delightful treats for any occasion. Whether you’re hosting a party or just want a sweet snack, Witch Hat Peanut Butter Cups are sure to impress.
In the following sections, we will guide you through the ingredients and step-by-step preparation of these delicious treats. You’ll also find tips for perfecting your Witch Hat Peanut Butter Cups and creative variations to keep things exciting. So, let’s dive into the world of these enchanting sweets!
Ingredients for Witch Hat Peanut Butter Cups
To create your own Witch Hat Peanut Butter Cups, you’ll need a few simple ingredients. Each component plays a vital role in achieving that perfect balance of flavor and texture. Here’s what you’ll need:
- 1 cup creamy peanut butter: This is the star of the show! Choose a smooth variety for easy mixing and a delightful filling.
- 1 cup powdered sugar: This sweet ingredient helps to balance the saltiness of the peanut butter and gives the filling a nice texture.
- 1 cup dark chocolate chips: Dark chocolate adds a rich flavor that pairs beautifully with peanut butter. You can also use semi-sweet chocolate if you prefer.
- 1 tablespoon coconut oil (or vegetable shortening): This helps to smooth out the chocolate, making it easier to work with and giving it a nice shine.
- 1/2 cup orange candy melts: These will be used for decorating and adding a pop of color to your witch hats.
- 1/2 cup purple candy melts: Just like the orange melts, these will add a fun and festive touch to your treats.
- 1/4 teaspoon sea salt (optional): A pinch of salt can enhance the flavors, but it’s totally up to your taste!
- Mini cupcake liners: These are essential for shaping your peanut butter cups and giving them that witch hat look.
Gathering these ingredients is the first step in your magical journey to create Witch Hat Peanut Butter Cups. Make sure to have everything ready before you start, as this will make the process smoother and more enjoyable. Now that you have your ingredients, let’s move on to the step-by-step preparation!


Step-by-Step Preparation of Witch Hat Peanut Butter Cups
Step 1: Gather Your Ingredients
Before you start making your Witch Hat Peanut Butter Cups, it’s important to gather all your ingredients. Having everything ready will make the process smooth and enjoyable. Make sure you have your creamy peanut butter, powdered sugar, dark chocolate chips, coconut oil, candy melts, and mini cupcake liners. A clean workspace will help you stay organized. Once you have everything in place, you’re ready to begin!
Step 2: Melt the Chocolate
Now it’s time to melt the chocolate! In a microwave-safe bowl, combine the dark chocolate chips and coconut oil. This combination will create a smooth and shiny chocolate coating. Microwave the mixture in 30-second intervals. Be sure to stir in between each interval. This will help prevent the chocolate from burning. Once the chocolate is fully melted and smooth, you’re ready for the next step!
Step 3: Prepare the Peanut Butter Mixture
In a mixing bowl, combine the creamy peanut butter and powdered sugar. Use a spatula or a spoon to mix them together until the mixture is smooth and well combined. If you like, you can add a pinch of sea salt to enhance the flavor. This peanut butter mixture will be the delicious filling for your cups. Set it aside while you prepare the chocolate-coated liners.
Step 4: Assemble the Witch Hat Peanut Butter Cups
Take your mini muffin tin and line it with mini cupcake liners. Using a spoon or a small pastry brush, coat the bottom and sides of each liner with the melted dark chocolate. Make sure to leave enough space at the top for the peanut butter filling. Once you’ve coated all the liners, place the muffin tin in the refrigerator for about 10-15 minutes. This will allow the chocolate to set properly.
Step 5: Chill and Set
After the chocolate has set, remove the muffin tin from the refrigerator. Spoon a generous amount of the peanut butter mixture into each chocolate-coated liner, filling them about three-quarters full. Then, pour more melted dark chocolate over the peanut butter filling, ensuring it’s completely covered. Use a spatula to smooth the tops if needed. Return the muffin tin to the refrigerator for another 10-15 minutes to let the chocolate harden completely.
Tips for Perfect Witch Hat Peanut Butter Cups
Choosing the Right Chocolate
When it comes to making Witch Hat Peanut Butter Cups, the type of chocolate you choose can make a big difference. Dark chocolate is a popular choice because it has a rich flavor that pairs wonderfully with the sweetness of peanut butter. However, if you prefer a sweeter taste, semi-sweet chocolate is a great alternative. You can even mix both types for a unique flavor profile!
Another option is to use milk chocolate, which will give your treats a creamier taste. Just remember, the chocolate should be high-quality for the best results. Look for chocolate that has a high cocoa content, as this will enhance the overall flavor. Also, don’t forget to add a bit of coconut oil or vegetable shortening when melting the chocolate. This will help it become smooth and shiny, making your Witch Hat Peanut Butter Cups look even more appealing!
Storing Your Witch Hat Peanut Butter Cups
Once you’ve made your delicious Witch Hat Peanut Butter Cups, you’ll want to store them properly to keep them fresh. Place your treats in an airtight container to prevent them from drying out. If you live in a warm climate, it’s best to keep them in the refrigerator. This will help maintain their shape and texture.
These delightful treats can last up to a week in the fridge. If you want to keep them longer, consider freezing them. Just make sure to separate each cup with parchment paper to prevent them from sticking together. When you’re ready to enjoy them, simply let them thaw at room temperature for a few minutes. With these storage tips, you can savor your Witch Hat Peanut Butter Cups for days to come!
Creative Variations of Witch Hat Peanut Butter Cups
Alternative Fillings for Witch Hat Peanut Butter Cups
If you want to mix things up, consider trying different fillings for your Witch Hat Peanut Butter Cups. While the classic peanut butter filling is delicious, you can experiment with other flavors. For instance, you could use almond butter or cashew butter for a nutty twist. These alternatives will give your treats a unique taste while still maintaining that creamy texture.
Another fun option is to add a layer of jam or jelly inside the cups. Raspberry or strawberry jam pairs wonderfully with chocolate and peanut butter. Simply spoon a small amount of jam on top of the peanut butter filling before sealing it with chocolate. This will create a delightful surprise in every bite!
For those who love a bit of crunch, consider adding crushed cookies or nuts to the peanut butter mixture. This will give your Witch Hat Peanut Butter Cups an exciting texture. Just be sure to chop the nuts finely so they mix well with the filling. With these alternative fillings, you can create a variety of flavors that will keep everyone guessing!
Decorating Ideas for Witch Hat Peanut Butter Cups
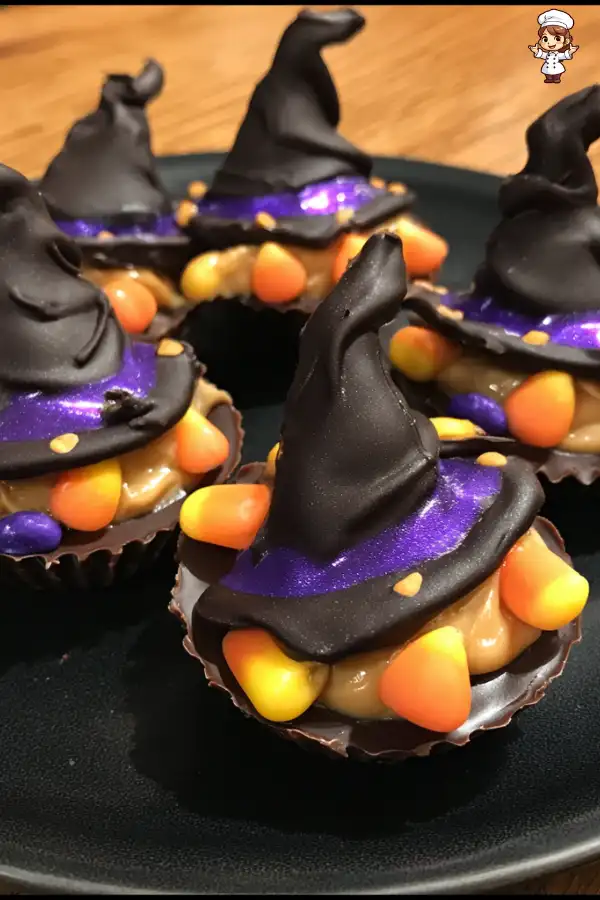
Decorating your Witch Hat Peanut Butter Cups is where the fun really begins! While the orange and purple candy melts create a festive look, you can get creative with other decorations. For example, consider using edible glitter or sprinkles to add a magical touch. Just sprinkle them on top of the melted candy before it sets for a sparkling effect.
You can also use icing to draw fun designs on top of the cups. Try creating little spider webs or spooky faces to enhance the Halloween theme. If you have candy eyes, they can be a fun addition to make your treats look even more whimsical.
For a more sophisticated look, drizzle white chocolate over the tops of the cups. This contrast will not only look beautiful but also add a delicious flavor. With these decorating ideas, your Witch Hat Peanut Butter Cups will be the star of any Halloween party!
FAQs About Witch Hat Peanut Butter Cups
Can I use different types of chocolate for Witch Hat Peanut Butter Cups?
Absolutely! You can use various types of chocolate for your Witch Hat Peanut Butter Cups. While dark chocolate is a popular choice due to its rich flavor, you can also opt for semi-sweet or milk chocolate. Each type will give your treats a different taste. If you want a sweeter option, milk chocolate is perfect. Mixing different chocolates can also create a unique flavor profile. Just remember to add coconut oil or vegetable shortening to keep the chocolate smooth and shiny!
How long do Witch Hat Peanut Butter Cups last?
Your delicious Witch Hat Peanut Butter Cups can last up to a week when stored properly. Keep them in an airtight container in the refrigerator to maintain their freshness. If you want to enjoy them for a longer time, consider freezing them. Just separate each cup with parchment paper to prevent sticking. When you’re ready to eat them, let them thaw at room temperature for a few minutes. This way, you can savor your treats for days!
Are Witch Hat Peanut Butter Cups suitable for kids?
Yes, Witch Hat Peanut Butter Cups are perfect for kids! They are fun to make and even more enjoyable to eat. The combination of chocolate and peanut butter is a favorite among children. Plus, decorating them can be a great activity for family bonding. Just be mindful of any nut allergies, as the recipe contains peanut butter. With a little supervision, kids can help with mixing, filling, and decorating these delightful treats!
Can I make Witch Hat Peanut Butter Cups ahead of time?
Definitely! Making Witch Hat Peanut Butter Cups ahead of time is a great idea, especially for parties or gatherings. You can prepare them a few days in advance and store them in the refrigerator. This way, you’ll have one less thing to worry about on the day of your event. Just make sure to keep them in an airtight container to maintain their freshness. Your guests will love these treats, and you’ll be ready to impress!
Print
Witch Hat Peanut Butter Cups
- Total Time: 35 minutes
- Yield: 12–15 cups 1x
- Diet: Vegetarian
Description
Witch Hat Peanut Butter Cups are a delightful treat that combines creamy peanut butter and dark chocolate, shaped like whimsical witch hats, perfect for Halloween celebrations.
Ingredients
- 1 cup creamy peanut butter
- 1 cup powdered sugar
- 1 cup dark chocolate chips
- 1 tablespoon coconut oil (or vegetable shortening)
- 1/2 cup orange candy melts
- 1/2 cup purple candy melts
- 1/4 teaspoon sea salt (optional)
- Mini cupcake liners
Instructions
- Gather your ingredients.
- Melt the chocolate by combining dark chocolate chips and coconut oil in a microwave-safe bowl, microwaving in 30-second intervals.
- Prepare the peanut butter mixture by combining creamy peanut butter and powdered sugar in a mixing bowl until smooth.
- Assemble the cups by lining a mini muffin tin with cupcake liners and coating them with melted chocolate.
- Chill the chocolate-coated liners in the refrigerator for 10-15 minutes, then fill with peanut butter mixture and cover with more melted chocolate.
- Return to the refrigerator for another 10-15 minutes to let the chocolate harden completely.
Latest Amazon Finds


Notes
- Choose high-quality chocolate for the best flavor.
- Store in an airtight container in the refrigerator for up to a week.
- Consider freezing for longer storage, separating each cup with parchment paper.
- Prep Time: 20 minutes
- Cook Time: 15 minutes
- Category: Dessert
- Method: No-Bake
- Cuisine: American
Nutrition
- Serving Size: 1 cup
- Calories: 150
- Sugar: 10g
- Sodium: 50mg
- Fat: 9g
- Saturated Fat: 3g
- Unsaturated Fat: 5g
- Trans Fat: 0g
- Carbohydrates: 15g
- Fiber: 1g
- Protein: 3g
- Cholesterol: 0mg
Keywords: Witch Hat Peanut Butter Cups, Halloween treats, peanut butter, chocolate, no-bake dessert