

Are you ready to whip up a spooky treat that will delight both kids and adults? The Haunted Graveyard Dirt Cake Recipe is the perfect dessert for Halloween parties, family gatherings, or any occasion where you want to add a touch of fun. This cake is not only delicious but also visually striking, resembling a graveyard scene that will impress your guests.
What Makes the Haunted Graveyard Dirt Cake Special?
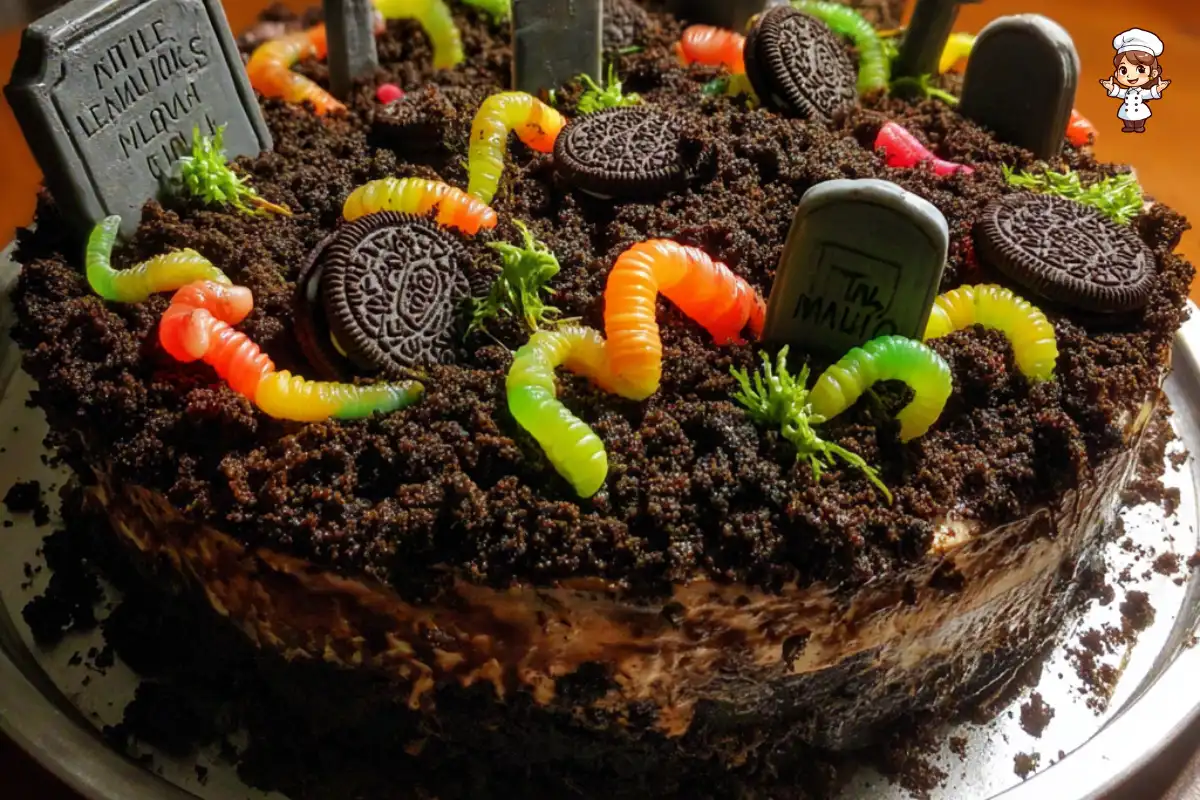
What sets this cake apart is its unique presentation and playful theme. The layers of chocolate cake, creamy pudding, and whipped topping create a rich and satisfying dessert. Meanwhile, the crushed chocolate cookies mimic dirt, while gummy worms and tombstone candies add a whimsical touch. This cake is a feast for the eyes and the taste buds!
Moreover, the Haunted Graveyard Dirt Cake Recipe is incredibly easy to make. With just a few simple ingredients and steps, you can create a show-stopping dessert that requires minimal baking skills. It’s a great way to involve kids in the kitchen, making it a fun family activity. Plus, the cake can be prepared in advance, allowing you to enjoy the festivities without stress.
So, gather your ingredients and get ready to create a spooky masterpiece that will be the highlight of your Halloween celebrations!
Ingredients for the Haunted Graveyard Dirt Cake Recipe
To create your very own Haunted Graveyard Dirt Cake Recipe, you’ll need a few key ingredients. Each component plays a vital role in bringing this spooky dessert to life. Here’s what you’ll need:
- 1 box of chocolate cake mix (plus ingredients required on the box, typically eggs, oil, and water)
- 1 cup of chocolate pudding (instant or prepared)
- 1 container (8 oz) of whipped topping (like Cool Whip)
- 1 package (15 oz) of chocolate sandwich cookies (like Oreos)
- 1 package of gummy worms (about 8 oz)
- 1 package of chocolate tombstone candies (or chocolate-covered graham crackers)
- Optional: edible decorations like candy eyes or spooky sprinkles
These ingredients combine to create a deliciously rich cake that looks like a graveyard scene. The chocolate cake serves as the base, while the pudding adds creaminess. The whipped topping gives it a light texture, and the crushed cookies provide that dirt-like appearance. Gummy worms and tombstone candies complete the spooky look, making it a fun treat for everyone!
Feel free to get creative with your ingredients. You can use different flavors of pudding or even add some extra decorations to make your cake stand out. The possibilities are endless, and that’s what makes this Haunted Graveyard Dirt Cake Recipe so special!


Step-by-Step Preparation of the Haunted Graveyard Dirt Cake Recipe

Step 1: Gather Your Ingredients for the Haunted Graveyard Dirt Cake Recipe
Before you start baking, it’s essential to gather all your ingredients. This will make the process smoother and more enjoyable. Make sure you have:
- 1 box of chocolate cake mix
- 1 cup of chocolate pudding
- 1 container of whipped topping
- 1 package of chocolate sandwich cookies
- 1 package of gummy worms
- 1 package of chocolate tombstone candies
- Optional: edible decorations like candy eyes or spooky sprinkles
Having everything ready will help you follow the Haunted Graveyard Dirt Cake Recipe without any interruptions. Plus, it’s a great way to involve kids in the kitchen. They can help you gather and measure the ingredients!
Step 2: Prepare the Cake Mixture for the Haunted Graveyard Dirt Cake Recipe
Now it’s time to make the cake! Start by preheating your oven according to the instructions on the cake mix box. Greasing and flouring a 9×13 inch baking pan is crucial to prevent sticking. Next, prepare the chocolate cake mix as directed on the box. This usually involves mixing the cake mix with eggs, oil, and water.
Once your batter is ready, pour it into the prepared pan. Bake for the time specified on the box, typically around 25-30 minutes. After baking, allow the cake to cool completely in the pan. This step is vital, as a warm cake can melt the pudding layer!
Step 3: Assemble the Layers of the Haunted Graveyard Dirt Cake Recipe
With the cake cooled, it’s time to create the layers. First, prepare the chocolate pudding according to the package instructions. If you’re using instant pudding, whisk it with cold milk until it thickens. Set it aside for a moment.
Next, take your chocolate sandwich cookies and place them in a zip-top bag. Use a rolling pin or your hands to crush them into fine crumbs. You’ll need about 2 cups of these crumbs to create the “dirt” layer.
Now, spread the chocolate pudding evenly over the cooled cake. Then, gently fold the whipped topping into the remaining cookie crumbs, saving some crumbs for decoration. Spread this mixture over the pudding layer to create the dirt effect. Your cake is starting to look like a spooky graveyard!
Step 4: Decorate Your Haunted Graveyard Dirt Cake
It’s time for the fun part—decorating! Stick the chocolate tombstone candies into the dirt layer, arranging them however you like. Scatter the gummy worms on top and around the tombstones, letting some hang off the edges for a creepy effect.
If you want to add an extra touch, consider using edible decorations like candy eyes or spooky sprinkles. These little details will make your Haunted Graveyard Dirt Cake Recipe even more exciting and visually appealing!
Once decorated, refrigerate the cake for at least 1 hour before serving. This chilling time allows the flavors to meld and the cake to set, making it even more delicious!
Tips for Perfecting the Haunted Graveyard Dirt Cake Recipe
Common Mistakes to Avoid in the Haunted Graveyard Dirt Cake Recipe
Making the Haunted Graveyard Dirt Cake Recipe can be a fun experience, but there are a few common mistakes to watch out for. First, ensure your cake is completely cooled before adding the pudding layer. If the cake is warm, it can cause the pudding to melt, ruining the layers.
Another mistake is not crushing the cookies finely enough. If the cookie crumbs are too large, they won’t create the desired dirt effect. Aim for a fine crumb texture to mimic real dirt. Also, be careful not to overmix the whipped topping with the cookie crumbs. Gently folding them together will keep the mixture light and fluffy.
Lastly, don’t skip the chilling step! Refrigerating the cake for at least an hour helps the flavors blend and the layers set. This step is crucial for achieving the best taste and texture.
Storage Tips for the Haunted Graveyard Dirt Cake
Storing your Haunted Graveyard Dirt Cake Recipe properly will keep it fresh and delicious. After decorating, cover the cake with plastic wrap or aluminum foil. This will prevent it from drying out and keep it looking great.
The cake can be stored in the refrigerator for up to 3 days. If you plan to make it ahead of time, it’s best to prepare the cake layers and pudding, then assemble and decorate it the day you plan to serve it. This way, the cake stays fresh and the decorations remain vibrant.
If you have leftovers, you can also freeze the cake. Just make sure to wrap it tightly in plastic wrap and then in aluminum foil. It can be frozen for up to a month. When you’re ready to enjoy it again, simply thaw it in the refrigerator overnight before serving.
Creative Variations of the Haunted Graveyard Dirt Cake Recipe
Alternative Ingredients for the Haunted Graveyard Dirt Cake Recipe
While the classic Haunted Graveyard Dirt Cake Recipe is delicious as is, you can easily switch things up with alternative ingredients. For instance, if you want a different flavor, try using vanilla cake mix instead of chocolate. This will give your cake a lighter taste while still allowing the chocolate pudding and cookie crumbs to shine.
Another fun twist is to use different flavors of pudding. Consider using butterscotch or even strawberry pudding for a unique flavor profile. These flavors can add a delightful surprise to your cake, making it even more enjoyable for your guests.
If you’re looking for a healthier option, you can substitute the whipped topping with Greek yogurt. This will give your cake a creamy texture while reducing the sugar content. You can also use crushed graham crackers instead of chocolate sandwich cookies for a different texture and flavor.
For those who love a bit of crunch, consider adding chopped nuts or granola to the dirt layer. This will add an interesting texture and a nutty flavor that complements the sweetness of the cake. The possibilities are endless, so feel free to experiment with your favorite ingredients!
Themed Decorations for the Haunted Graveyard Dirt Cake Recipe
Decorating your Haunted Graveyard Dirt Cake Recipe is where you can truly let your creativity shine. While gummy worms and tombstone candies are classic choices, you can take it a step further with themed decorations. For a more eerie vibe, consider adding candy spiders or edible glitter to create a spooky atmosphere.
Another fun idea is to use cookie cutters to create shapes from fondant or colored frosting. You can make ghosts, bats, or even mini pumpkins to place around the cake. These decorations will not only enhance the visual appeal but also add to the Halloween spirit.
For a more interactive experience, set up a decorating station where guests can add their own toppings. Provide a variety of options like candy corn, chocolate sprinkles, or even mini marshmallows. This way, everyone can customize their slice of cake, making it a fun and memorable treat!
Lastly, consider using themed plates and napkins to serve your cake. This small touch can elevate the entire presentation and make your dessert the star of the show. With these creative variations and decorations, your Haunted Graveyard Dirt Cake Recipe will be a hit at any Halloween gathering!
FAQs About the Haunted Graveyard Dirt Cake Recipe
How long does the Haunted Graveyard Dirt Cake last?
The Haunted Graveyard Dirt Cake Recipe can last up to 3 days when stored properly in the refrigerator. Make sure to cover it with plastic wrap or aluminum foil to keep it fresh. After a few days, the cake may start to lose its texture and flavor, so it’s best enjoyed within this time frame.
Can I make the Haunted Graveyard Dirt Cake ahead of time?
Absolutely! You can prepare the Haunted Graveyard Dirt Cake Recipe a day in advance. Just make sure to assemble and decorate it the day you plan to serve it. This way, the cake stays fresh, and the decorations remain vibrant. If you need to make it even earlier, you can bake the cake and prepare the pudding, then store them separately in the refrigerator until you’re ready to assemble.
What can I use instead of chocolate pudding in the Haunted Graveyard Dirt Cake Recipe?
If you want to switch things up, there are several alternatives to chocolate pudding. You can use vanilla pudding for a lighter flavor or even butterscotch pudding for a unique twist. If you prefer a healthier option, consider using a homemade pudding made with almond milk and natural sweeteners. These alternatives will still create a delicious layer in your cake!
Is the Haunted Graveyard Dirt Cake suitable for kids?
Yes, the Haunted Graveyard Dirt Cake Recipe is perfect for kids! It’s fun, interactive, and visually appealing, making it a hit at any Halloween party. The ingredients are kid-friendly, and the decorating process can be a great activity for children. Just be sure to supervise younger kids when using any small decorations or candies to ensure safety.
Print
Haunted Graveyard Dirt Cake Recipe
- Total Time: 1 hour 30 minutes
- Yield: 12 servings 1x
- Diet: Vegetarian
Description
A spooky dessert that resembles a graveyard scene, perfect for Halloween parties and family gatherings.
Ingredients
- 1 box of chocolate cake mix (plus ingredients required on the box, typically eggs, oil, and water)
- 1 cup of chocolate pudding (instant or prepared)
- 1 container (8 oz) of whipped topping (like Cool Whip)
- 1 package (15 oz) of chocolate sandwich cookies (like Oreos)
- 1 package of gummy worms (about 8 oz)
- 1 package of chocolate tombstone candies (or chocolate-covered graham crackers)
- Optional: edible decorations like candy eyes or spooky sprinkles
Instructions
- Gather all your ingredients.
- Preheat your oven and prepare the cake mix according to the box instructions. Bake and cool the cake completely.
- Prepare the chocolate pudding according to package instructions.
- Crush the chocolate sandwich cookies into fine crumbs.
- Spread the chocolate pudding over the cooled cake.
- Fold whipped topping into the remaining cookie crumbs and spread over the pudding layer.
- Decorate with chocolate tombstone candies and gummy worms.
- Refrigerate for at least 1 hour before serving.
Latest Amazon Finds


Notes
- Ensure the cake is completely cooled before adding pudding.
- Crush cookies finely for the best dirt effect.
- Do not skip the chilling step for optimal flavor and texture.
- Prep Time: 30 minutes
- Cook Time: 30 minutes
- Category: Dessert
- Method: No-bake and baking
- Cuisine: American
Nutrition
- Serving Size: 1 slice
- Calories: 350
- Sugar: 25g
- Sodium: 200mg
- Fat: 15g
- Saturated Fat: 7g
- Unsaturated Fat: 5g
- Trans Fat: 0g
- Carbohydrates: 50g
- Fiber: 2g
- Protein: 4g
- Cholesterol: 30mg
Keywords: Haunted Graveyard Dirt Cake, Halloween dessert, spooky cake, chocolate cake