


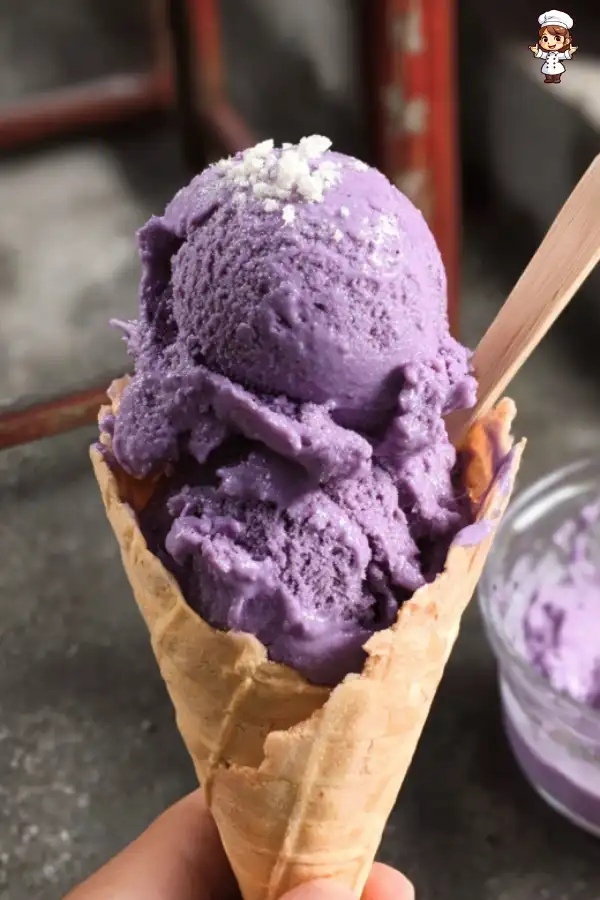
When the heat is on and you’re craving something cool, nothing satisfies quite like a scoop of ice cream. Now, imagine indulging in a vibrant purple treat that not only delights your taste buds but also turns heads. Enter Homemade No-Churn Ube Ice Cream! This luscious, creamy dessert captures the essence of ube, a sweet purple yam that is a beloved staple in Filipino cuisine. The best part? You don’t need an ice cream maker to whip up this colorful delight. Just a handful of ingredients and a little patience will yield a frozen dessert that’s as delicious as it is eye-catching.
Ube ice cream has gained popularity across the globe, not just for its unique flavor but also for its stunning appearance. With its deep lavender hue and subtle nutty sweetness, it’s perfect for any treat or occasion. Plus, this no-churn method makes preparation a breeze. Grab your mixing bowl and electric hand mixer, and let’s dive into creating this creamy delight!
Ingredients about Homemade No-Churn Ube Ice Cream
To whip up your very own Homemade No-Churn Ube Ice Cream, you’ll need the following ingredients:
List of ingredients with measurements
- 600 g heavy cream, cold
- 1 tablespoon ube extract
- 375 g sweetened condensed milk
Optional ingredient substitutions
If you’re looking to adjust the recipe a bit, consider these substitutions:
- Heavy cream: You may use coconut cream for a dairy-free version.
- Ube extract: If unavailable, you can replace it with another flavor extract, such as vanilla or purple food coloring, though the taste will differ.
- Sweetened condensed milk: Substitute with evaporated milk and a sugar alternative like honey or agave nectar for a lighter version.


How to Make Homemade No-Churn Ube Ice Cream
Making your own ice cream can be a fun and rewarding experience. Follow these easy steps to ensure your Homemade No-Churn Ube Ice Cream comes out perfectly.
Step 1: Prepare your ingredients
Start by placing your heavy cream in a large mixing bowl. Make sure the cream is cold; this will help it whip up to stiff peaks quickly. Add in the ube extract as well. Using an electric hand mixer fitted with a whisk attachment, beat the cream on medium speed until it transforms into fluffy, stiff peaks. This process usually takes about 3 to 5 minutes.
Step 2: Fold in the sweetened condensed milk
Once your whipped cream is ready, it’s time to add sweetness. Carefully drizzle in the sweetened condensed milk. Using a spatula, gently fold the two mixtures together. It’s important to do this slowly, so you maintain the light and airy texture of the whipped cream. Continue folding until there are no streaks of cream or condensed milk remaining, but avoid overmixing to keep it fluffy.
Step 3: Transfer to a loaf pan
Now that you have your ube ice cream mixture, pour it into a loaf pan. Spread the mixture evenly, smoothing the top with your spatula. This will help ensure even freezing.
Step 4: Freeze overnight
Cover the loaf pan tightly with plastic wrap to prevent ice crystals from forming. Place it in the freezer overnight. This gives the ice cream sufficient time to set and become solid.
How to Serve Homemade No-Churn Ube Ice Cream
The moment we’ve all been waiting for: serving and enjoying your delicious Homemade No-Churn Ube Ice Cream!
Best ways to serve Homemade No-Churn Ube Ice Cream
To serve, take your ice cream scooper and run it under hot water for a few seconds. Dry it off and then scoop into bowls or cones. The hot water will make it easier to scoop, ensuring that each serving looks great.
Serving suggestions or pairings
There are plenty of ways to indulge in your ube ice cream:
- Simple Bowls: Serve it in bowls for a classic presentation.
- Ice Cream Cones: Use waffle cones to add a delightful crunch.
- Dessert Toppings: Top with toasted coconut, sprinkles, or even a drizzle of chocolate syrup for an extra touch.
- Pair with other desserts: Ube ice cream goes well with cakes, pies, or even ube-flavored desserts to enhance the flavor experience.
How to Store Homemade No-Churn Ube Ice Cream
Once you’ve made your ice cream, it’s crucial to store it properly to maintain its delightful texture and flavor.
Proper storage methods
Keep the ice cream tightly covered in the loaf pan or transfer it to an airtight container. This helps prevent any unwanted ice crystals from forming and keeps your ice cream fresh.
Tips for reheating or freezing
If your ice cream becomes too hard, let it sit at room temperature for a few minutes before scooping. Just a little wait can make a big difference in the texture!
Tips to Make Homemade No-Churn Ube Ice Cream
Making ice cream is as much about technique as it is about the ingredients. Here are some tips to ensure that your Homemade No-Churn Ube Ice Cream comes out perfectly every time.
Common mistakes to avoid
- Overmixing the ingredients: This can deflate your whipped cream and result in a denser texture.
- Using warm cream: Always use cold heavy cream for the best whipping results.
Helpful tips for better results
- Chill your mixing bowl: Consider refrigerating your mixing bowl before starting. A cold bowl can help your cream whip more effectively.
- Consider adding mix-ins: For a unique twist, you could add chopped fruits, nuts, or even chocolate chips before freezing.
Variation of Homemade No-Churn Ube Ice Cream
Feeling experimental? There are many ways to put a spin on your no-churn ube ice cream recipe!
Suggested variations or twists on the recipe
- Strawberry Ube Swirl: Layer in fruit puree for a beautiful contrast and added flavor.
- Ube Cheesecake Ice Cream: Mix in some cream cheese to the base for a richer taste.
- Cookie Crumble Ube Ice Cream: Fold in crumbled cookies for added texture.
Adjustments for dietary preferences
If you have dietary restrictions or preferences, consider these options:
- Dairy-free: Use coconut cream or almond milk in place of heavy cream.
- Sugar-free: Use a sugar alternative in your sweetened condensed milk or opt for unsweetened ingredients.
FAQs
You might have some questions while making or enjoying your Homemade No-Churn Ube Ice Cream. Here are some common queries to help you out!
What can I do if the dish isn’t turning out right?
If your ice cream is still too soft after freezing, it may need more time. If it is too hard, letting it sit at room temperature for a few minutes before scooping can help.
Can I make this ahead of time?
Absolutely! You can make this ice cream several days in advance. It actually tastes best when frozen for at least 24 hours, as it allows the flavors to blend.
What can I substitute for ingredients?
If you can’t find ube extract, you can use vanilla extract or a different flavoring, but keep in mind that it will alter the flavor of the ice cream. For sweetened condensed milk, honey or agave syrup can work well depending on your sweetness preference.
Now you’re all set to embark on your delicious homemade ice cream journey! This Homemade No-Churn Ube Ice Cream is not only easy to make but also a delightful treat for any occasion. Enjoy the vibrant flavors and beautiful color of this charming dessert, and don’t forget to share it with friends and family. Happy scooping!
Print
Homemade No-Churn Ube Ice Cream
- Total Time: 8 hours (including freezing)
- Yield: 8–10 servings 1x
- Diet: Vegetarian
Description
Homemade No-Churn Ube Ice Cream is a creamy, vibrant purple Filipino dessert made with ube extract, heavy cream, and sweetened condensed milk. No ice cream maker needed!
Ingredients
- 600 g heavy cream, cold
- 1 tablespoon ube extract
- 375 g sweetened condensed milk
Instructions
- Place cold heavy cream and ube extract in a large mixing bowl. Using an electric hand mixer, beat until stiff peaks form (3-5 minutes).
- Gently fold in sweetened condensed milk with a spatula, maintaining the airy texture.
- Pour mixture into a loaf pan and smooth the top evenly.
- Cover tightly with plastic wrap and freeze overnight until solid.
Latest Amazon Finds


Notes
- Use cold heavy cream for best whipping results.
- Fold sweetened condensed milk slowly to keep the mixture fluffy.
- Run your ice cream scoop under hot water before scooping for easier serving.
- Store ice cream in an airtight container to prevent ice crystals.
- Prep Time: 10 minutes
- Cook Time: 0 minutes
- Category: Dessert
- Method: No-churn freezing
- Cuisine: Filipino
Nutrition
- Serving Size: 1/2 cup
- Calories: 250
- Sugar: 24g
- Sodium: 35mg
- Fat: 18g
- Saturated Fat: 11g
- Unsaturated Fat: 6g
- Trans Fat: 0g
- Carbohydrates: 20g
- Fiber: 1g
- Protein: 2g
- Cholesterol: 65mg
Keywords: No-churn ube ice cream, homemade ube ice cream, ube dessert, Filipino ice cream, easy no-churn ice cream