

Have you ever craved the classic taste of Oreos but wanted to enjoy them fresh from your kitchen? Making your own Homemade Oreos is not only fun, but it also allows you to customize the flavors to your liking. This recipe invites you into the world of baking, where you can whip up delightful, crisp chocolate cookies filled with a creamy, sweet center. There’s something genuinely heartwarming about making your own treats; not only can they rival the store-bought version, but they also hold the magic of being made with your own hands. Let’s dive into this simple and satisfying adventure of crafting Homemade Oreos.
Ingredients for Homemade Oreos
To make your delicious Homemade Oreos, you will need the following ingredients:
List of Ingredients with Measurements
- 1 and 1/4 cups all-purpose flour
- 1/2 cup unsweetened Dutch process cocoa powder
- 1 teaspoon baking soda
- 1/8 teaspoon salt
- 1/2 cup unsalted butter, softened to room temperature
- 3/4 cup granulated sugar
- 1/4 cup packed light brown sugar
- 1 large egg, at room temperature
- 1 teaspoon pure vanilla extract
- 1/4 cup unsalted butter, softened to room temperature (for filling)
- 1/4 cup vegetable shortening, at room temperature
- 1 and 3/4 cups confectioners’ sugar
- 1 teaspoon pure vanilla extract (for filling)
Optional Ingredient Substitutions
If you find yourself missing an ingredient, don’t worry! Here are some easy substitutions you can try:
- Instead of all-purpose flour, you can use a gluten-free flour blend.
- If you want a deeper chocolate flavor, you might choose to use dark cocoa powder instead of Dutch process cocoa.
- In place of unsalted butter, you can use margarine or plant-based butter alternatives for a dairy-free option.
- You can replace the vegetable shortening with more unsalted butter if you prefer.


How to Make Homemade Oreos
Making your own Homemade Oreos is straightforward if you follow the steps carefully. Here’s a breakdown of the process:
Step 1: Prepare the Oven and Baking Sheets
Before you begin mixing your ingredients, preheat your oven to 350°F (177°C). This ensures that the cookies bake evenly. While the oven is warming up, line your baking sheets with parchment paper. This prevents the cookies from sticking and makes cleanup a breeze.
Step 2: Mix the Dry Ingredients
In a large mixing bowl, whisk together 1 and 1/4 cups of flour, 1/2 cup of cocoa powder, 1 teaspoon of baking soda, and 1/8 teaspoon of salt. Whisking helps combine the dry ingredients thoroughly, which is crucial for the proper texture of the cookies. Once combined, set this mixture aside.
Step 3: Cream the Butter and Sugars
In another mixing bowl, beat together 1/2 cup of softened unsalted butter, 3/4 cup of granulated sugar, and 1/4 cup of light brown sugar until the mixture is creamy. This usually takes about 3 minutes. It’s essential to achieve a fluffy texture as it contributes to the overall lightness of the cookies. After the butter and sugar are well combined, add in 1 large egg and 1 teaspoon of pure vanilla extract, mixing until fully incorporated.
Step 4: Combine Wet and Dry Ingredients
Now, gradually add the dry mixture to the wet mixture. Blend them together until a thick dough forms. You might need to use your hands to knead it slightly if it’s too stiff, but be careful not to overwork the dough.
Step 5: Shape the Cookies
Next, roll the dough into small balls, approximately 2 teaspoons each. Place these on your lined baking sheets and flatten them into discs that are about 1.5 inches in diameter. Be sure to leave some space between each cookie as they will spread while baking.
Step 6: Chill the Dough
Once you have shaped the cookies, pop them into the refrigerator for about 10 minutes. Chilling helps the cookies hold their shape during baking.
Step 7: Bake the Cookies
After chilling, bake the cookies in the preheated oven for 8-10 minutes. They’re done when the edges are set and the tops show slight cracks. Once baked, cool the cookies on the baking sheets for at least 5 minutes before carefully transferring them to a wire rack to cool completely.
Step 8: Make the Cream Filling
While the cookies cool, it’s time to whip up the cream filling. In a mixing bowl, beat together 1/4 cup of softened unsalted butter and 1/4 cup of vegetable shortening until creamy—about 2 minutes will do. Gradually add 1 and 3/4 cups of confectioners’ sugar and 1 teaspoon of pure vanilla extract. Start on low speed to prevent the sugar from flying out, then change to high speed and beat for an additional 1-2 minutes until the mixture is smooth and fluffy.
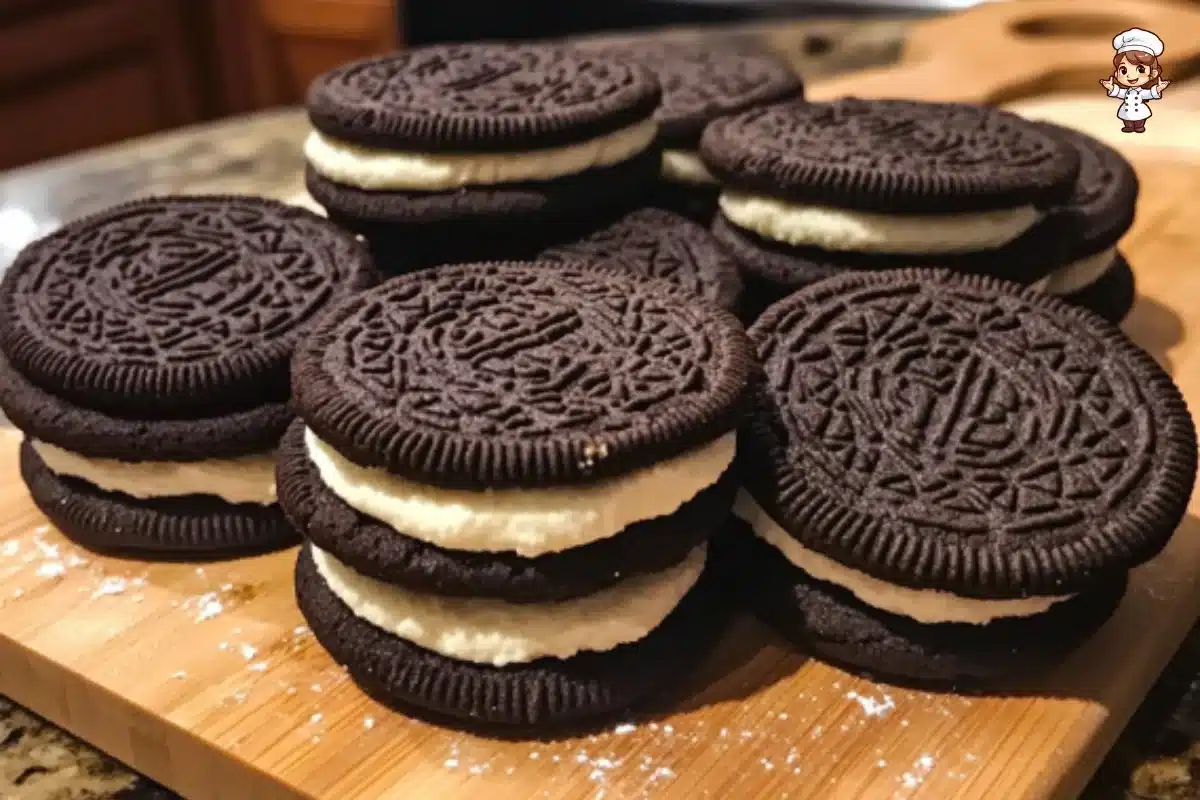
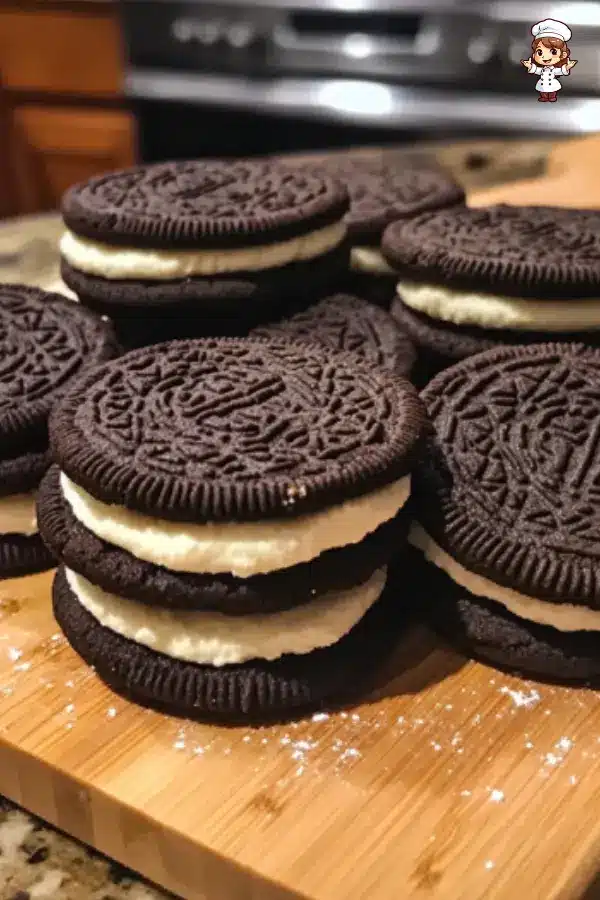
Step 9: Assemble the Homemade Oreos
Take one cookie, spread or pipe the cream filling on the bottom side, and then sandwich it with another cookie. Press gently to ensure the filling spreads to the edges. Continue this process until all cookies are assembled.
How to Serve Homemade Oreos
Once you have made your Homemade Oreos, it’s time to enjoy them! Here are some great ways to serve them:
Best Ways to Serve Homemade Oreos
- Serve them fresh! There’s nothing quite like the experience of sinking your teeth into a fresh, homemade Oreo. You can also enjoy them with a glass of milk, which complements their rich chocolate flavor perfectly.
- Cut them in half to reveal the delightful filling and place them on a plate for a more elegant presentation if you’re having guests over.
Serving Suggestions or Pairings
- Pair your Homemade Oreos with different beverages like coffee, iced tea, or hot cocoa for a delightful treat.
- You can also add a scoop of vanilla or mint chocolate chip ice cream between two cookies for a quick and delicious ice cream sandwich.
How to Store Homemade Oreos
Storing your Homemade Oreos correctly will keep them fresh and delicious for longer. Here are some simple tips:
Proper Storage Methods
- Place your Homemade Oreos in an airtight container to maintain their freshness. If you separate them with parchment paper, it helps to avoid any sticky situations with the filling.
- Keep them in a cool, dry place for up to a week. You can also refrigerate them for even longer shelf life.
Tips for Reheating or Freezing
- If you want to store them for an extended period, consider freezing them. Just make sure the filling is fully set before you wrap them tightly in plastic wrap and place them in an airtight container or freezer bag.
- To enjoy them after freezing, let them sit at room temperature for about 15-20 minutes before eating, or heat them slightly in the microwave for a few seconds to warm them up.
Tips to Make Homemade Oreos
Creating the perfect Homemade Oreos might take a little practice, but here are some handy tips to enhance your baking skills:
Common Mistakes to Avoid
- Overmixing the dough can lead to tough cookies. Mix just until the dry ingredients are incorporated.
- Not chilling the dough can cause the cookies to spread too much while baking, so resist the urge to skip this essential step.
- Ensure your ingredients are at room temperature, especially butter and eggs, for better mixing and baking.
Helpful Tips for Better Results
- Use a cookie scoop for uniform-sized cookies. This ensures even baking and makes your presentation look neat and tidy.
- Experiment with adding a pinch of sea salt on top of the cookies before baking to elevate the chocolate flavor.
- Try different extracts or flavored creams for your filling, such as mint or almond, to switch things up.
Variation of Homemade Oreos
If you’re feeling adventurous or want to cater to different tastes, consider trying these variations:
Suggested Variations or Twists on the Recipe
- For a classic twist, use white chocolate or peanut butter filling instead of the traditional cream filling. Simply melt these alternatives and pipe them onto the cooled cookies.
- Try adding crushed cookies, nuts, or sprinkles to the filling for extra texture and taste.
Adjustments for Dietary Preferences
- For gluten-free oreos, substitute the all-purpose flour with a gluten-free blend, ensuring that the other ingredients remain compliant.
- If you want to make your cookies dairy-free, swap the butter with coconut oil or dairy-free butter, and make sure the chocolate is dairy-free.
FAQs
What can I do if the dish isn’t turning out right?
If your dough seems too dry or crumbly, add a teaspoon of milk or water to moisten it. If it’s too wet, you can incorporate a small amount of flour until you achieve the right consistency.
Can I make this ahead of time?
Absolutely! You can prepare the dough and store it in the refrigerator for up to two days. Alternatively, you can bake and fill the cookies and store them for later enjoyment.
What can I substitute for ingredients?
Feel free to substitute ingredients according to your dietary needs or preferences. The list provided in the ingredients section has various alternatives. Remember that these substitutions might slightly alter the taste or texture, so choosing wisely based on your preferences is essential.
Homemade Oreos are more than just a treat; they are a delightful experience that brings warmth and joy to baking. Whether you’re making them for yourself, to share with friends, or for a special occasion, these cookies are sure to bring smiles and satisfy your sweet tooth. So grab your ingredients, roll up your sleeves, and enjoy the fantastic journey of creating your own cherished version of this classic cookie!
Print
Homemade Oreos
- Total Time: 30 minutes
- Yield: About 24 cookies (12 sandwich Oreos) 1x
- Diet: Vegetarian
Description
A simple and delicious recipe to make homemade Oreos with crisp chocolate cookies and creamy sweet filling, customizable and fresh from your kitchen.
Ingredients
- 1 and 1/4 cups all-purpose flour
- 1/2 cup unsweetened Dutch process cocoa powder
- 1 teaspoon baking soda
- 1/8 teaspoon salt
- 1/2 cup unsalted butter, softened to room temperature
- 3/4 cup granulated sugar
- 1/4 cup packed light brown sugar
- 1 large egg, at room temperature
- 1 teaspoon pure vanilla extract
- 1/4 cup unsalted butter, softened to room temperature (for filling)
- 1/4 cup vegetable shortening, at room temperature (for filling)
- 1 and 3/4 cups confectioners’ sugar (for filling)
- 1 teaspoon pure vanilla extract (for filling)
Instructions
- Preheat oven to 350°F (177°C). Line baking sheets with parchment paper.
- Whisk together flour, cocoa powder, baking soda, and salt in a bowl.
- In another bowl, beat softened butter, granulated sugar, and brown sugar until creamy.
- Add egg and vanilla extract to the butter mixture and mix well.
- Gradually add dry ingredients to wet mixture and combine to form dough.
- Roll dough into 2 teaspoon-sized balls, place on baking sheet, and flatten to 1.5 inches diameter.
- Chill dough on baking sheets in refrigerator for 10 minutes.
- Bake cookies for 8-10 minutes until edges are set and tops crack slightly. Cool on sheets for 5 minutes, then transfer to wire rack to cool completely.
- For filling, beat softened butter and shortening until creamy.
- Gradually add confectioners’ sugar and vanilla extract, beating until smooth and fluffy.
- Assemble Oreos by spreading filling on one cookie and sandwiching with another. Press gently to spread filling evenly.
Latest Amazon Finds


Notes
- Do not overmix dough to avoid tough cookies.
- Chilling dough helps cookies keep shape while baking.
- Use room temperature ingredients for best results.
- Cookie scoop helps make uniform-sized cookies.
- Try adding sea salt on cookies before baking to enhance chocolate flavor.
- Experiment with flavored extracts in filling such as mint or almond.
- Store Oreos in airtight container, separated with parchment paper, in a cool dry place or refrigerated for longer freshness.
- Freeze for extended storage and thaw before serving.
- Prep Time: 20 minutes
- Cook Time: 10 minutes
- Category: Dessert, Snack
- Method: Baking
- Cuisine: American
Nutrition
- Serving Size: 1 sandwich cookie
- Calories: 150
- Sugar: 15g
- Sodium: 70mg
- Fat: 8g
- Saturated Fat: 5g
- Unsaturated Fat: 2g
- Trans Fat: 0g
- Carbohydrates: 20g
- Fiber: 1g
- Protein: 1g
- Cholesterol: 20mg
Keywords: homemade Oreos recipe, DIY Oreos, chocolate sandwich cookies, Oreo cookie recipe, homemade cream-filled cookies