

Oh my goodness, where do I even start with this classic banana pudding recipe? It’s like a warm hug on a plate! There’s just something about that creamy, dreamy texture and the delightful flavor that makes it an all-time favorite dessert, right? I remember my grandma would whip this up for family gatherings, and we’d all gather around the table, eagerly waiting for her to bring it out. The smell of sweet bananas mingling with vanilla wafting through the air was pure magic. I can still hear my cousins giggling and racing to get the first scoop! Trust me, every bite is like a little piece of nostalgia. The layers of soft, ripe bananas, crunchy vanilla wafers, and that velvety pudding come together to create something truly special. It’s perfect for any occasion—whether you’re hosting a summer barbecue or just need a little comfort food at home. I can’t wait for you to try it and hopefully make some sweet memories of your own!
Ingredients for Banana Pudding Recipe
Gathering the right ingredients is key to making this banana pudding as delicious as I remember! Here’s what you’ll need:
- 4 ripe bananas, sliced
- 1 box of vanilla wafers
- 2 cups of milk
- 1/2 cup of granulated sugar
- 1/3 cup of cornstarch
- 1/4 teaspoon of salt
- 4 egg yolks
- 2 tablespoons of butter
- 1 teaspoon of vanilla extract
- 1 cup of whipped cream
Make sure those bananas are nice and ripe! Trust me, they’ll add that extra sweetness and flavor that makes this dessert shine. If you’re in the mood for a little twist, you can even swap out the vanilla wafers for some graham crackers—either way, you can’t go wrong! Get ready to dive into a creamy, dreamy experience that’ll have everyone asking for seconds.


How to Prepare Banana Pudding Recipe
Alright, now let’s get to the fun part—making that delicious banana pudding! Follow these simple steps, and we’ll have a creamy masterpiece in no time. Just take it step by step, and I promise you’ll be rewarded with a dessert that’s sure to impress!
Step 1: Combine Dry Ingredients
First things first, grab a saucepan and combine 2 cups of milk, 1/2 cup of granulated sugar, 1/3 cup of cornstarch, and 1/4 teaspoon of salt. Stir it all together until it’s well mixed—think of it as creating a cozy little base for our pudding. Make sure there are no lumps in the cornstarch! This mixture is going to turn into pure deliciousness.
Step 2: Cook the Mixture
Now, place that saucepan over medium heat. Here’s where the magic happens! Stir constantly while it cooks, and keep an eye on it. You want to make sure it thickens up nicely—this should take about 5-7 minutes. If you get distracted, don’t worry, just keep stirring! If it starts to bubble, reduce the heat a little to avoid any splatters. We want the pudding, not a kitchen mess!
Step 3: Prepare Egg Yolks
Once your mixture has thickened, it’s time to prepare the egg yolks. In a separate bowl, whisk together 4 egg yolks. Now, you need to temper the yolks, which means we’ll gradually add a few spoonfuls of the hot pudding mixture into the yolks while whisking continuously. This helps prevent the eggs from scrambling. Once combined, return this egg mixture back to the saucepan and cook for another 2 minutes, stirring gently. You’ll see it start to thicken even more—yum!
Step 4: Finish the Pudding
Now, remove the saucepan from the heat. This is the exciting part! Stir in 2 tablespoons of butter and 1 teaspoon of vanilla extract. Let those flavors mingle and melt together. You’ll be greeted with a rich, fragrant aroma that’s just heavenly. Feel free to take a little taste—trust me, you won’t regret it!
Step 5: Assemble the Dessert
Time to layer! Grab a dish (a 9×13 works great) and start with a layer of sliced bananas. Then, add a layer of vanilla wafers. Pour that luscious pudding over the top, making sure to cover the layers evenly. Repeat the process until you run out of ingredients, finishing with that creamy pudding layer on top. It’s starting to look amazing already!
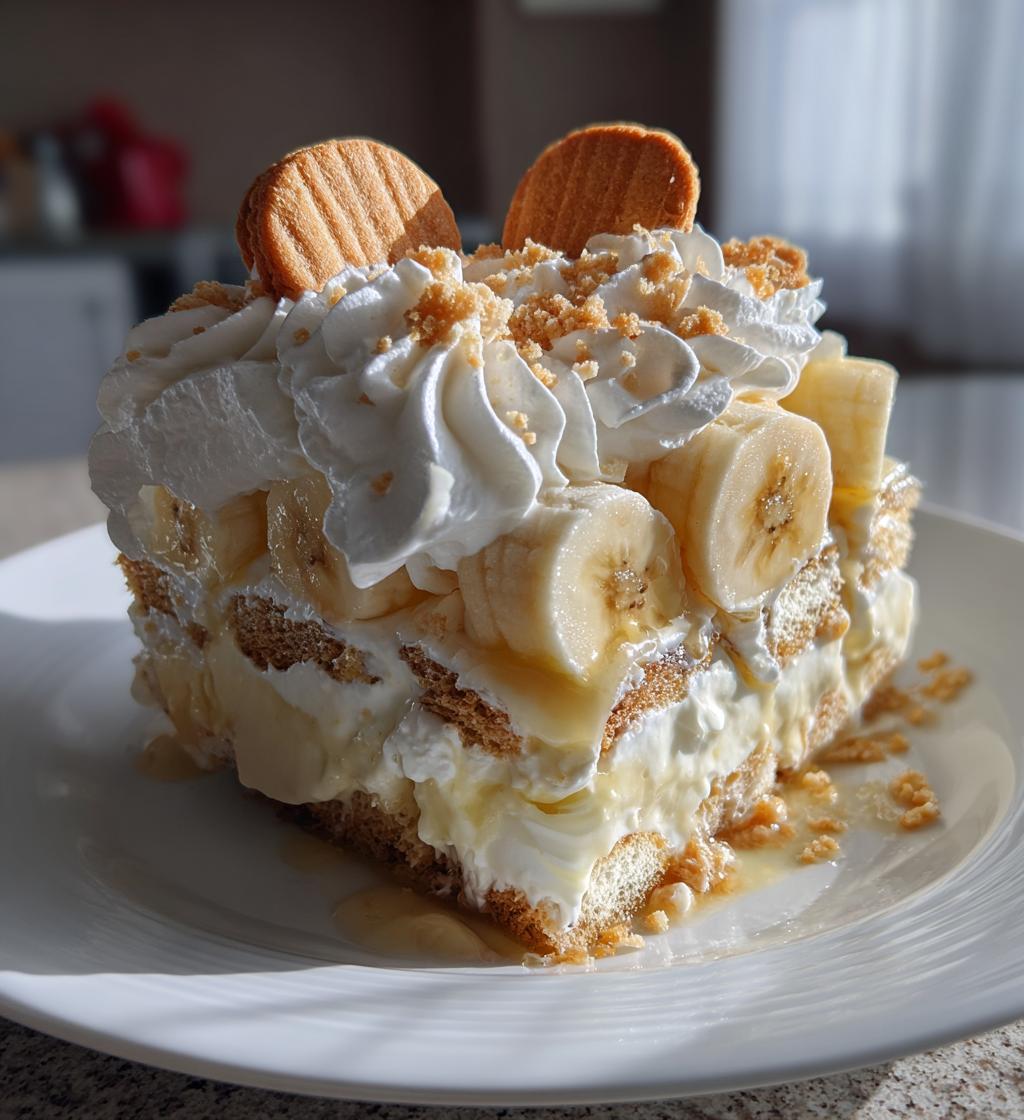
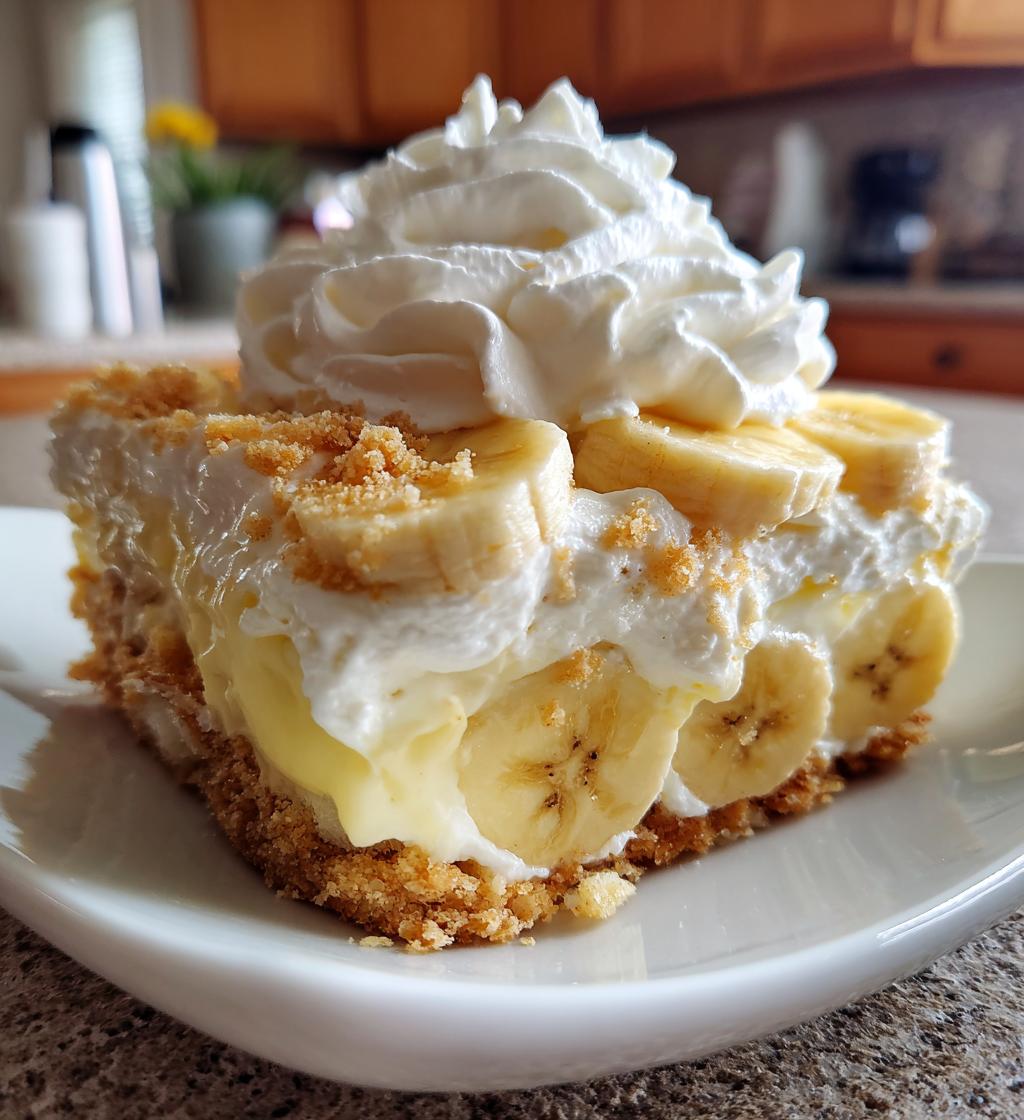
Step 6: Add Whipped Cream
Finally, it’s time for the crowning glory—top your banana pudding with 1 cup of whipped cream. Spread it on generously, and don’t be shy! You can even add some extra banana slices or crushed vanilla wafers on top for a little flair. Now, pop it in the refrigerator and let it chill for at least 2 hours. This helps the flavors meld together beautifully and lets that pudding set. Trust me, the wait will be worth it!
Nutritional Information Disclaimer
Hey there! Just a little note about the nutritional information—please keep in mind that the nutrition values can vary based on the specific ingredients and brands you use. I do my best to give you a rough estimate, but precise values aren’t provided here. For the most accurate information, it’s always a good idea to check the packaging of your ingredients. Enjoy making your banana pudding, and remember, it’s all about the joy of cooking and sharing delicious moments with loved ones!
Why You’ll Love This Banana Pudding Recipe
- Quick preparation—whip it up in under 30 minutes!
- Creamy texture that’s simply irresistible
- Classic flavor that brings back memories of family gatherings
- Perfect for sharing at parties, potlucks, or barbecues
- Kid-friendly and sure to please even the pickiest eaters
- Uses simple, everyday ingredients you probably have at home
- Can be made ahead of time, saving you stress on the day of serving
- Easily customizable—try adding your favorite fruits or cookies!
- Leftovers taste even better the next day, if you can resist!
Tips for Success with Your Banana Pudding Recipe
Alright, my fellow dessert enthusiasts, let’s talk tips to make sure your banana pudding is nothing short of perfection! With just a few simple tricks, you can elevate your pudding game to a whole new level. Here’s what I’ve learned over the years:
- Use Ripe Bananas: Seriously, don’t skimp on this! The riper the bananas, the sweeter and more flavorful your pudding will be. Look for bananas with lots of brown spots—those are the ones you want!
- Chill Time is Key: I know it’s tempting to dig in right away, but give your pudding at least 2 hours in the fridge. This chilling time allows the flavors to meld together and the pudding to set just right. Patience is a virtue, especially when it comes to desserts!
- Mix It Up: Feel free to get creative! You can add a layer of fresh berries, like strawberries or blueberries, for a pop of color and flavor. Or, try using different cookies instead of vanilla wafers—chocolate or even oatmeal cookies can be a fun twist!
- Don’t Overcook: When you’re cooking the pudding mixture, keep a close eye on it. You want it thickened but not overcooked. If it starts to bubble too fiercely, lower the heat. Trust me, no one wants a rubbery pudding!
- Cover with Plastic Wrap: If you’re making this ahead of time, cover the surface of the pudding with plastic wrap before chilling. This prevents a skin from forming on top and keeps your pudding nice and smooth.
- Presentation Matters: When you’re ready to serve, consider adding a sprinkle of crushed vanilla wafers or a drizzle of caramel sauce on top for that extra wow factor. We eat with our eyes first, right?
With these tips in hand, you’re all set to create a banana pudding that will wow your friends and family! Get ready to bask in the compliments, because this dessert is going to be a hit!
Variations on the Classic Banana Pudding Recipe
Now, if you’re feeling a little adventurous or just want to mix things up, there are so many fun variations you can try with this classic banana pudding recipe! Trust me, each twist brings its own delightful surprise. Here are some ideas that I absolutely love:
- Chocolate Lovers: If you’re a chocolate fanatic like me, why not add some cocoa powder to the pudding mix? You can also layer in chocolate cookies instead of vanilla wafers for a rich, indulgent treat. Chocolate and bananas are a match made in dessert heaven!
- Berry Bliss: Fresh berries are a perfect addition! Try layering in strawberries or blueberries between the bananas and wafers. The tartness of the berries adds a refreshing contrast to the creamy pudding.
- Peanut Butter Delight: For a nutty twist, incorporate peanut butter into the pudding mixture. Just whisk in about 1/2 cup of creamy peanut butter after you remove it from the heat. It’s like a banana and peanut butter sandwich in pudding form—yum!
- Coconut Cream: Add a tropical flair by stirring in some shredded coconut to the pudding before layering. You can even garnish the top with toasted coconut flakes for an extra crunch and flavor boost!
- Caramel Swirl: Drizzle some caramel sauce over the layers of bananas and wafers for a decadent touch. You can even mix a little caramel into the pudding for that sweet, gooey goodness.
- Nutty Crunch: Sprinkle in some chopped nuts, like walnuts or pecans, between the layers for a delightful crunch. It adds texture and a nice nutty flavor that complements the bananas perfectly.
- Different Cookies: Don’t feel limited to vanilla wafers! Try using graham crackers, chocolate wafers, or even ginger snaps for a unique flavor profile. Each cookie brings its own personality to the pudding.
So, whether you stick with the classic or get creative with these variations, you’re bound to create a banana pudding that’s uniquely yours. Have fun experimenting, and don’t forget to share your tasty creations—I’d love to hear about them!
Storage & Reheating Instructions
So, you’ve made this delicious banana pudding, and now you have some leftovers (if you can resist the urge to eat it all, that is!). Storing it properly is key to keeping that creamy goodness fresh for as long as possible. Here’s how to do it:
First off, if you have any leftovers, make sure to cover the banana pudding with plastic wrap or a lid to prevent it from absorbing any odors from the fridge. You don’t want your banana pudding tasting like last week’s takeout! It can be stored in the refrigerator for up to 3 days. Just remember, the longer it sits, the softer the wafers will become, so it’s best enjoyed within the first couple of days for that perfect texture.
If you need to reheat it, I recommend doing so gently. You can pop it in the microwave for about 20-30 seconds, then check to see if it’s warmed through. Be careful not to overheat; you just want it to be slightly warm, not hot, as the pudding can separate if it gets too hot. Stir it gently before enjoying it again, and if you want, add a little more whipped cream on top for that fresh touch!
There you have it! Keep that banana pudding safe and sound in the fridge, and you’ll get to savor those delightful flavors even after the initial feast. Happy storing and reheating!
Your Turn to Enjoy This Banana Pudding Recipe
Now that you’ve got all the delicious details for making this banana pudding, I can’t wait to hear how it turns out for you! Have you made it before? Or maybe you tried one of the fun variations I shared? I’d love to know what you think! Did you stick to the classic recipe, or did you get creative with different flavors and toppings?
Feel free to leave a comment below and share your experiences, tips, or even your own twists on this banana pudding recipe. I’m always so excited to hear about your culinary adventures and what makes your version special. Plus, your insights might inspire someone else to try something new! So, let’s keep the conversation going—happy cooking, and enjoy every creamy, dreamy bite!
For more delicious recipes, check out our blog for inspiration!
Also, if you’re interested in learning more about the health benefits of bananas, you can read this article on Healthline.
Print
Classic Banana Pudding Recipe: 5 Steps to Comfort Food Bliss
- Total Time: 2 hours 30 minutes
- Yield: 8 servings 1x
- Diet: Vegetarian
Description
A classic banana pudding dessert that is creamy and delicious.
Ingredients
- 4 ripe bananas
- 1 box vanilla wafers
- 2 cups milk
- 1/2 cup sugar
- 1/3 cup cornstarch
- 1/4 teaspoon salt
- 4 egg yolks
- 2 tablespoons butter
- 1 teaspoon vanilla extract
- 1 cup whipped cream
Instructions
- In a saucepan, combine milk, sugar, cornstarch, and salt.
- Cook over medium heat, stirring constantly until thickened.
- In a bowl, whisk egg yolks and gradually add some of the hot mixture to temper the yolks.
- Return the egg mixture to the saucepan and cook for another 2 minutes.
- Remove from heat and stir in butter and vanilla extract.
- Slice bananas and layer them with vanilla wafers in a dish.
- Pour the pudding over the layers.
- Top with whipped cream.
- Chill in the refrigerator for at least 2 hours before serving.
Notes
- Use ripe bananas for best flavor.
- Can substitute vanilla wafers with graham crackers.
- Store leftovers in the refrigerator.
- Prep Time: 20 minutes
- Cook Time: 10 minutes
- Category: Dessert
- Method: Stovetop
- Cuisine: American
Nutrition
- Serving Size: 1 serving
- Calories: 250
- Sugar: 15g
- Sodium: 150mg
- Fat: 10g
- Saturated Fat: 5g
- Unsaturated Fat: 3g
- Trans Fat: 0g
- Carbohydrates: 36g
- Fiber: 1g
- Protein: 4g
- Cholesterol: 50mg
Keywords: banana pudding recipe