

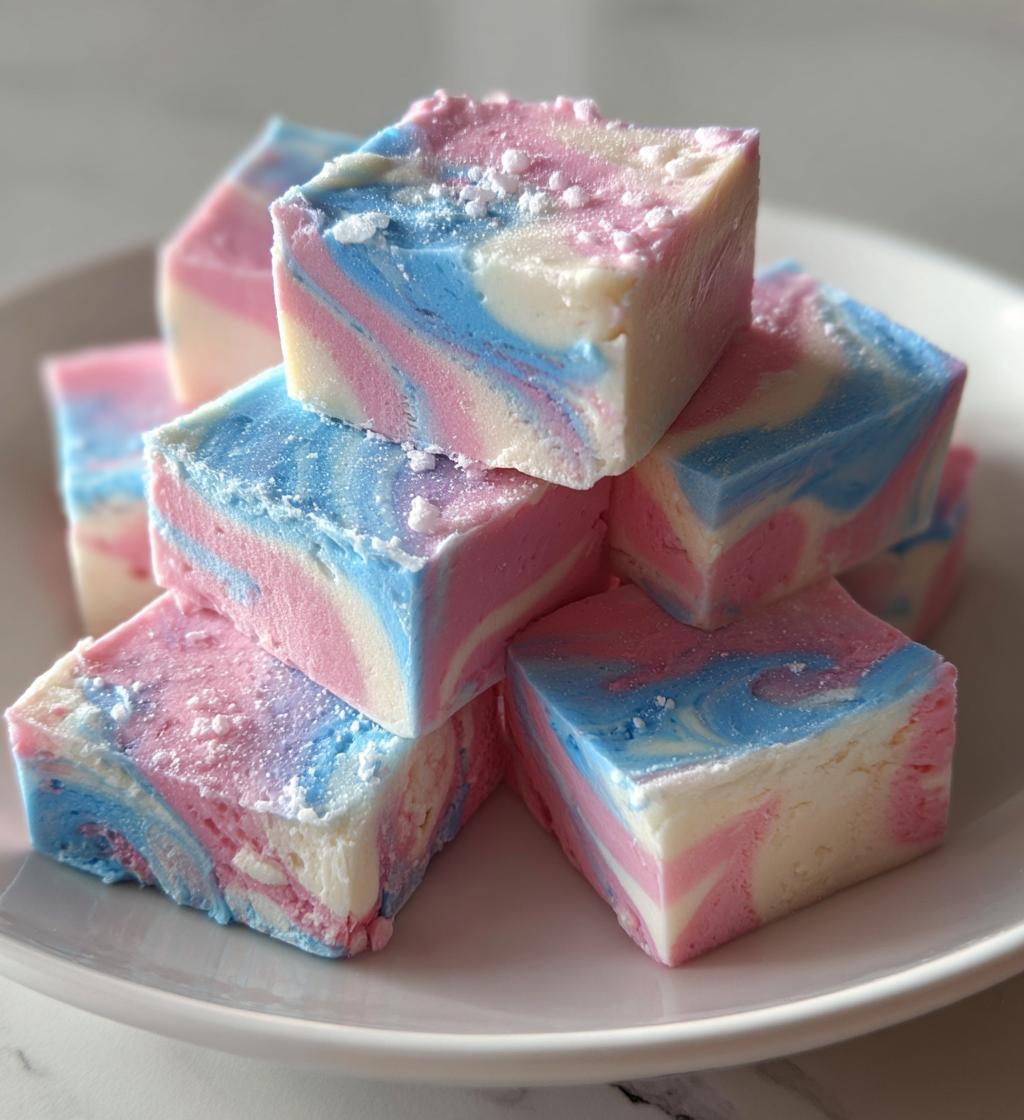
Oh my goodness, let me tell you about this cotton candy fudge! Imagine the delightful swirl of pastel colors and that sweet, sugary flavor that instantly takes you back to carnival days. I can still remember the first time I had cotton candy as a kid—standing there, wide-eyed, with sticky fingers and a huge smile, the world felt like pure magic. This fudge captures that nostalgia perfectly, transforming the whimsical taste of cotton candy into a creamy, decadent treat you can make right in your kitchen. It’s not just any dessert; it’s a colorful explosion of joy that’ll brighten up any gathering or even just a cozy night in. Trust me, once you take a bite, you’ll be hooked! Plus, it’s super easy to whip up, making it the perfect recipe for both seasoned bakers and beginners alike. So, let’s dive into making this vibrant, sweet cotton candy fudge that’s sure to impress your friends and family!
Ingredients List
Gather these simple ingredients to create your delightful cotton candy fudge! Each one plays a crucial role in bringing that nostalgic flavor to life:
- 2 cups white chocolate chips: These will be the creamy base of your fudge, so make sure to use high-quality chips for the best taste.
- 1 cup sweetened condensed milk: This adds the perfect amount of sweetness and creaminess, helping to bind everything together.
- 1 teaspoon vanilla extract: Just a splash enhances the flavor, making the fudge irresistibly delicious.
- 1/2 cup cotton candy, chopped: This is where the magic happens! Choose your favorite flavor—classic pink or blue, or get creative with something wild!
- Food coloring (optional): If you want to make your fudge even more vibrant, add a few drops of food coloring to match your cotton candy or just to brighten it up!
With these ingredients ready to go, you’re all set to create a sweet and colorful treat that brings joy and nostalgia into every bite! Make sure to measure everything out before you start, so you can dive right into the fun part—mixing and melting!


How to Prepare Cotton Candy Fudge
Making cotton candy fudge is a fun and rewarding experience! Trust me, the process is just as delightful as the end result. Follow along, and I’ll guide you through every step to ensure your fudge turns out perfectly sweet and colorful!
Step-by-Step Instructions
- Prep Your Dish: Start by lining an 8-inch square baking dish with parchment paper. This will make it super easy to lift the fudge out once it’s set. You want those clean edges for perfect squares, right?
- Melt the Chocolate: In a medium saucepan, combine the white chocolate chips and sweetened condensed milk. Turn the heat to low and stir constantly. This is where you need to be patient—if the heat is too high, the chocolate can seize up. Just keep stirring until it’s all beautifully melted and smooth.
- Add Flavor: Once your mixture is silky, stir in that teaspoon of vanilla extract. Oh wow, the aroma of vanilla fills the kitchen and makes everything feel cozy! Give it a good mix until it’s well combined.
- Incorporate the Cotton Candy: Now comes the fun part—add the chopped cotton candy! Make sure to mix it in gently. You want to see those pastel colors swirl through your fudge. If you’re using food coloring, now’s the time to add a few drops. Stir until it’s just mixed; you don’t want to overdo it and lose those pretty colors.
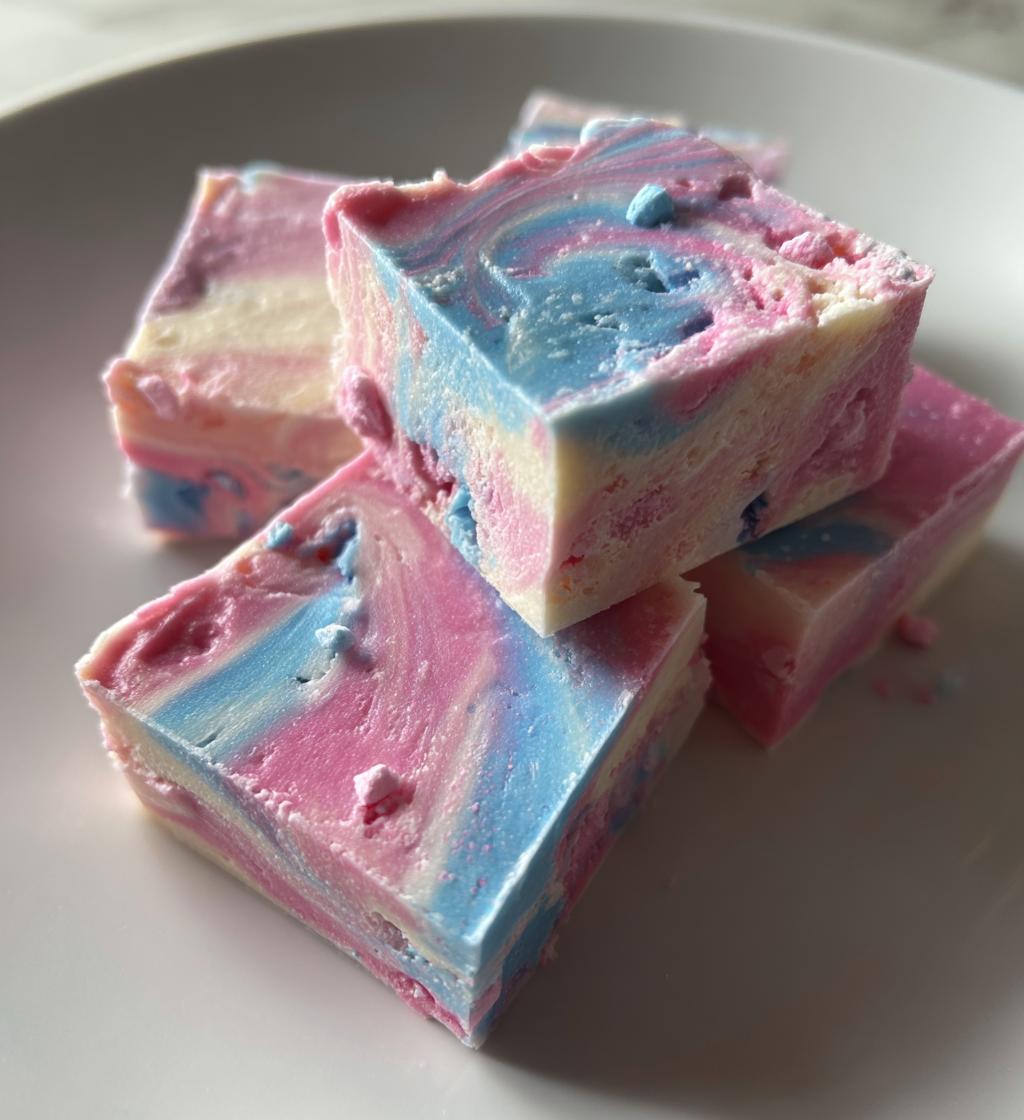
- Pour and Spread: Pour your fudge mixture into the prepared baking dish. Use a spatula to spread it evenly across the bottom. Look at that vibrant swirl of colors! It’s like a carnival in your kitchen!
- Chill Out: Pop the dish into the refrigerator for about 2 hours. This step is crucial! You want your fudge to set properly, so don’t rush it. Just let it chill and firm up while you dream about how delicious it’s going to be.
- Cut and Serve: Once the fudge is set, lift it out using the parchment paper. Cut it into squares, and voila! You’ve got yourself a batch of charming cotton candy fudge ready to impress. Serve them up on a fun plate or package them as sweet gifts!
And there you have it! You’ve transformed simple ingredients into a delightful treat that’s sure to bring a smile to everyone’s face. Enjoy every colorful bite!
Why You’ll Love This Recipe
This cotton candy fudge isn’t just a treat; it’s an experience! Here’s why you’re going to adore making and sharing this colorful delight:
- Super Easy to Make: With just a few simple steps, you can whip up a batch of this fudge in no time. It’s perfect for when you want something sweet without the fuss!
- Delightful Flavor: The blend of creamy white chocolate and the whimsical taste of cotton candy creates a flavor explosion that’s both nostalgic and refreshing. You’ll be taken back to those carefree carnival days!
- Visually Stunning: The vibrant swirls of color make this fudge as beautiful as it is tasty. It’s a showstopper at parties, and people will be drawn to its playful appearance!
- Perfect for Any Occasion: Whether it’s a birthday party, holiday gathering, or just a sweet treat for movie night, this fudge fits right in. It’s a crowd-pleaser for kids and adults alike!
- Customizable: Feel free to get creative! You can switch up the flavors or colors of cotton candy, add sprinkles, or even mix in other candies to make it your own.
- Great for Gifting: Cut into pretty squares and package them up for your friends or family. It’s a heartfelt, homemade gift that shows you care!
Trust me, once you make this cotton candy fudge, you’ll want to keep it in your recipe rotation. It’s one of those treats that brings smiles and happy memories with every bite!
Tips for Success
Making cotton candy fudge is a delightful adventure, but a few tips can help ensure your fudge turns out perfectly every time. Here’s what I’ve learned along the way:
- Low and Slow for Melting: When melting your white chocolate chips with the sweetened condensed milk, keep the heat low. High temperatures can cause the chocolate to seize, turning into a lumpy mess! Stir continuously for a smooth and creamy mixture.
- Chop Cotton Candy Finely: To ensure the cotton candy blends evenly into the fudge, chop it into smaller pieces. This way, every bite is infused with that sweet flavor and fun texture!
- Mix Gently: When stirring in the cotton candy and any food coloring, be gentle! You want to maintain those gorgeous swirls and not overmix it into a single color. Just a few folds will do the trick!
- Use Quality Ingredients: High-quality white chocolate chips make all the difference in taste. Don’t skimp here! A richer chocolate leads to a more indulgent fudge.
- Experiment with Coloring: If you’re adding food coloring, start with just a drop or two. You can always add more if you want a bolder look, but it’s harder to tone it down! Mix well to see the final color before adding more.
- Cool Completely: Be sure to refrigerate the fudge until it’s completely set. If you cut it too early, it may crumble or not hold its shape. Patience is key!
- Storage Matters: Store your cotton candy fudge in an airtight container. This keeps it fresh and prevents it from drying out. If you’re making it for a party, it’s best enjoyed within a week!
With these tips in your back pocket, you’ll be well on your way to mastering the art of cotton candy fudge! Happy cooking!
Variations on Cotton Candy Fudge
Now that you’ve mastered the basic cotton candy fudge, let’s have some fun with variations! This recipe is super versatile, and you can easily switch things up to suit your taste or occasion. Here are some delightful ideas to get your creative juices flowing:
- Flavor Twist: Try using different flavors of cotton candy! Instead of classic pink or blue, look for flavors like bubblegum, strawberry, or even grape cotton candy. Each will give your fudge a unique taste and color.
- Chocolate Swirl: For an extra indulgent treat, swirl in some melted chocolate (dark, milk, or even white) into your fudge mixture before it sets. It adds a deliciously rich flavor and a beautiful marbled effect!
- Nutty Crunch: Add some chopped nuts like pecans, walnuts, or even crushed almonds for a crunchy texture. They’ll give your fudge a nice contrast to the creamy base and enhance the flavor.
- Sprinkles Galore: Before refrigerating, sprinkle some colorful jimmies or fun-shaped sprinkles on top of the fudge. They not only add a festive touch but also make your fudge even more fun for kids!
- Layered Fudge: Make a layered version by pouring half the fudge mixture into the dish, letting it set for a bit, and then adding another layer of a different flavor or color on top. It’s a showstopper and looks so pretty!
- Marshmallow Fluff: Stir in mini marshmallows or marshmallow fluff along with the cotton candy. This adds a chewy texture and makes the fudge even more decadent!
- Seasonal Themes: For special occasions, you can adjust the colors and flavors to match the season. Think pastel colors for spring, warm tones for fall, or festive red and green for the holidays!
Don’t hesitate to mix and match these variations! The beauty of this cotton candy fudge is that you can tailor it to your preferences and get creative in the kitchen. Enjoy experimenting and making this treat uniquely yours!
Nutritional Information
Let’s talk about what’s in this delicious cotton candy fudge! While it’s definitely a sweet treat meant for indulgence, it’s always good to know what you’re enjoying. Here’s an estimated breakdown of the nutrition for each square of fudge:
- Calories: 120
- Fat: 6g
- Saturated Fat: 3.5g
- Unsaturated Fat: 2.5g
- Trans Fat: 0g
- Cholesterol: 5mg
- Sodium: 30mg
- Carbohydrates: 18g
- Fiber: 0g
- Sugar: 15g
- Protein: 1g
Keep in mind that these values are estimates and can vary based on the specific brands of ingredients you use. It’s always a good idea to check the labels! Enjoy your sweet indulgence, and remember that moderation is key when it comes to treats like this. Happy munching!
Storage & Reheating Instructions
Once you’ve made your delightful cotton candy fudge, you’ll want to keep it fresh and tasty for as long as possible! Here’s how to store your fudge properly:
- Let it Cool Completely: Before storing, make sure your fudge has cooled and set completely in the refrigerator. This prevents any condensation from forming inside the container, which can affect the texture.
- Airtight Container: Place your fudge squares in an airtight container. You can layer them with parchment paper between the layers to keep them from sticking together. This helps maintain their deliciousness!
- Refrigeration: Store your fudge in the refrigerator. It’ll stay fresh for up to a week. I recommend enjoying it within the first few days for the best flavor and texture, but it can last longer if kept sealed well.
- Freezing: If you want to keep it for a longer period, you can freeze the fudge! Just wrap each square tightly in plastic wrap and place them in a freezer-safe bag or container. It can last up to two months in the freezer.
- Thawing: When you’re ready to enjoy your frozen fudge, simply transfer it to the refrigerator and let it thaw overnight. No need to reheat—just enjoy it cold!
There’s no need for reheating since cotton candy fudge is best enjoyed chilled. Just take it out of the fridge or freezer, and you’re ready to indulge in that sweet, creamy goodness! Happy snacking!
FAQ Section
Can I use different types of chocolate for this recipe?
Absolutely! While white chocolate is traditional for that sweet and creamy base, you can experiment with milk or dark chocolate. Just keep in mind that it will change the flavor profile a bit, but hey, chocolate is chocolate, right?
How long does cotton candy fudge last?
When stored properly in an airtight container in the refrigerator, your cotton candy fudge can last up to a week. If you freeze it, it’ll stay good for about two months. Just make sure to thaw it in the fridge when you’re ready to enjoy it!
Can I make this fudge dairy-free?
Yes! You can substitute the white chocolate with dairy-free chocolate chips and use a dairy-free sweetened condensed milk alternative. This way, you can still indulge in that sweet cotton candy flavor while keeping it plant-based!
What if I don’t have cotton candy?
No problem! You can use cotton candy flavoring or even flavored extracts to mimic that taste. Just be sure to adjust the amounts to your preference, and maybe add some colorful sprinkles for that visual appeal!
Is this recipe suitable for kids?
Definitely! This cotton candy fudge is a fun treat that kids will love, both to eat and to help make. Just make sure that any tasks involving melting chocolate are supervised by an adult, as it can get a bit hot!
For more delicious recipes, check out our blog for inspiration!
Print
Delightful Cotton Candy Fudge: 7 Sweet Memories in Every Bite
- Total Time: 2 hours 25 minutes
- Yield: 16 squares 1x
- Diet: Vegetarian
Description
A sweet and colorful treat that combines the flavors of cotton candy and fudge.
Ingredients
- 2 cups white chocolate chips
- 1 cup sweetened condensed milk
- 1 teaspoon vanilla extract
- 1/2 cup cotton candy, chopped
- Food coloring (optional)
Instructions
- Line an 8-inch square baking dish with parchment paper.
- In a saucepan, melt white chocolate chips and sweetened condensed milk over low heat.
- Stir in vanilla extract and mix until smooth.
- Add cotton candy and food coloring, stirring until well combined.
- Pour the mixture into the prepared dish and spread evenly.
- Refrigerate for 2 hours or until set.
- Cut into squares and serve.
Notes
- Store in an airtight container.
- Use different colors of food coloring for a fun look.
- Try adding sprinkles on top before refrigerating.
- Prep Time: 15 minutes
- Cook Time: 10 minutes
- Category: Dessert
- Method: Stovetop
- Cuisine: American
Nutrition
- Serving Size: 1 square
- Calories: 120
- Sugar: 15g
- Sodium: 30mg
- Fat: 6g
- Saturated Fat: 3.5g
- Unsaturated Fat: 2.5g
- Trans Fat: 0g
- Carbohydrates: 18g
- Fiber: 0g
- Protein: 1g
- Cholesterol: 5mg
Keywords: cotton candy fudge, dessert, sweets