

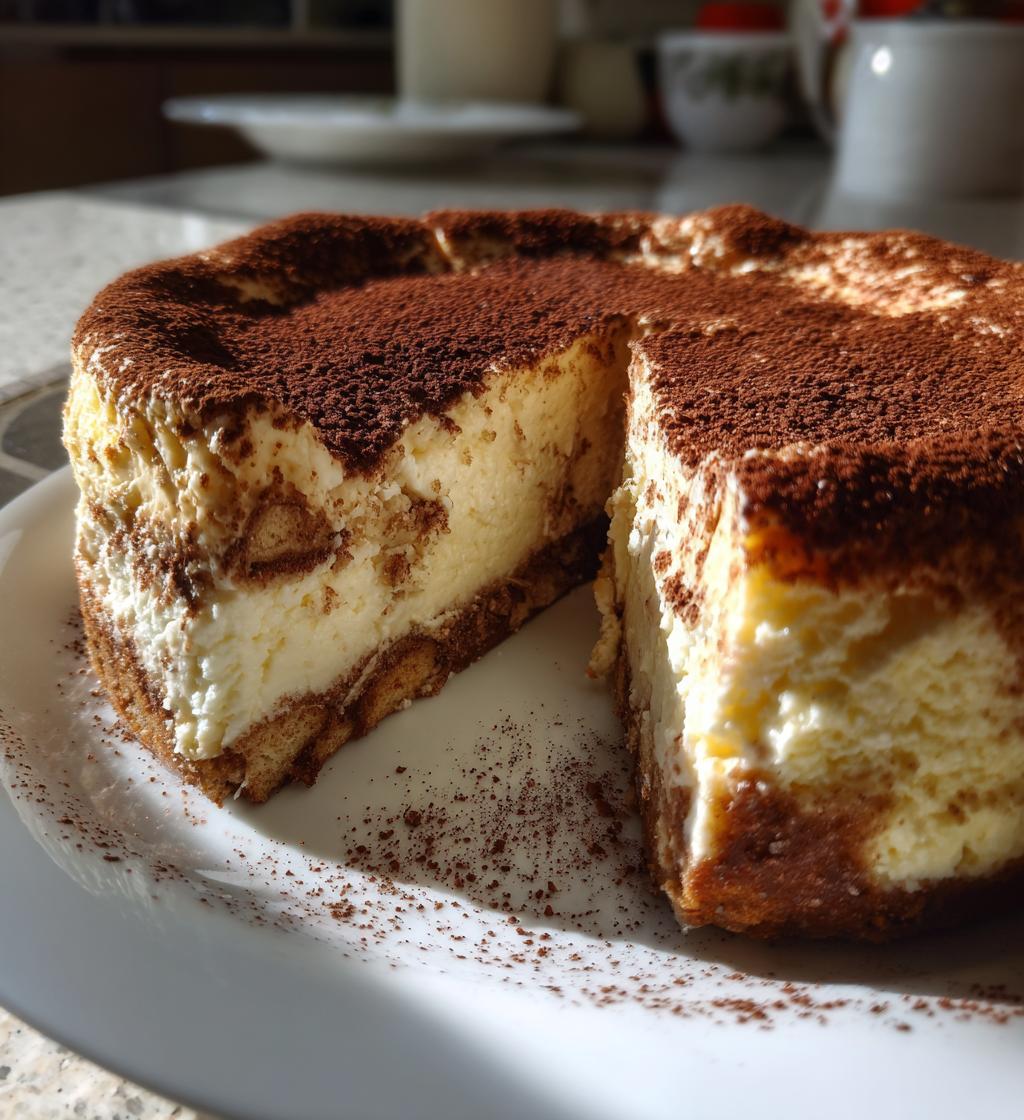
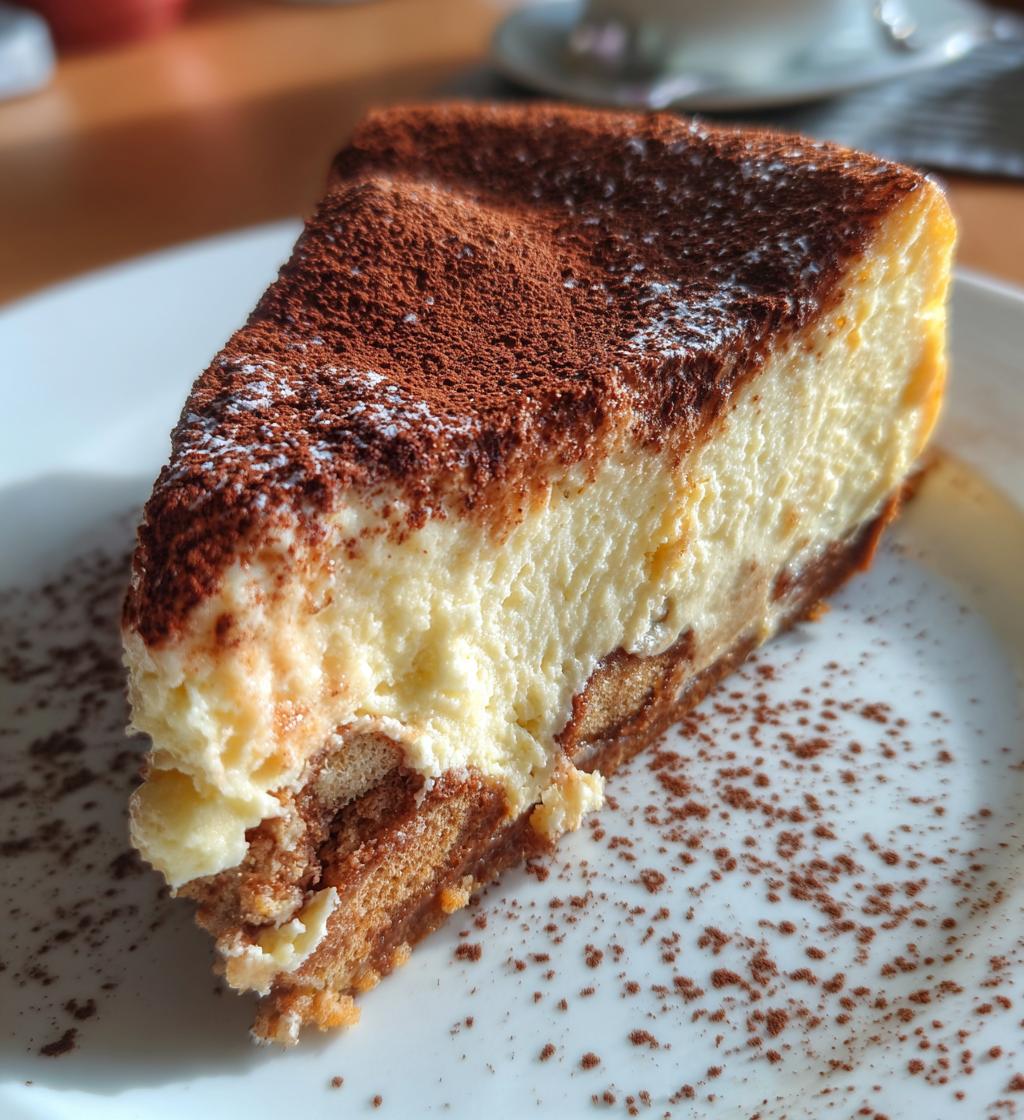
Oh my goodness, if you love tiramisu and cheesecake, you’re in for a real treat! This tiramisu cheesecake is a glorious fusion that combines the rich, creamy texture of cheesecake with the delightful coffee and cocoa flavors of classic tiramisu. Just imagine sinking your fork into a luscious layer of creamy mascarpone and cream cheese, all while enjoying the subtle kick of coffee liqueur soaked ladyfingers. It’s like a little taste of Italy right at home!
What I adore about this recipe is that it’s a no-bake wonder, making it super easy to whip up even on the busiest days. Plus, you can prepare it ahead of time, giving those layers a chance to meld together beautifully while you go about your day. Trust me, the hardest part is waiting for it to chill! And don’t worry if you’re not a baking pro; this recipe is straightforward and practically foolproof. So grab your ingredients, and let’s dive into making this dreamy tiramisu cheesecake that’s sure to impress your friends and family!
Why You’ll Love This Recipe
Let me tell you, this tiramisu cheesecake is a game-changer for any dessert lover! First off, it’s a no-bake recipe, which means you can skip the oven and still create something unbelievably delicious. In just about 30 minutes of prep time, you’ll have a stunning dessert ready to chill, making it perfect for those busy days or last-minute gatherings.
The rich flavors of mascarpone and cream cheese beautifully blend with the coffee and liqueur, giving you that iconic tiramisu experience in cheesecake form. It’s creamy, dreamy, and oh-so-indulgent! Plus, it’s a showstopper for parties; everyone will be raving about your culinary skills. Seriously, you’re going to want to keep this recipe on repeat!


Ingredients for Tiramisu Cheesecake
Gathering your ingredients is half the fun! Here’s what you’ll need to create this delightful tiramisu cheesecake:
- 8 oz cream cheese, softened
- 1 cup mascarpone cheese, at room temperature
- 1 cup heavy cream, chilled
- 1 cup powdered sugar, sifted
- 1 cup brewed coffee, cooled (make it strong for an extra kick!)
- 1/2 cup coffee liqueur, such as Kahlúa
- 2 cups ladyfinger cookies, about one package
- 1 tsp vanilla extract, for that lovely flavor
- Cocoa powder, for dusting on top before serving
Make sure your cream cheese and mascarpone are nice and soft; it’ll help everything blend together smoothly. And don’t skimp on that coffee—it’s where the magic happens! Now that you have your ingredients ready, let’s move on to creating this masterpiece!
How to Prepare Tiramisu Cheesecake
Alright, let’s get down to the nitty-gritty of making this incredible tiramisu cheesecake! I promise it’s easier than it sounds. Just follow these steps, and you’ll have a luscious dessert that’ll wow everyone. Ready? Let’s do this!
Step-by-Step Instructions
- First, grab a large mixing bowl and beat the cream cheese and mascarpone cheese together until they’re smooth and creamy. I like using an electric mixer for this—it makes everything so much easier!
- In another bowl, pour in the heavy cream and add the powdered sugar. Whip them together until you get those lovely stiff peaks. You want it to be thick and fluffy, almost like a cloud. This is where the magic happens!
- Now, gently fold the whipped cream into the cream cheese mixture. Use a spatula and be careful not to deflate that airy goodness! You want everything to be well combined but still light and fluffy.
- Next up, let’s prepare the coffee mixture. In a shallow dish, combine the brewed coffee and coffee liqueur. Make sure the coffee is cooled down—nobody wants soggy ladyfingers! Dip each ladyfinger quickly into the coffee mixture; just a second on each side will do. You don’t want them too soggy, or they’ll fall apart.
- Now, it’s time to start layering. Lay half of the dipped ladyfingers in a serving dish, covering the bottom completely. It’s like building a little coffee-flavored foundation!
- Spread half of that creamy cheese mixture over the ladyfingers, smoothing it out with a spatula. Oh, it’s already looking divine!
- Repeat the process with the remaining ladyfingers and the rest of the cheese mixture, creating a second layer. You’ll end up with beautiful layers of creamy goodness—so satisfying!
- Cover your dish with plastic wrap and pop it in the fridge. You’ll want to let it chill for at least 4 hours, but overnight is even better. Patience is key here, my friend!
- When you’re ready to serve, dust the top with cocoa powder for that classic tiramisu touch. It adds a little extra flair and flavor!
And there you have it! Your very own tiramisu cheesecake, ready to be devoured. Just remember, the longer it chills, the better it tastes, so try to resist the urge to dig in immediately (I know, it’s tough!). Enjoy every decadent bite!
Tips for Success
To ensure your tiramisu cheesecake turns out absolutely perfect, here are some tried-and-true tips that I swear by! First, make sure your cream cheese and mascarpone are at room temperature before mixing. This is crucial for a smooth, lump-free consistency—nobody wants a chunky cheesecake!
When whipping the heavy cream, take your time and don’t rush it. You want those stiff peaks to form, which gives the cheesecake its light and airy texture. If you find it’s a bit too sweet for your taste, feel free to adjust the powdered sugar; just remember to start with less and add more if needed!
Chilling time is key. I highly recommend letting it sit overnight if you can. This allows all those amazing flavors to meld together and makes for a richer experience. And when you dust with cocoa powder before serving, do it right before—this keeps it looking fresh and beautiful. Trust me, following these tips will make your tiramisu cheesecake a total showstopper!
Variations of Tiramisu Cheesecake
If you’re feeling adventurous, there are so many fun ways to give your tiramisu cheesecake a personal twist! For a chocolate lover’s delight, try adding some melted dark chocolate to the cheese mixture for a rich chocolate tiramisu. You could also sprinkle mini chocolate chips between the layers for an extra surprise!
Another idea is to swap out the coffee liqueur with a flavored liqueur like amaretto or hazelnut, which will give it a unique nutty flavor. Want a fruity kick? Incorporate a layer of raspberry or strawberry puree between the cheesecake layers; it adds a vibrant color and a delicious tartness. You can even experiment with spices—just a dash of cinnamon or nutmeg can elevate the flavor beautifully. The possibilities are endless, so have fun and make it your own!
Nutritional Information
Now, let’s talk about the tiramisu cheesecake and what you can expect in terms of nutrition. Keep in mind that these values are estimates based on typical ingredients, so your results may vary slightly depending on specific brands and measurements.
- Serving Size: 1 slice
- Calories: 350
- Fat: 25g
- Saturated Fat: 15g
- Trans Fat: 0g
- Cholesterol: 90mg
- Sodium: 150mg
- Carbohydrates: 30g
- Sugar: 25g
- Fiber: 1g
- Protein: 5g
This dessert is indulgent, so it’s perfect for a special occasion or when you just want to treat yourself. Enjoy it in moderation, and savor every creamy, coffee-infused bite!
FAQ About Tiramisu Cheesecake
Got questions about making this dreamy tiramisu cheesecake? Don’t worry—I’ve got you covered! Here are some of the most common inquiries I get, along with my best tips to help you succeed.
Can I make this cheesecake ahead of time?
Absolutely! In fact, I recommend it! This tiramisu cheesecake is best when chilled overnight, allowing all those flavors to meld together beautifully. You can prep it a day in advance and just dust it with cocoa powder right before serving.
What can I use instead of coffee liqueur?
If you prefer to skip the coffee liqueur, that’s totally fine! You can either use a bit more brewed coffee or substitute it with a flavored syrup or even just a splash of vanilla extract. Adjust the amount to your taste, and you’ll still have a delicious cheesecake!
Can I use store-bought ladyfingers?
Yes! Store-bought ladyfingers are perfect for this recipe, and they save you time. Just make sure they’re fresh for the best texture! If you’re feeling adventurous, you can also make your own at home for an extra special touch.
What should I do if my cheesecake is too sweet?
If you find your tiramisu cheesecake is on the sweeter side, don’t stress! You can balance it out by adding a little more whipped cream to the mix or serving it with fresh berries on the side. The tartness will complement the sweetness perfectly!
How do I store leftovers?
Store any leftovers in an airtight container in the fridge for up to 3 days. Just be sure to keep it well-covered to maintain that creamy texture. I doubt you’ll have any left, but just in case, it’s good to know!
Now that you have all the answers, you’re ready to tackle this tiramisu cheesecake and impress everyone with your culinary skills! Enjoy every luscious bite!
Serving Suggestions
When it comes to serving your tiramisu cheesecake, the sky’s the limit! I love to pair it with a shot of rich espresso or a creamy cappuccino for that perfect coffee moment. You could even serve it alongside a scoop of vanilla ice cream for a delightful contrast in temperatures and textures. Fresh berries, like raspberries or strawberries, add a pop of color and a nice tartness that complements the sweetness of the cheesecake beautifully.
For a little extra flair, try drizzling some chocolate or caramel sauce over each slice before serving. It not only looks stunning but also adds an extra layer of indulgence. And if you’re feeling fancy, garnish with a sprig of mint for a refreshing touch! No matter how you serve it, this tiramisu cheesecake is sure to be the star of the dessert table!
Tiramisu Cheesecake: 7 Comforting Layers of Nostalgic Flavor
- Total Time: 4 hours 30 minutes
- Yield: 8 servings 1x
- Diet: Vegetarian
Description
A delicious fusion of tiramisu and cheesecake.
Ingredients
- 8 oz cream cheese
- 1 cup mascarpone cheese
- 1 cup heavy cream
- 1 cup powdered sugar
- 1 cup brewed coffee, cooled
- 1/2 cup coffee liqueur
- 2 cups ladyfinger cookies
- 1 tsp vanilla extract
- Cocoa powder for dusting
Instructions
- Beat cream cheese and mascarpone until smooth.
- In another bowl, whip heavy cream and powdered sugar until stiff peaks form.
- Fold whipped cream into cheese mixture.
- In a shallow dish, combine coffee and coffee liqueur.
- Dip ladyfingers in coffee mixture briefly.
- Layer half of the ladyfingers in a serving dish.
- Spread half of the cheese mixture over ladyfingers.
- Repeat layers with remaining ladyfingers and cheese mixture.
- Chill for at least 4 hours or overnight.
- Dust with cocoa powder before serving.
Latest Amazon Finds


Notes
- Use strong brewed coffee for better flavor.
- Let the cheesecake sit overnight for best results.
- Adjust sweetness to your taste by varying powdered sugar.
- Prep Time: 30 minutes
- Cook Time: 0 minutes
- Category: Dessert
- Method: No-bake
- Cuisine: Italian
Nutrition
- Serving Size: 1 slice
- Calories: 350
- Sugar: 25g
- Sodium: 150mg
- Fat: 25g
- Saturated Fat: 15g
- Unsaturated Fat: 5g
- Trans Fat: 0g
- Carbohydrates: 30g
- Fiber: 1g
- Protein: 5g
- Cholesterol: 90mg
Keywords: tiramisu cheesecake, dessert, no-bake cheesecake, Italian dessert