

There’s something truly special about the aroma of freshly baked bread wafting through your home. Homemade sandwich bread not only fills your kitchen with warmth but also brings a sense of accomplishment. Making your own bread allows you to control the ingredients, ensuring a healthier and tastier option for you and your family.
Why Choose Homemade Sandwich Bread?
Choosing homemade sandwich bread over store-bought options has many benefits. First, you can customize the flavor and texture to suit your preferences. Want a softer crust? You can achieve that easily. Prefer a heartier loaf? Just adjust the ingredients! Plus, you know exactly what goes into your bread, avoiding preservatives and artificial additives.
Another reason to opt for homemade sandwich bread is the cost-effectiveness. Baking at home can save you money in the long run. A few simple ingredients can yield multiple loaves, making it a budget-friendly choice. Additionally, the satisfaction of creating something from scratch is unmatched. Each slice of your homemade bread is a testament to your effort and creativity.
Finally, homemade sandwich bread is versatile. You can use it for sandwiches, toast, or even as a base for delicious French toast. The possibilities are endless! So, let’s dive into the ingredients and steps needed to create your very own homemade sandwich bread.
Ingredients for Homemade Sandwich Bread
To create the perfect homemade sandwich bread, you’ll need a few simple ingredients. Each component plays a vital role in achieving that soft, fluffy texture and delightful flavor. Here’s what you’ll need:
- All-purpose flour: 4 cups (500 grams) – This is the main ingredient that gives structure to your bread.
- Active dry yeast: 2 teaspoons (7 grams) – Yeast is essential for making the bread rise and become light and airy.
- Sugar: 2 tablespoons (25 grams) – Sugar not only adds a hint of sweetness but also helps activate the yeast.
- Salt: 1 teaspoon (6 grams) – Salt enhances the flavor and controls the fermentation process of the yeast.
- Warm water: 1 and 1/2 cups (360 ml) – The warm water helps activate the yeast, making it bubbly and ready to work.
- Unsalted butter: 2 tablespoons (30 grams), melted – Butter adds richness and flavor to the bread. You’ll also need a bit extra for greasing the bowl and pan.
Gathering these ingredients is the first step in your bread-making journey. Make sure to measure them accurately for the best results. Now that you have everything ready, let’s move on to the next step: mixing the dough for your homemade sandwich bread!


Step-by-Step Preparation of Homemade Sandwich Bread
Step 1: Gather Your Ingredients
Before you start baking, it’s important to gather all your ingredients. This makes the process smoother and more enjoyable. Make sure you have:
- 4 cups of all-purpose flour
- 2 teaspoons of active dry yeast
- 2 tablespoons of sugar
- 1 teaspoon of salt
- 1 and 1/2 cups of warm water
- 2 tablespoons of melted unsalted butter
Having everything ready will help you focus on mixing and kneading the dough without interruptions. Now, let’s move on to mixing the dough!
Step 2: Mix the Dough for Homemade Sandwich Bread
In a large mixing bowl, start by whisking together the all-purpose flour and salt. This ensures that the salt is evenly distributed throughout the flour. Next, take a small bowl and combine the warm water with the sugar. Sprinkle the yeast over the top and let it sit for about 5-10 minutes. You’ll notice it becoming frothy, which means your yeast is active and ready to work!
Once the yeast mixture is frothy, pour it into the bowl with the flour mixture. Add the melted butter at this stage. Using a wooden spoon or spatula, stir everything together until the dough begins to form. It should look a bit shaggy but well combined.
Step 3: Knead the Dough
Now comes the fun part—kneading! Transfer the dough onto a lightly floured surface. Knead the dough for about 8-10 minutes. You want it to become smooth and elastic. If the dough feels too sticky, don’t worry! Just sprinkle a little more flour, one tablespoon at a time, until it reaches the right consistency. Kneading is essential as it develops the gluten, giving your bread that lovely texture.
Step 4: First Rise of the Dough
After kneading, form the dough into a ball. Place it in a greased bowl, turning it to coat the surface with oil. This prevents it from sticking. Cover the bowl with a clean kitchen towel or plastic wrap. Now, let it rise in a warm, draft-free area for about 1 to 1.5 hours. You’ll know it’s ready when it has doubled in size. This first rise is crucial for creating a light and airy loaf!
Step 5: Shape the Dough for Homemade Sandwich Bread
Once your dough has risen, it’s time to shape it. Gently punch it down to release the air. Transfer it back to a floured surface and shape it into a rectangle. Then, roll it tightly into a log, pinching the seams to seal. This shaping helps create a nice structure for your loaf.
Step 6: Second Rise
Now, place the shaped loaf seam-side down in a greased 9×5-inch loaf pan. Cover it again with a towel or plastic wrap. Let it rise for another 30-45 minutes. You want it to rise just above the rim of the pan. This second rise is important for achieving that perfect height and texture in your homemade sandwich bread.
Step 7: Bake the Homemade Sandwich Bread
While the dough is rising, preheat your oven to 350°F (175°C). Once the dough has risen, it’s time to bake! Place the loaf in the preheated oven and bake for 30-35 minutes. You’ll know it’s done when the bread is golden brown and sounds hollow when tapped on the bottom. The internal temperature should be around 190°F (88°C). Your kitchen will smell amazing during this time!
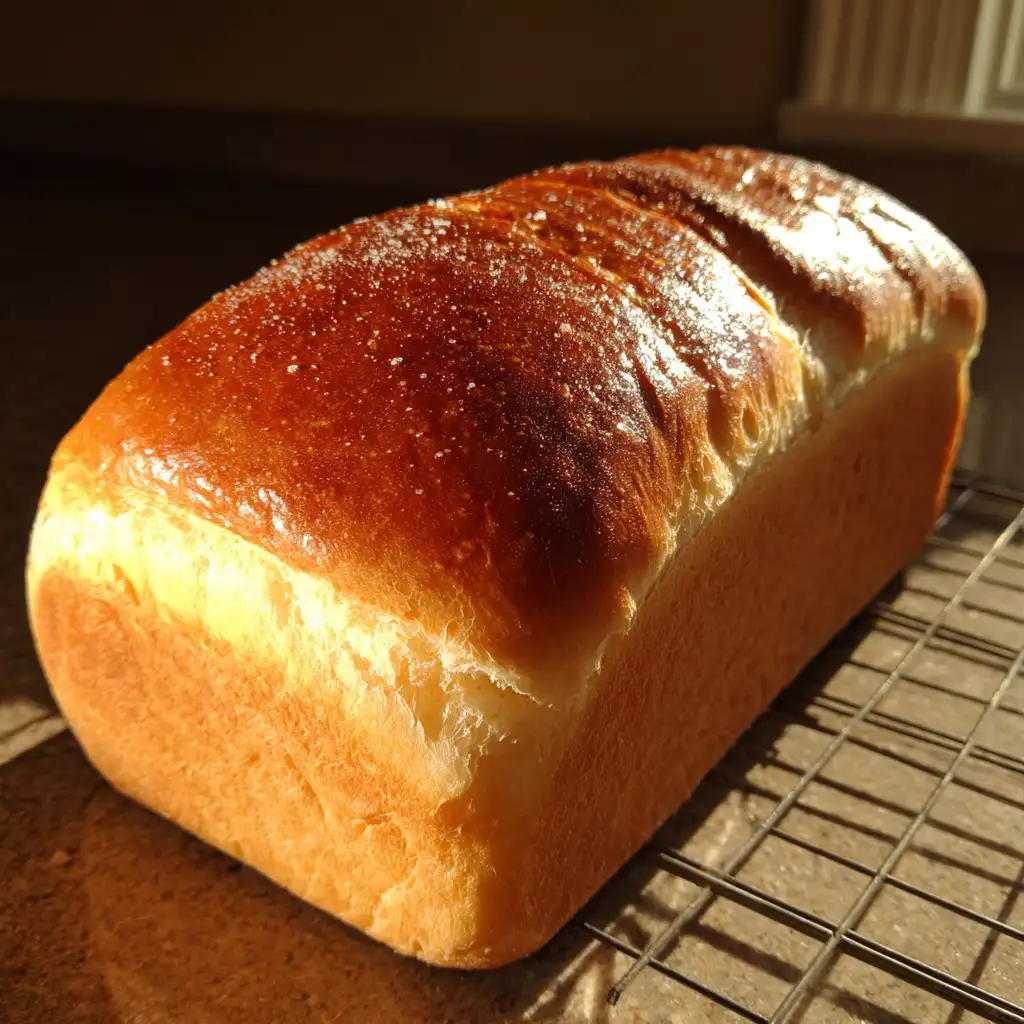
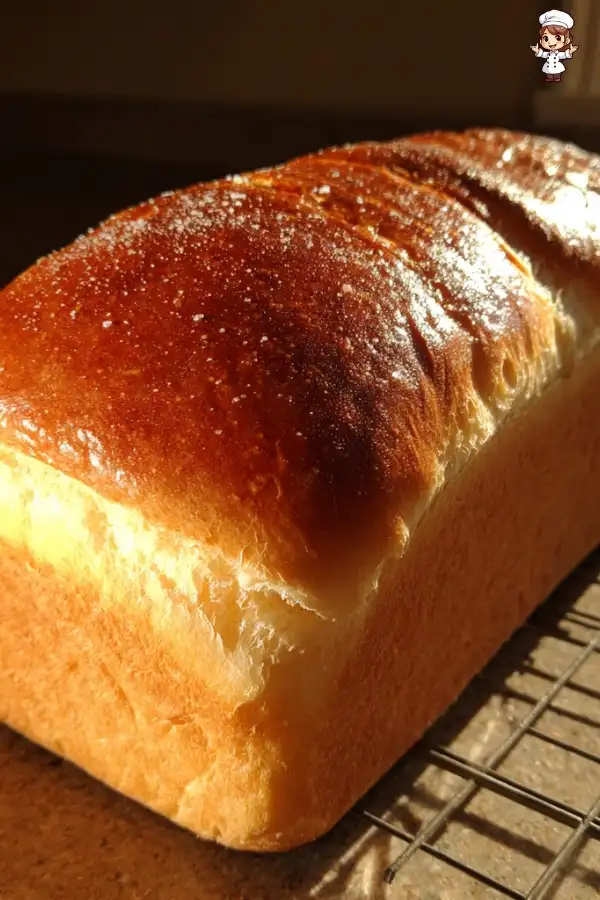
Step 8: Cool and Slice
After baking, remove the loaf from the oven and let it cool in the pan for about 10 minutes. Then, transfer it to a wire rack to cool completely. This step is important because it allows the steam to escape, preventing the bread from becoming soggy. Once cooled, slice the bread and enjoy it fresh! Your homemade sandwich bread is now ready to be used for delicious sandwiches, toast, or simply enjoyed with a pat of butter.
Tips for Perfect Homemade Sandwich Bread
Making homemade sandwich bread can be a delightful experience, but a few tips can help you achieve the best results. Here are some helpful suggestions to ensure your bread turns out perfectly every time:
- Use Fresh Ingredients: Always check the expiration dates on your yeast and flour. Fresh ingredients will yield better results, ensuring your bread rises well and has great flavor.
- Measure Accurately: Baking is a science, so precise measurements are crucial. Use a kitchen scale for the best accuracy, especially for flour. Too much or too little can affect the dough’s texture.
- Temperature Matters: Make sure your water is warm but not too hot. Ideally, it should be around 110°F (43°C). Water that’s too hot can kill the yeast, while cold water won’t activate it properly.
- Don’t Rush the Rising: Allow the dough to rise until it has doubled in size. This may take longer in cooler environments. Patience is key to achieving a light and fluffy loaf.
- Knead Well: Proper kneading develops gluten, which gives your bread structure. If the dough feels sticky, sprinkle a little flour, but avoid adding too much, as it can make the bread dense.
- Experiment with Flavors: Feel free to add herbs, spices, or even seeds to your dough for extra flavor. Ingredients like garlic powder, rosemary, or sesame seeds can elevate your homemade sandwich bread.
- Cool Completely: Allow the bread to cool completely before slicing. This helps maintain the bread’s texture and prevents it from becoming gummy.
- Store Properly: To keep your bread fresh, store it in an airtight container at room temperature for up to three days. For longer storage, slice and freeze it. Just toast or thaw slices as needed!
By following these tips, you’ll be well on your way to mastering the art of homemade sandwich bread. Enjoy the process and the delicious results!
Variations of Homemade Sandwich Bread
Once you’ve mastered the basic recipe for homemade sandwich bread, you can start experimenting with different variations. These twists can add unique flavors and textures to your bread, making it even more enjoyable. Here are two popular variations to try:
Whole Wheat Homemade Sandwich Bread
If you’re looking for a healthier option, whole wheat homemade sandwich bread is a fantastic choice. Whole wheat flour is packed with nutrients and fiber, making it a great addition to your diet. To make this variation, simply replace half of the all-purpose flour with whole wheat flour. Here’s how to do it:
- Use 2 cups (250 grams) of whole wheat flour and 2 cups (250 grams) of all-purpose flour.
- Keep the other ingredients the same, but you may need to add a little more water. Whole wheat flour absorbs more moisture.
- Follow the same steps for mixing, kneading, and rising.
This whole wheat version will have a slightly denser texture and a nutty flavor. It’s perfect for sandwiches or toast, and it’s a great way to incorporate more whole grains into your meals!
Herb-Infused Homemade Sandwich Bread
If you want to add a burst of flavor to your homemade sandwich bread, consider making an herb-infused version. Adding herbs can elevate the taste and make your bread stand out. Here’s how to infuse your bread with delicious herbs:
- Choose your favorite dried herbs, such as rosemary, thyme, or oregano. About 1-2 tablespoons should do the trick.
- Add the herbs to the flour mixture in Step 2, mixing them in with the flour and salt.
- Continue with the recipe as usual, and enjoy the aromatic flavors that will fill your kitchen as it bakes!
This herb-infused bread is perfect for sandwiches, but it also pairs wonderfully with soups and salads. The added flavor will impress your family and friends!
These variations of homemade sandwich bread allow you to customize your baking experience. Whether you choose the wholesome whole wheat option or the flavorful herb-infused version, you’re sure to enjoy the delightful results. Happy baking!
FAQs About Homemade Sandwich Bread
How long does homemade sandwich bread last?
Homemade sandwich bread is best enjoyed fresh, but it can last for a few days. When stored in an airtight container at room temperature, it will stay fresh for up to three days. If you want to keep it longer, consider freezing it. Just slice the bread before freezing, so you can take out only what you need!
Can I freeze homemade sandwich bread?
Absolutely! Freezing homemade sandwich bread is a great way to preserve its freshness. To freeze, wrap the cooled loaf tightly in plastic wrap or aluminum foil. Then, place it in a freezer-safe bag. It can last for up to three months in the freezer. When you’re ready to enjoy it, simply thaw it at room temperature or toast the slices directly from the freezer.
What can I do if my homemade sandwich bread is too dense?
If your homemade sandwich bread turns out too dense, there are a few things you can try. First, ensure that your yeast is fresh and active. If the yeast doesn’t bubble when mixed with warm water, it may not work properly. Additionally, make sure you knead the dough well to develop gluten, which helps create a light texture. Lastly, check your measurements. Too much flour can lead to a dense loaf, so be precise when measuring.
How can I make homemade sandwich bread without yeast?
If you want to make homemade sandwich bread without yeast, you can use baking powder or baking soda as a leavening agent. These ingredients create a quick bread that doesn’t require rising time. For a simple recipe, combine flour, baking powder, salt, and milk or yogurt. Mix until a dough forms, shape it, and bake it in the oven. While it won’t have the same texture as yeast bread, it can still be delicious!
Print
Homemade sandwich bread
- Total Time: 2 hours 15 minutes
- Yield: 1 loaf
- Diet: Vegetarian
Description
Homemade sandwich bread is easy to make and delicious, offering a customizable flavor and texture while avoiding preservatives and artificial additives.
Ingredients
- All-purpose flour: 4 cups (500 grams)
- Active dry yeast: 2 teaspoons (7 grams)
- Sugar: 2 tablespoons (25 grams)
- Salt: 1 teaspoon (6 grams)
- Warm water: 1 and 1/2 cups (360 ml)
- Unsalted butter: 2 tablespoons (30 grams), melted
Instructions
- Gather your ingredients.
- Mix the dough by whisking together flour and salt, then combine warm water with sugar and yeast.
- Knead the dough on a floured surface for 8-10 minutes.
- Let the dough rise in a greased bowl for 1 to 1.5 hours.
- Shape the dough into a rectangle and roll it into a log.
- Let the shaped dough rise in a greased loaf pan for 30-45 minutes.
- Bake in a preheated oven at 350°F (175°C) for 30-35 minutes.
- Cool the bread before slicing.
Latest Amazon Finds


Notes
- Use fresh ingredients for the best results.
- Measure accurately for precise baking.
- Ensure water temperature is around 110°F (43°C).
- Allow the dough to rise until doubled in size.
- Knead well to develop gluten.
- Experiment with flavors by adding herbs or spices.
- Cool completely before slicing.
- Store in an airtight container for freshness.
- Prep Time: 15 minutes
- Cook Time: 35 minutes
- Category: Baking
- Method: Baking
- Cuisine: American
Nutrition
- Serving Size: 1 slice
- Calories: 120
- Sugar: 1g
- Sodium: 150mg
- Fat: 3g
- Saturated Fat: 1.5g
- Unsaturated Fat: 1g
- Trans Fat: 0g
- Carbohydrates: 22g
- Fiber: 1g
- Protein: 4g
- Cholesterol: 5mg
Keywords: homemade sandwich bread, baking, bread recipe