


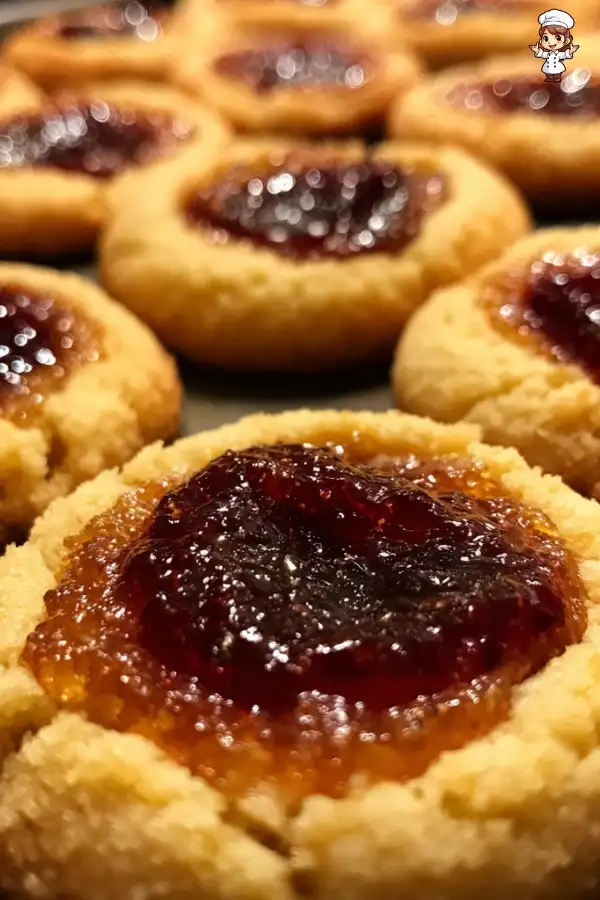
Thumbprint cookies are delightful little treats that are both fun to make and delicious to eat. These cookies are characterized by their unique shape, which features a small indentation in the center. This thumbprint is typically filled with jam, chocolate, or other sweet fillings. The combination of a buttery cookie and a fruity or chocolatey center creates a perfect balance of flavors. They are often enjoyed during holidays, special occasions, or simply as a sweet snack with a cup of tea or coffee.
The History of Thumbprint Cookies
The origins of thumbprint cookies can be traced back to various cultures around the world. While the exact history is unclear, many believe they have roots in Eastern European baking traditions. In countries like Sweden and Poland, similar cookies have been made for generations. These cookies were often filled with fruit preserves, reflecting the local ingredients available at the time. Over the years, thumbprint cookies have evolved, and today, they are loved globally for their versatility and ease of preparation. Whether you prefer raspberry jam or chocolate, there’s a thumbprint cookie for everyone!
Ingredients for Thumbprint Cookie Recipe
To create the perfect thumbprint cookies, you’ll need a few simple ingredients. Each component plays a vital role in achieving that delightful texture and flavor. Here’s what you’ll need:
- 2 cups all-purpose flour (240 g) – This is the base of your cookies, providing structure and stability.
- 1 cup unsalted butter, softened (226 g) – Butter adds richness and flavor, making the cookies tender.
- 1/2 cup granulated sugar (100 g) – This sweetener helps to balance the flavors and contributes to the cookie’s texture.
- 1/2 cup brown sugar, packed (100 g) – Brown sugar adds moisture and a hint of caramel flavor.
- 1 teaspoon vanilla extract (5 ml) – Vanilla enhances the overall taste, giving the cookies a warm aroma.
- 1/4 teaspoon salt (1.5 g) – A pinch of salt elevates the sweetness and balances the flavors.
- 2 large egg yolks – Egg yolks add richness and help bind the ingredients together.
- 1/2 cup jam or chocolate (for filling, any flavor of your choice) – This is the star of the show! Choose your favorite jam or melted chocolate to fill the thumbprint.
Gathering these ingredients is the first step in your baking adventure. Each one contributes to the delightful taste and texture of your thumbprint cookies. Once you have everything ready, you can move on to the preparation steps!


Preparation of Thumbprint Cookie Recipe
Step 1: Preheat the Oven
First things first, you need to preheat your oven. Set it to 350°F (175°C). This step is crucial because a properly heated oven ensures even baking. While the oven warms up, you can prepare your baking sheet. Line it with parchment paper to keep the cookies from sticking. This simple step makes cleanup a breeze!
Step 2: Prepare the Dough
Now, let’s get to the fun part—making the dough! In a large mixing bowl, combine the softened unsalted butter, granulated sugar, and brown sugar. Using an electric mixer, beat the mixture on medium speed. You want it to become light and fluffy, which usually takes about 2-3 minutes. This process incorporates air into the dough, making your cookies soft and tender.
Next, add the egg yolks and vanilla extract to the butter-sugar mixture. Mix until everything is well combined. This is where the magic begins! The rich flavors of butter and vanilla will make your cookies irresistible.
Step 3: Shape the Cookies
Once your dough is ready, it’s time to shape the cookies. Scoop out about 1 tablespoon of dough and roll it into a ball using your hands. Place these balls on the prepared baking sheet, making sure to space them about 2 inches apart. This spacing is important because the cookies will spread a little while baking.
Step 4: Fill the Cookies
Now comes the fun part—creating the thumbprint! Using your thumb or the back of a spoon, gently press down in the center of each dough ball. Be careful not to press all the way through; you just want to create a nice indentation. After that, it’s time to fill those thumbprints! Spoon about 1/2 teaspoon of your chosen jam or melted chocolate into each indentation. Remember, don’t overfill! If you do, the filling might bubble over while baking, and nobody wants that mess.
Step 5: Bake the Cookies
With the cookies shaped and filled, it’s time to bake! Place the baking sheet in your preheated oven. Bake for 12-15 minutes, or until the edges are lightly golden brown. The centers may look a bit soft, but don’t worry! They will firm up as they cool. Keep an eye on them to avoid overbaking.
Step 6: Cool and Serve
Once the cookies are done baking, remove them from the oven. Allow them to cool on the baking sheet for about 5 minutes. This helps them set a bit before transferring. After that, carefully move the cookies to a wire rack to cool completely. Once cooled, they are ready to be enjoyed! Serve your thumbprint cookies with a warm cup of coffee or tea, or package them as delightful gifts for friends and family. They are sure to impress!
Tips for Perfect Thumbprint Cookie Recipe
Choosing the Right Jam or Filling
When it comes to thumbprint cookies, the filling is just as important as the cookie itself. Choosing the right jam or filling can elevate your cookies to a whole new level. Here are some tips to help you select the perfect filling:
- Flavor Pairing: Consider the flavor of your cookie. For a classic taste, fruit jams like raspberry, strawberry, or apricot work wonderfully. If you prefer something richer, chocolate or Nutella can add a delightful twist.
- Texture: Look for jams that are not too runny. A thicker jam will hold its shape better during baking, preventing overflow. If you’re using chocolate, make sure it’s melted but not too hot, as it can seep out of the cookie.
- Homemade vs. Store-Bought: If you have the time, homemade jam can add a personal touch. However, store-bought options are perfectly fine and save time. Just choose high-quality brands for the best flavor.
Experimenting with different fillings can lead to exciting new flavors. Don’t hesitate to try out unique combinations, like lemon curd or peanut butter, to find your favorite!
Common Mistakes to Avoid
Even the best bakers can make mistakes. Here are some common pitfalls to watch out for when making thumbprint cookies:
- Overmixing the Dough: Mixing too much can lead to tough cookies. Once you add the flour, mix just until combined. A soft, slightly sticky dough is what you want.
- Not Chilling the Dough: If your dough feels too soft, consider chilling it for about 30 minutes. This helps the cookies hold their shape better while baking.
- Filling Too Much: It’s tempting to fill the thumbprint to the brim, but overfilling can cause the jam or chocolate to bubble over. Stick to about 1/2 teaspoon for the best results.
- Ignoring Oven Temperature: Always preheat your oven. Baking in a cold oven can lead to uneven baking and affect the texture of your cookies.
By avoiding these common mistakes, you’ll be on your way to baking perfect thumbprint cookies every time. Happy baking!
Variation of Thumbprint Cookie Recipe
Chocolate Thumbprint Cookies
If you’re a chocolate lover, you’ll adore this variation of the classic thumbprint cookie recipe. Chocolate thumbprint cookies are rich, decadent, and perfect for satisfying your sweet tooth. To make these delightful treats, simply follow the original recipe but make a few adjustments.
Start by replacing half of the all-purpose flour with unsweetened cocoa powder. This will give your cookies a deep chocolate flavor. You can use 1 cup of flour and 1 cup of cocoa powder for a more intense chocolate experience. When mixing the dough, ensure that the cocoa powder is well combined with the flour to avoid clumps.
For the filling, you can use melted chocolate or chocolate ganache. To make ganache, heat equal parts of heavy cream and chocolate until melted and smooth. Spoon this luscious filling into the thumbprints before baking. The result? A rich, chocolatey cookie that’s sure to impress!
Nut-Free Thumbprint Cookies
For those with nut allergies or preferences, making nut-free thumbprint cookies is easy and just as delicious! Simply follow the original thumbprint cookie recipe without any changes to the ingredients. However, if you want to add a little extra flavor, consider using almond extract instead of vanilla. This will give your cookies a lovely hint of almond without using any nuts.
When it comes to filling, you can stick with fruit jams or chocolate, as these are naturally nut-free. If you want to add a unique twist, try using sunflower seed butter as a filling. It has a similar texture to nut butter and pairs well with fruit jams. This way, you can enjoy the delightful taste of thumbprint cookies without worrying about allergens!
These variations allow you to customize your thumbprint cookies to suit your taste and dietary needs. Whether you choose chocolate or nut-free options, you’re sure to create a batch of cookies that everyone will love!
FAQs About Thumbprint Cookie Recipe
Can I use different fillings for thumbprint cookies?
Absolutely! One of the best things about thumbprint cookies is their versatility. You can use a variety of fillings to suit your taste. Popular options include fruit jams like raspberry, strawberry, or apricot. If you’re a chocolate lover, melted chocolate or Nutella works wonderfully too. You can even experiment with unique fillings like lemon curd or peanut butter. The choice is yours, so feel free to get creative!
How do I store thumbprint cookies?
Storing thumbprint cookies is simple! To keep them fresh, place the cookies in an airtight container. They can be stored at room temperature for up to a week. If you want to keep them longer, consider refrigerating them. Just make sure to separate layers with parchment paper to prevent sticking. This way, you can enjoy your delicious cookies for days to come!
Can I freeze thumbprint cookies?
Yes, you can freeze thumbprint cookies! To do this, allow the cookies to cool completely after baking. Then, place them in a single layer on a baking sheet and freeze until solid. Once frozen, transfer them to an airtight container or freezer bag. They can be stored in the freezer for up to three months. When you’re ready to enjoy them, simply thaw at room temperature or warm them in the oven for a few minutes.
What is the best way to make thumbprint cookies soft?
To ensure your thumbprint cookies are soft and tender, there are a few tips to follow. First, make sure not to overmix the dough after adding the flour. Overmixing can lead to tough cookies. Second, use room temperature butter, as it helps create a light and fluffy texture. Lastly, avoid overbaking! Keep an eye on the cookies and remove them from the oven when the edges are lightly golden. They will continue to firm up as they cool, resulting in soft, delicious cookies.
Print
Thumbprint cookie recipe
- Total Time: 35 minutes
- Yield: 24 cookies 1x
- Diet: Vegetarian
Description
Thumbprint cookies are delightful treats characterized by their unique shape and filled with jam or chocolate, perfect for any occasion.
Ingredients
- 2 cups all-purpose flour (240 g)
- 1 cup unsalted butter, softened (226 g)
- 1/2 cup granulated sugar (100 g)
- 1/2 cup brown sugar, packed (100 g)
- 1 teaspoon vanilla extract (5 ml)
- 1/4 teaspoon salt (1.5 g)
- 2 large egg yolks
- 1/2 cup jam or chocolate (for filling, any flavor of your choice)
Instructions
- Preheat your oven to 350°F (175°C) and line a baking sheet with parchment paper.
- In a large mixing bowl, combine softened butter, granulated sugar, and brown sugar. Beat until light and fluffy.
- Add egg yolks and vanilla extract, mixing until well combined.
- Scoop about 1 tablespoon of dough, roll into a ball, and place on the baking sheet, spacing them 2 inches apart.
- Using your thumb or the back of a spoon, create an indentation in the center of each dough ball.
- Fill each indentation with about 1/2 teaspoon of your chosen jam or melted chocolate.
- Bake for 12-15 minutes or until the edges are lightly golden brown.
- Allow cookies to cool on the baking sheet for 5 minutes before transferring to a wire rack to cool completely.
Latest Amazon Finds


Notes
- Experiment with different fillings like lemon curd or peanut butter.
- Chill the dough if it feels too soft before shaping.
- Store cookies in an airtight container for up to a week.
- Prep Time: 20 minutes
- Cook Time: 15 minutes
- Category: Dessert
- Method: Baking
- Cuisine: Various
Nutrition
- Serving Size: 1 cookie
- Calories: 120
- Sugar: 8 g
- Sodium: 50 mg
- Fat: 7 g
- Saturated Fat: 4 g
- Unsaturated Fat: 2 g
- Trans Fat: 0 g
- Carbohydrates: 12 g
- Fiber: 0 g
- Protein: 1 g
- Cholesterol: 30 mg
Keywords: thumbprint cookies, cookie recipe, baking, dessert